background image

PNEG-1276

Top Dry Autoflow Construction
Manual 24', 30' and 36'

Construction and Owner’s Manual

PNEG-1276

Date: 11-29-12

Summary of Contents for PNEG-1276

Page 1: ...PNEG 1276 Top Dry Autoflow Construction Manual 24 30 and 36 Construction and Owner s Manual PNEG 1276 Date 11 29 12...

Page 2: ...2 PNEG 1276 Top Dry Autoflow Construction Manual 24 30 and 36...

Page 3: ...acks and Brackets 25 Lifting Jack Usage 26 Chapter 6 Stiffener Details 27 Stiffener Gauges 27 Outside Stiffeners 28 Top Stiffener Starting Location 29 Stiffener Installation and Location 30 Bolting Re...

Page 4: ...allation 58 Fan Entrance Sheets 60 Access Door Platform TDP 5012 62 Small Platform Assembly 63 Large Platform Assembly 65 Cross Over Platform Assembly for Use with Stairs TDP 5013 67 Transition Instal...

Page 5: ...hese sections Failure to read this manual and its safety instructions is a misuse of the equipment and may lead to serious injury or death DANGER WARNING CAUTION NOTICE This is the safety alert symbol...

Page 6: ...cause roof vent icing DC 969 CAUTION The manufacturer does not warrant any roof damage caused by excessive vacuum or internal pressure from fans or other air moving systems Adequate ventilation and or...

Page 7: ...I Decals 1004 E Illinois St Assumption IL 62510 Phone 1 217 226 4421 Rotating flighting will kill or dismember Flowing material will trap and suffocate Crusted material will collapse and suffocate Kee...

Page 8: ...al GSI Decals 1004 E Illinois St Assumption IL 62510 Phone 1 217 226 4421 Failure to heed these warnings could result in serious injury death structural damage or collapse of tank 1 Use CENTER FLOOR O...

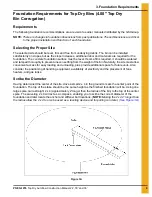
Page 9: ...thoroughly to prevent uneven settling from the weight of the bin Naturally the site must allow convenient access for easy loading and unloading plus provide additional space for future units Also con...

Page 10: ...ble you to set the top of the forms to match the top of the center stake Check the form work with a transit to ensure a uniform elevation for the entire foundation The foundation should be level withi...

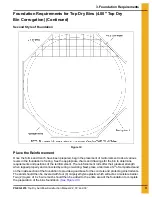
Page 11: ...ngs for the bin to determine requirements and positions of the reinforcement The reinforcement rods offer their greatest strength when lapped properly and connected by wiring or welding Next place a m...

Page 12: ...d refer to Figure 3D to determine the concrete pad size 1 The top of this pad should be level with the top of the bin s foundation 2 Recommended pad thickness is 4 minimum 3 Front of pad should be per...

Page 13: ...Fan Pad Optional Placement of the Duct Fan Pad GSI Top Dry Duct System only Refer to Figure 3E to determine the duct pad size 1 The top of this pad should be level with the top of the bin s foundatio...

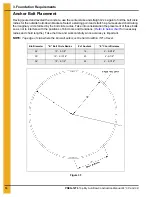
Page 14: ...the imaginary circle formed by the bolt circle radius Take into consideration the placement of these bolts so as not to interfere with the positions of bin doors and transitions Refer to below chart f...

Page 15: ...all have a minimum compressive strength of 3000 PSI at 28 days 4 Requirements for reinforcement do not include overlap 5 Lap all circumferential bars 35 bar diameters and stagger all laps in plan 3 0...

Page 16: ...9 900 600 200 13 7 8 1 9 2 12 9 900 600 200 15 9 10 2 6 3 13 2 900 600 400 18 Ring B N Outside Radius Sq Ft Mesh 6 x 6 6 6 Optional 4 18 x 18 Grid Ft Length 6 Bar Ft Total Cu Yds Concrete 6 1 2 2 15 9...

Page 17: ...hing to the sidewall Figure 4A Grade 2 Grade 2 bolts are designated with a plain head Grade 5 Grade 5 bolts are designated by three 3 slash marks on the head All 5 16 diameter bolts are to be grade 5...

Page 18: ...t the stiffeners to the sidewall sheets It is also used in attaching roof panels to the top sidewall sheet and attaching roof panels and flashing to the center collar 0 3125 x 1 250 Pre assembled with...

Page 19: ...at washers S 248 are used at the stiffener splices and some are used in the roof rafter splices 0 375 x 1 000 Hex flanged head without a plastic sealing washer This bolt is used to splice the stiffene...

Page 20: ...ng suggested locations of Top Dry accessories When locating the manway be sure the outside ladder will not interfere with other accessories below Roof vents should be spaced evenly around the roof Qua...

Page 21: ...hown as Viewed from the Inside of Bin All 4 00 corrugated sidewall sheets must be placed correctly All 4 00 corrugated sidewall sheets have a top and bottom Failure to observe this will not allow the...

Page 22: ...18 Ga 20 Ga 20 Ga 20 Ga 20 Ga 20 Ga 20 Ga 24 10 17 Ga 17 Ga 18 Ga 18 Ga 18 Ga 20 Ga 20 Ga 20 Ga 20 Ga 20 Ga 30 5 18 Ga 18 Ga 18 Ga 18 Ga 20 Ga 30 6 18 Ga 18 Ga 18 Ga 18 Ga 18 Ga 20 Ga 30 7 17 Ga 18 Ga...

Page 23: ...be the top ring of the bin Check the various gauges of the bin with the color code chart and begin building accordingly REMEMBER Assemble the top ring first Once you have selected the proper gauge ma...

Page 24: ...ocated in the second ring Attach the top stiffeners leaving out the seven 7 bolts indicated in Figure 5B at each stiffener location Install the flashing bolts from the outside and tighten first nut on...

Page 25: ...the jacks will enable you to later elevate the bin Now tighten the bolts in sequence starting from the center and working to the edge in both directions This permits the sidewall sheets to draw up ev...

Page 26: ...To the inside of the first ring bolt the next ring Be sure to stagger the sheets and select the proper gauge material Lower the bin on the foundation after assembling and tightening bolts on the new r...

Page 27: ...14 Ga 16 Ga 16 Ga 16 Ga 24 6 12 Ga 14 Ga 16 Ga 16 Ga 24 7 12 Ga 14 Ga 16 Ga 16 Ga 16 Ga 24 8 12 Ga 12 Ga 14 Ga 16 Ga 16 Ga 24 9 10 Ga 12 Ga 12 Ga 14 Ga 14 Ga 16 Ga 24 10 8 Ga 10 Ga 12 Ga 14 Ga 16 Ga...

Page 28: ...3 16 Blue FC 4207308 2 Ring 8 Gauge Base 88 3 16 Yellow FC 4206308 2 Ring 8 Gauge 87 15 16 Yellow FC 42062 2 Ring 10 Gauge Transitional 94 19 32 Puple FC 4205712 2 Ring 12 Gauge 94 19 32 Black FC 4205...

Page 29: ...rs and on the splice use 3 8 x 1 hex bolts a washer on the nut side connection Refer to the stiffener layout See Figure 6A on Page 28 for stiffener usage All stiffeners are outside the bin wall Use 5...

Page 30: ...s the stiffener with base plate attached will not rest on the foundation due to unlevel concrete etc Shim plates have been furnished and should be used to fill opening between base plate and concrete...

Page 31: ...head and neoprene washers are on the outside of the bin NOTE For the splice plates FC 42076 use 5 16 x 1 1 4 bolts for the stiffener to sidewall connections Figure 6E Standard 17 gauge through 20 gau...

Page 32: ...bin and the wall brackets on the inside of the bin The wall brackets are to be positioned with the brackets top hole matching the first hole up from the horizontal seam not counting the horizontal se...

Page 33: ...kets in the upper two 2 holes of the top set of three 3 holes leaving the bolts loose Install the splice plates at the rolled C eave member seams using 3 8 x 1 flanged hex bolts and nuts Tighten all b...

Page 34: ...ollar Assembly Add channel braces and brace plates to center collar as shown using 3 8 x 1 bolts and nuts Do not attach cross channel until floor is done if using a jack on center collar See Figure 7D...

Page 35: ...ter collar at the center of the bin and raise it to the required height per diameter of tank Height is measured from the bottom of the center collar to the concrete See Figure 7E Figure 7E Nominal Dia...

Page 36: ...t and right rafters Be sure to alternate left right left right etc The floor sheet support purlins can now be installed using 5 16 x 3 4 bin bolts There are two 2 different lengths of purlins to fit b...

Page 37: ...lins bolt in the third hole using 5 16 x 3 4 bin bolts The angle is to be bolted to the underneath side of the rafters joining rafter to rafter with the angle interior angle facing the center of the b...

Page 38: ...hole counting up from the sidewall The middle purlins are bolted in the fourth hole counting up from the sidewall Bolt purlins to rafters with interior angle facing the center of the bin as shown in F...

Page 39: ...hole counting up from the sidewall The middle purlins are bolted in the fourth hole counting up from the sidewall Bolt purlins to rafters with interior angle facing the center of the bin as shown in F...

Page 40: ...with 5 16 x 3 4 self tapping screws See Figure 8F Figure 8F Floor Sheet Installation The assembled sheets can now be laced over the framework As the sheets are placed and overlapped they are to be scr...

Page 41: ...all install a fender washer S 3671 and nut Screw the flashing to the flashing angle at the dump hopper opening with five 5 10 self drilling screws S 280 and screw the flashing pieces together where th...

Page 42: ...ng Installation Continued Figure 8J Eave Flashing Splice The flashing splice pieces can now be attached to the eave flashing to seal around the rib of the floor sheet as shown with 10 self drilling sc...

Page 43: ...tes Bolt a angle dam TD 100598 to each dump chute using three 3 1 4 x 5 8 bolts and nuts as shown in Figure 8L Use 1 4 x 5 8 bolts and double nuts to fasten dump chutes to hopper Do not tighten first...

Page 44: ...nd eighth holes in the floor sheet indicate the location of the leveling band posts Attach posts with 5 16 x 1 1 4 bin bolts S 277 The third hole from the bottom of the sheet there will be eight 8 pos...

Page 45: ...d posts on the floor as shown in Figure 8N The fourth seventh and tenth holes in the floor sheets indicate the location of the leveling band posts Attach with 5 16 x 1 1 4 bin bolts S 277 In the fourt...

Page 46: ...sts Attach with 5 16 x 1 1 4 bin bolts S 277 In the third hole from the bottom of the floor sheets there will be eighteen 18 posts one in every other sheet In the sixth and tenth hole there will be tw...

Page 47: ...tach bands to posts Also use 5 16 x 3 4 bin bolts to join band sections Note that band sections connect to each other only at end most holes until completing the circle where an overlap may occur Figu...

Page 48: ...8 Installation 48 PNEG 1276 Top Dry Autoflow Construction Manual 24 30 and 36 30 Leveling Band Location Inner Leveling Bands Figure 8R Middle Leveling Bands Figure 8S...

Page 49: ...6 49 30 Leveling Band Locations Continued Outer Leveling Bands Figure 8T 30 Leveling Band Grain Depth Settings 30 Old New Inner 30 2 Same Middle 22 6 16 6 Outer 16 2 12 2 Dump Time Estimate Corn at 10...

Page 50: ...8 Installation 50 PNEG 1276 Top Dry Autoflow Construction Manual 24 30 and 36 36 Leveling Band Location Inner Leveling Bands Figure 8U Number 2 Set of Leveling Bands Figure 8V...

Page 51: ...nued Number 3 Set of Leveling Bands Figure 8W Number 4 Set of Leveling Bands Figure 8X 36 Leveling Band Grain Depth Settings 36 Old New 36 Old New Inner 31 5 Same No 4 14 2 12 2 No 2 26 5 22 5 Dump Ti...

Page 52: ...collar assembly Use a 3 8 x 1 hex head cap bolt to fasten assembly to the cross angle Position the pulley in the direction of the desired winch location on the sidewall See Figure 9A Figure 9A Field...

Page 53: ...ep excess chain at the lift plate Adjust the chains until the chutes are approximately level when the lift plate is in the closed up position Once the chains are uniformly adjusted crimp the S hooks c...

Page 54: ...9 Assembly 54 PNEG 1276 Top Dry Autoflow Construction Manual 24 30 and 36 Dump Chute Chain Assembly Continued Figure 9D...

Page 55: ...together to form perforated cone as shown in Figure 9E Use 1 4 x 5 8 bolts and nuts to attach sections together Figure 9E Center Cone Installation After chains have been adjusted install cone over th...

Page 56: ...D WITH ROOF HARDWARE PACKAGE 1 Use eave clips TD 101017 for 24 tanks and eave clips TD 101074 for 30 36 tanks The Top Dry eave clips are located in the roof hardware package 2 Locate eave clips so tha...

Page 57: ...lips Attach clips using 5 16 x 3 4 bin bolts Add perforated band sections Note that these do not attach to the leveling bands but hang down on the inside of the top inner leveling band See Figure 9H F...

Page 58: ...of the hangers to the endmost slots of the top plate TD 100665 as shown in Figure 9I Hold the top plate up under the bottom flange of the C channel in front of the fan opening Mark and drill four 4 3...

Page 59: ...ugh the sidewall and install 5 16 x 3 4 bin bolts and nuts Position the side plates on each side with the angle outward and fasten in place using six 6 1 4 x 1 self drilling screws See Figure 9J NOTE...

Page 60: ...9 Assembly 60 PNEG 1276 Top Dry Autoflow Construction Manual 24 30 and 36 Fan Entrance Sheets Figure 9K 24 through 36 Fans Figure 9L 42 Fans...

Page 61: ...9 Assembly PNEG 1276 Top Dry Autoflow Construction Manual 24 30 and 36 61 Detailed Layout for Proper Location of Platforms Figure 9M...

Page 62: ...port that the support brace is placed correctly Now proceed to the platform floor Align holes on platform floor with holes on platform support and bolt together using 5 16 x 3 4 truss head bolt and nu...

Page 63: ...s from the inside of the bin to the outside This will provide maximum weather protection Figure 9O Ref Part Description Weight Qty 1 TD 100051 Channel Bracket 3 90 8 2 TD 100052 Handrail Post 49 3 4 3...

Page 64: ...ertical support to the existing sidewall stiffeners as shown in Figure 9P and double nut with 5 16 nuts Figure 9P When bolting stiffener to sidewall at locations where platform supports are to be atta...

Page 65: ...ction Figure 9R Ref Part Description Qty Weight 1 TD 100051 Channel Bracket 10 4 87 2 TD 100052 Handrail Post 49 3 4 7 55 47 3 TD 100053 Toeboard 71 1 2 1 4 99 4 TD 100054 Toeboard 92 1 6 42 5 TD 1000...

Page 66: ...n the vertical support to the existing sidewall stiffeners as shown in Figure 9S and double nut with 5 16 nuts Figure 9S When bolting stiffener to sidewall at locations where platform supports are to...

Page 67: ...ical support to sidewall Special attention should be taken when assembling the platform support that the support brace is placed correctly Now proceed to the platform floor Align holes on platform flo...

Page 68: ...dimensions of cut out The base angle will also need to be cut at entrance collar cut out Take note of the diagram showing the 1 dimension from bottom of entrance collar side bracket to concrete This...

Page 69: ...Figure 9W Ref Part Description 1 TR 4724 1 Transition Side 1 TR 4724 2 Transition Side 2 TR 4767 Transition Faceplate 3 TR 4726 Top Entrance Collar Piece 4 TR 4727 Bottom Entrance Collar 5 TR 4728 Siz...

Page 70: ...the doors to move freely 4 Now attach the handles D02 0045 and D03 0512 to the doors NOTE The locking handles along with the hardware labeled out go to the outside doors The rear handles have their ow...

Page 71: ...ins Install inner panel hinge assemblies per illustration instructions with hinges NOTE Do not distort door frame with use of alignment or drift punches if necessary drill or ream holes to insert bolt...

Page 72: ...10 Accessories 72 PNEG 1276 Top Dry Autoflow Construction Manual 24 30 and 36 2 Ring Door Assembly Figure 10B...

Page 73: ...056 WD 6056 Middle Inner Door Hinge 2 2 10 WD 6054 WD 6054 Top Inner Door Hinge 1 1 11 S 4380 S 4380 Rubber Trim Seal Strip 2 1 4 2 1 4 12 WD 6039 WD 6039 Latch Bar 3 3 13 WD 6037 WD 6037 Inner Panel...

Page 74: ...10 Accessories 74 PNEG 1276 Top Dry Autoflow Construction Manual 24 30 and 36 Optional Bin Step Assembly WD 042 Figure 10C...

Page 75: ...cured continue adding necessary sidewall ring s To the lower edge of the bottom ring attach the base angle ring Before lowering the bin apply mastic sealer to the entire underneath side of the base an...

Page 76: ...76 PNEG 1276 Top Dry Autoflow Construction Manual 24 30 and 36 NOTES...

Page 77: ...PARTICULAR PURPOSE OR DESIGN OF SUCH PRODUCTS GSI shall not be liable for any direct indirect incidental or consequential damages including without limitation loss of anticipated profits or benefits T...

Page 78: ...lations which should be carefully followed in all cases Authorities having jurisdiction should be consulted before installations are made GSI Group 1004 E Illinois St Assumption IL 62510 0020 Phone 1...

Reviews: