background image

ASSEMBLING THE NECK
TUNERS

Push the 6 tuners into the back of the headstock and then using the 6 very
small screws provided, screw them to the back of the headstock. Then place
the tuner washers onto the bushings and place the six bushings onto the
tuner pegs that are now sticking through the headstock. Using a 10mm
spanner slightly tighten the bushings to the main tuner pegs.

NECKBODY ATTACHMENT

Now you can attach the neck to the body using the four large screws. The
neck plate acts as a large washer and covers the locator hole on the back of
the body. It is a personal preference if you use the neck plate pad (the black
plastic piece that sits behind the chrome neck plate – it serves no actual
purpose) 
Holding the neck firmly against the body watch that no gap appears between the body and 
the heel of the neck. Some fitting may be required.
Use the 4 large head phillips screw to attach the neck.  ( pre drill the holes first )

SET UP

Put on the strings and tune to pitch.

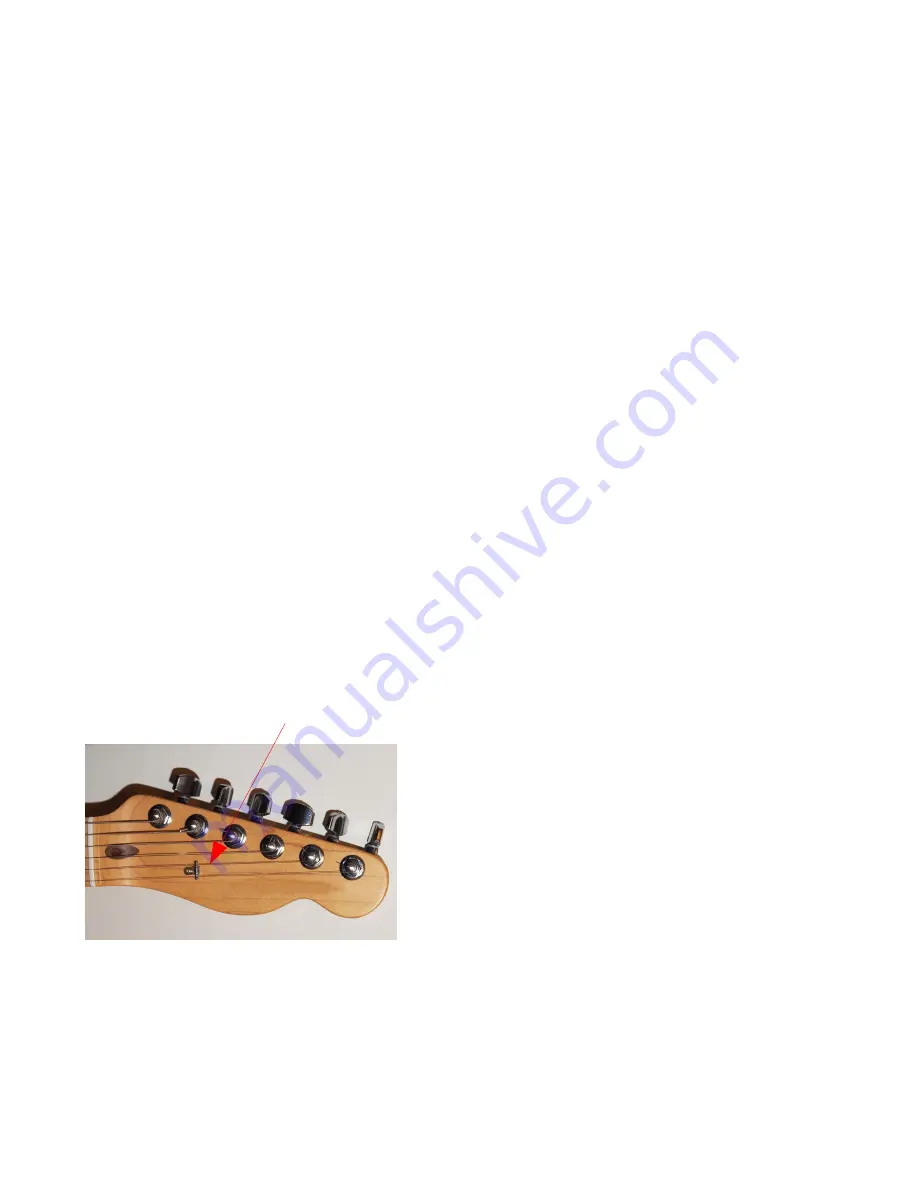
STRING TREE

This step can be done after the guitar strings are on your guitar and you have an exact
position to put them in. Make sure to loosen the strings a bit when doing this step!

Now attach the string tree  to the peg head. Pre drill a small hole in the face of the peg head 
about 3 inches above the string nut.

Slip the string notches onto the screw followed by the round cylindrical
spacer.
The string tree pulls the first and second strings of the guitar downward. That
downward pressure will keep the strings from popping out of the nut slots
while you are playing.

Summary of Contents for Tele Style Kit

Page 1: ...Cr East Gwillimbury ON L9N 0C3 Canada Please read these instructions carefully before beginning to build your guitar in order to have a complete overview of the project There are five steps that you w...

Page 2: ...one week later when the lacquer has cured COLOR COAT The acrylic lacquer made by the automotive industry is particularly well suited to your needs In addition to providing a full range of colour choi...

Page 3: ...eadstock A half round file should be used to level the top edge of the headstock Finally the edge should be sanded smooth with fine 400 grit sandpaper FINAL RUBBING AND POLISHING After allowing the cl...

Page 4: ...n the bridge and the pickup Only drive then half way down Place the bridge so that the pickup is centered Attach the bridge assembly to the body using four 1 screws Control Plate Solder the small sing...

Page 5: ...k plate it serves no actual purpose Holding the neck firmly against the body watch that no gap appears between the body and the heel of the neck Some fitting may be required Use the 4 large head phill...

Page 6: ...een second and third fret The space between the top of the first fret and the bottom of the string should be about 006 or just about the thickness of the paper that these instructions are written on I...

Page 7: ...osen the set screw to shorten the string length When the harmonic and the fretted note sound the same note the saddle is at the correct position Repeat this procedure for the other five strings PICKUP...

Reviews: