background image

- 11 -

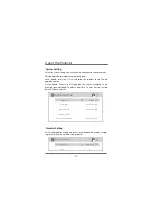
Menu Settings

Step 1:

 In the Multimedia interface, press the menu key of the remote 

control to enter the menu setting options.

Step 2:

 After entering the interface, adjust the parameters as needed, and 

then press the "OK" key to verify.

Picture Mode

&RQWUDVW
%ULJKWQHVV
&RORU
7LQW
6KDUSQHVV

Aspect Ratio

&RORU7HPSHUDWXUH
1RLVH5HGXFWLRQ

6WDQGDUG

50
50
50
50
50
16:9
Medium

0LGGOH

PICTUPE

MOVIE

MUSIC

PHOTO

TEXT

Use of the Projector

Summary of Contents for RD-850-5896008

Page 1: ...INSTRUCTION MANUAL Note As the product system is updated from time to time the VSHFLȰF RSHUDWLRQ FRQWHQW LV EDVHG RQ WKH DFWXDO VLWXDWLRQ ...

Page 2: ...HNMR TKSHLDCH É2TOONQSDCÉ NQL SR Remote Control 5 Switching Machine Operation 6 Focus Keystone Correction 7 Standard Setting 8 Use of the Projector 9 Multimedia 9 Source Settings 10 Menu Settings 11 Miracast 12 iOS Cast 13 ÉÉÉÉÉÉÉÉÉ6H HÉ2DSSHMF System Setting 15 Projector Setting 15 ...

Page 3: ...le the unit by yourself as this will invalidate the warranty service To protect your eyes do not stare directly at the lens when the projector is on The projector must be kept away from water and any other liquids 4 To prevent electric shock please keep the projector out of the rain and away from moisture It is recommended to switch off the projector after it has run for 6 hours non stop Please us...

Page 4: ... 1 Lens 2 IR for Remote Control 3 Speaker 4 IR for Remote Control 5 Air Intake 6 Power Input 7 Cooling Window 8 Headphone Jack 9 AV Port 10 USB Port 11 USB Port Wired SyncScreen Port 12 HDMI Port 2 ɠ ɥ ɦ ɧɨɩ ꋻ ꋼ ɡ ɢ ɣ ɤ ...

Page 5: ...ndicator Standby red Power On blue 6 Focusing 7 Keystone Correction 8 Bottom Label Tear off the bottom sticker you can remove the bottom dust cover to clean up the dust 9 Machine Foot Pad 10 Hole for Stand 1 4 inch 11 Height Adjustment Machine Feet 3 ꋻ ɠ ɡɢ ɣ ɥ ɦ ɧ ɨ ɩ ɤ ...

Page 6: ...ontrol Specifications Model Lamp Image System Language Resolution Input Voltage Weight Working Temp Input Port Output Port Aspect Ratio Size Operation Mode 4 Multimedia Supported Formats Image Format Video Format Audio Format File Format BMP JPG PNG JPEG MP4 MKV WMV RMVB RM AVI FLV TRP VOB 3GP DIVX TP TS MPG M2TS F4V DAT MP3 AAC FLAC MAV WMA M4A TXT ...

Page 7: ...Remote Control ɠ ɡ ɢ ɣ ɤ ɥ ɦ ɧ ɨ ɩ ꋻ ꋼ ꋽ 1 Power 2 Aspect Ratio 3 Arrow Keys 4 Home 5 Menu 6 Volume Down 7 Menu 8 Screen Flip 9 Source 10 Enter 11 Return 12 Volume Up 13 Mute 5 ...

Page 8: ...d on for the first time Please refer to the Focus Keystone Correction section for calibration Step 4 After the image is adjusted clearly it can be viewed normally Power Off Step 1 In the working state press the power button of the body or the power button on the remote control to switch the projector to the standby state Step 2 After the projector enters the standby state the machine is in the pro...

Page 9: ...using process you can play the programs or pick up the product menu images to match the focusing adjustment Keystone Correction Please turn the trapezoidal adjustment dial until the image is displayed normally Note The projector has only mechanical trapezoidal correction in the vertical direction and there is no horizontal correction Make sure the projector is level with the projected image h h Ĝ ...

Page 10: ... away from the projection screen according to the preset graphic size When installing place the projector on a solid stable countertop The airframe should be well ventilated Do not cover or block the vents There should be no obstruc tions within 30cm of the vents Note The above data is for reference only please refer to the physical measurement 8 50 m LQFK 70 100 120 ...

Page 11: ...imedia Step 1 Insert the U disk into the USB port of the projector Step 2 Select Multimedia and then press the OK key to enter Step 3 Select the file to be played Multimedia Miracast iOS Cast Setting Source MOVIE MUSIC PHOTO TEXT ...

Page 12: ... signal source in the main interface or press the remote control source key Step 2 Press the OK key to enter the options Signal Source HDMI AV Multimedia Miracast iOS Cast Setting Source Pop up source box 20 0HGLD 0 9 Use of the Projector ...

Page 13: ... setting options Step 2 After entering the interface adjust the parameters as needed and then press the OK key to verify Picture Mode RQWUDVW ULJKWQHVV RORU 7LQW 6KDUSQHVV Aspect Ratio RORU 7HPSHUDWXUH 1RLVH 5HGXFWLRQ 6WDQGDUG 50 50 50 50 50 16 9 Medium 0LGGOH PICTUPE MOVIE MUSIC PHOTO TEXT Use of the Projector ...

Page 14: ...e Note The projector and the Android device cannot be connected to different WiFi otherwise the corresponding projector device will not be found on the Android device 1 On your Android Mobile Pad open the settings menu 2 Access your display settings or screen mirroring 3 Select your Miracast receiver NETLINK XXXX Miracast To connect Android Mobile Pad Device with Projetor Based on WiFi Display Tec...

Page 15: ...evice name Mirror your iPhone iPad or iPod touch 0DNH VXUH WKDW RXU L26 GHYLFH LV FRQQHFWHG WR WKH VDPH QHWZRUN DV RXU SURMHFWRU RU FRQQHFW L26 GHYLFH ZLWK 3 E 3URMHFWRU NEWAP XXXX 2Q RXU L26 GHYLFH RSHQ RQWURO HQWHU DQG WDS VFUHHQ 0LUURULQJ RRNLQJ IRU GHYLFHV WKDW FDQ EH PLUURUHG RQ 6HOHFW NETLINK XXXX icast IURP WKH OLVW Screen Mirroring Music 6FUHHQ 0LUURULQJ 6FUHHQ 0LUURULQJ ZY XXXX RRNLQJ IRU...

Page 16: ...3VUKT WiFi Setting Step 1 Select Setting in the main interface and press OK key to enter setting interface Step 2 Select WiFi Setting Step 3 Turn on the WiFi find the WiFi you need to connect to enter the password through the virtual keyboard and confirm the connection Use of the Projector ...
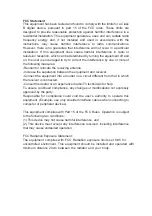
Page 17: ...ion according to the prompts recommended to update from time to time Restore factory default Choose carefully Projector Setting Select the projection setting and select the corresponding settings accord ing to the installation method of the projector System Setting Language Local Update Online Update Software Version Restore Factory Default English Please press OK Please press OK Please press OK 3...

Page 18: ...ng antenna Increase the separation between the equipment and receiver Connect the equipment into an outlet on a circuit different from that to which the receiver is connected Consult the dealer or an experienced radio TV technician for help To assure continued compliance any changes or modifications not expressly approved by the party Responsible for compliance could void the user s authority to o...

Page 19: ...The terms HDMI and HDMI High Definition Multimedia Interface and the HDMI Logo are trademarks or registered trademarks of HDMI Licensing Administrator Inc in the United States and other countries ...

Reviews: