background image

Guangzhou Yingfeng Lighting Equipment Co.,Ltd

www.yf-light.com

7

9.4.

Manual control interface

10、C

hannels

options

Illustration

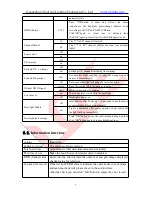
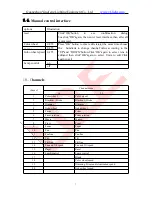
reset

Click”OK”button

to

see

confirmation

dialog

box,click”OK”again, then enter reset interface,then after all
motor reset.

Color wheel

0-255

Press “OK”button to enter edit state.at the same time,choose
the

hundreds to change channel value according to the

“UP”and “DOWN”button.Click”OK”again to select tens to
edit,and then click”OK”again to select Units to edit.Click
again to exit.

0-255

Gobo wheel speed 0-255

Lamp control

on
off

channel

Channel mode

16

20

1

Color wheel

Color wheel

2

Blackout / Strobe

Blackout / Strobe

3

Dimmer

Dimmer

4

Gobo wheel

Gobo wheel

5

Prism

Prism

6

Prism rotation

Prism rotation

7

Macro

Macro

8

Frost

Frost

9

Focus

Focus

10

Pan

Pan

11

Pan fine

Pan fine

12

Tilt

Tilt

13

Tilt fine

Tilt fine

14

Pan and Tilt speed

Pan and Tilt speed

15

Reset

Reset

16

Lamp control

Lamp control

17

Blank

18

Color wheel speed

19

Dimming, Prism and Atomization speed

20

Gobo wheel speed

Summary of Contents for BEAM 200

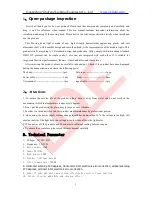
Page 1: ...Guangzhou Yingfeng Lighting Equipment Co Ltd www yf light com BEAM 200 User Manual ...

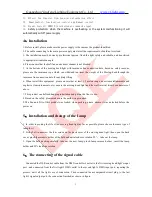
Page 2: ...echnical Parameter page2 3 Install page2 4 The install and exchange of lamp page3 5 The connecting of the signal cable page3 6 Button Introduction page4 7 Executive function and start editing exit editor page4 8 Interface introduction page5 9 Channels page7 10 Problems and Solutions page8 11 Maintenance page8 12 Statement page8 ...

Page 3: ...and check the following parts The body 1pcs Safe rope 1pcs Power cable 1pcs hook 2pcs User manual 1psc signal cable 1pcs 2 Attentions 1 To ensure the service life of the product please keep it away from water and do not work in the environment which the temperature is above sixty degrees 2 Don t put the product on the place easy to loose or easy vibration 3 In order to avoid electric shock this pr...

Page 4: ... range no extreme inflammable and explosive items ornaments etc ensure the moving head light and the wall interval twenty centimeters of above 7 This product can be fixed hanging installation and put on the floor to use 8 Based on the safety please make sure the earth wire grounded 9 The Pan and Tilt of this product was locked when packing please ensure it was unlocked before the power on 5 Instal...

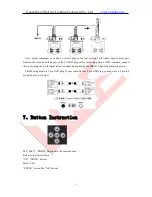
Page 5: ...s circuit plug have a 120Ω resistance connect this circuit plug can avoid signal reflection phenomenon during the DMX512 signal transmission process This Moving head use 3 pin XLR plug If your controller use 5 pin XLR plug you must use a 5 pin to 3 pin patch cord See below 7 Button Instruction The LEFT RIGHT button have the same function Return to the last interface UP DOWN button Select Edit ENTE...

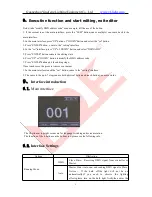
Page 6: ... code 7 Press ENTER button quit the editing stage If use touch scree the process is more convenient 1 In the main interface touch the set button come to the setting interface 2 The same to the up 4 7 step can use both physical button and touch button no more words 9 Interface introduction 9 1 Main interface The 3 buttons at top right corner are for language switching and screen rotation The functi...

Page 7: ...ontinue running clear Motor return and stop running Screen saver on 30 seconds later it will close the backlight off Backlight on forever Boot light bubble off reset directly after Power on if not need to use the menu or control table to turn it on manually on Light on automatic after power on and can not reset until the light bulb on successfully Restore default settings Click OK button to see th...

Page 8: ... OK again to select tens to edit and then click OK again to select Units to edit Click again to exit 0 255 Gobo wheel speed 0 255 Lamp control on off channel Channel mode 16 20 1 Color wheel Color wheel 2 Blackout Strobe Blackout Strobe 3 Dimmer Dimmer 4 Gobo wheel Gobo wheel 5 Prism Prism 6 Prism rotation Prism rotation 7 Macro Macro 8 Frost Frost 9 Focus Focus 10 Pan Pan 11 Pan fine Pan fine 12 ...

Page 9: ...n and completely packed before delivery All users should strictly abide by the above statement warnings and instructions Any damage caused by misuse is not within the company warranty and the company will not be responsible for the cause of damage because of the operator s ignorance of this user manual problem solution No power supply Check the power supply voltage Power on but the moving head lig...

Reviews: