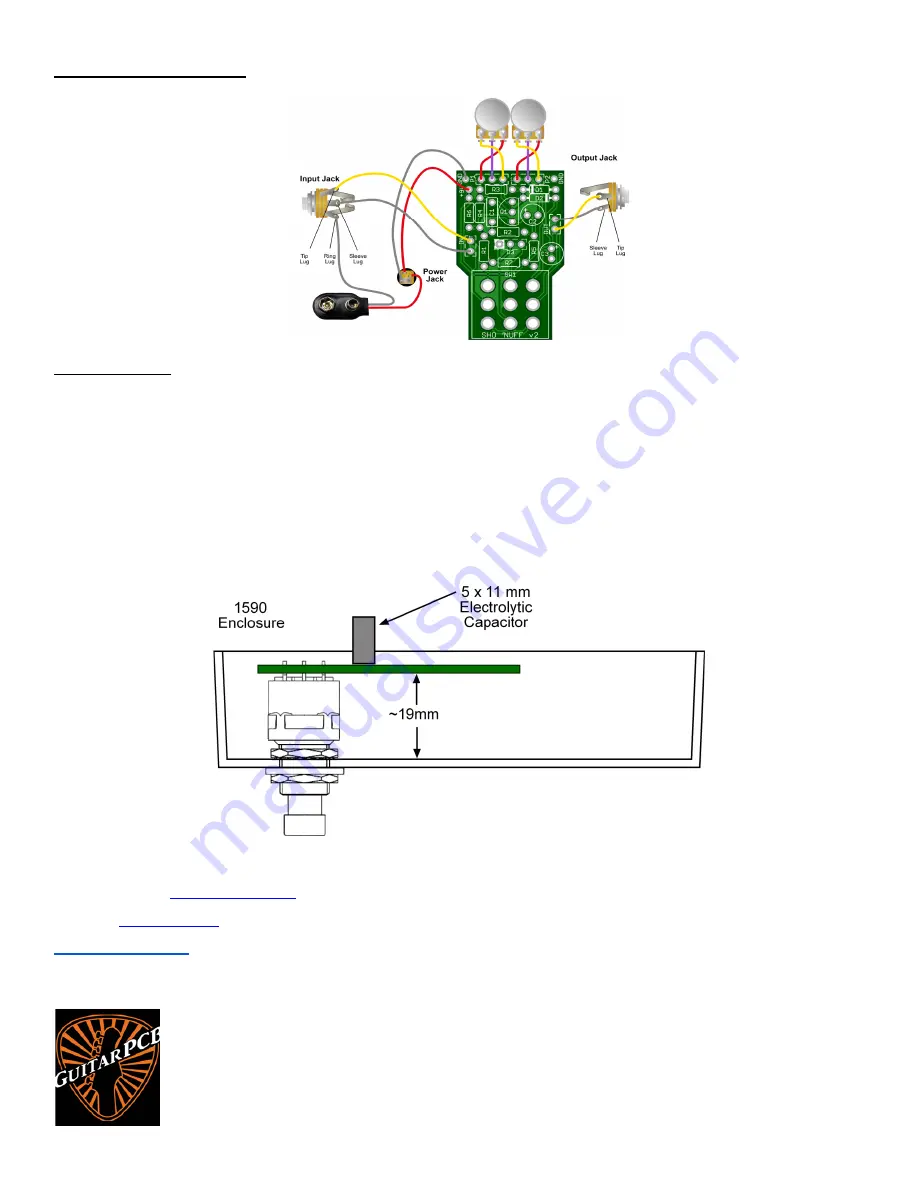
Wiring Diagram for v2
Enclosure Warning
If you use a 1590A, 1590B, 1290NS or any other shallow enclosure,
you must plan carefully.
You may need to mount the 3PDT
switch on the same side as the components, so that when you insert the populated board into the enclosure, you are looking at the
back of the board, not the component side. Otherwise, you may end up with a problem with components sticking too high out of the
enclosure so the back will not screw on
(see problem in picture example below)
.
We suggest mounting short items (resistors and diodes) on the top of the board, and put the 3PDT switch and all taller components
(Electrolytic and Film capacitors) on the underside, however
pin orientation is critical
on components like transistors, diodes and
polarized caps.
Be sure to drill your enclosure so that other components such as audio jacks and pots do not interfere with board
components.
Plan carefully, or use a 125B or other deeper enclosure!
Need a kit? Check out our authorized worldwide distributors:
USA – Check out
PedalPartsAndKits
for all your GuitarPCB kit needs in the USA.
Europe –
Das Musikding
Order either boards or kits direct from Europe.
PedalPartsAustralia
- Order either boards or kits direct from Australia
If they do not have a KIT listed send them a note asking if they can help you out.
This document, PCB Artwork and Schematic Artwork © GuitarPCB.com. Schematic, PCB and this document by
DCountry13, Tonmann, Bruce R. and Barry. All copyrights, trademarks, and artworks remain the property of
their owners. Distribution of this document is prohibited without written consent from GuitarPCB.com.
GuitarPCB.com claims no rights or affiliation to those names or owners.


