background image

Section C. Operation and Use

1. Fill bowl – Your La Lili is provided with a 
single hot and cold mixing valve located on the
front of your spa(far left).  This is a pressure balance
valve that requires you to lift the handle to start the
water flow and to adjust to the temperature that is
desired.  The clean jet motor must be completely
submerged in water.  CAUTION:  DO NOT USE
FOAMING, SUDSING OR MINERAL OIL BASED
ADDITIVES IN THE WATER.

2. To start – Press the button that is situated next
to the water fill lever.  This will start your Clean Jet
motor.  You may stop the whirlpool function at any
time by pressing the button again.

3. Adjustable air control - The air control 
button is situated on the left hand side of the spa
base, just under the chair.  You can control the 
supply of air to the clean jet motor by turning this
chrome button in a clockwise direction.

4. Hand Shower – The La Lili is equipped with a
hand held sprayer.  To activate the hand shower,
pull the hand shower from the receptacle and

depress the thumb control on the sprayer handle.
This will turn on the water. When you release 
pressure on the thumb control this will turn the
water off.

5. Adjustable footrest - The La Lili utilizes a
comfortable 3-position footrest system in which the
footrest can be adjusted by pulling out the pin
located at the centre of the La Lili base and 
placing the pin in one of the tree holes situated on
the footrest stand.  You can also slide the footrest
forward by pulling out the pin located at the side
of the actual footrest.  This will cause the footrest
pad to slide forward. 

6. To drain whirlpool tub – La Lili. The La Lili
is equipped with a built in optional discharge
pump.  Open the drain plug by turning the control
knob which is situated at the far right of the spa
base. The discharge pump will turn on 
automatically and the water will drain.

7. 9500 Shiatsu Roller back massage chair -
Your La Lili is equipped with a state –of-the-art
massage system.  The massage system is easy to
use; the remote has a one touch power that starts
directly in the auto function mode, or you can
select your own massage. You can also adjust the
front to rear position of the chair and the reclining
back.  By using the remote your client can adjust
the back to the most comfortable position.

4

Summary of Contents for La Lili

Page 1: ...Owners Manual ...

Page 2: ...e 6 7 Section F Specifications 8 Section G Warranty 9 CAUTION Must be installed by a licensed plumber and electrician in accordance with local codes Plumbing and Electrical Installation instructions must be adhered to in order for the warranty to be in effect and to insure the utmost in safety Chair and spa have a maximum seating capacity of 350 pounds Thank you for purchasing the La Lili spa from...

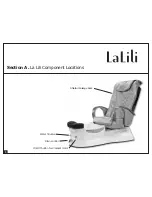
Page 3: ...Section A La Lili Component Locations Drain control On Off button for CleanJet motor Water fill valve Shiatsu massage back 1 ...

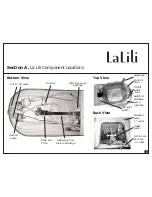
Page 4: ...rge pump optional ABS piping from drain to discharge Hot cold hoses Clean Jet pump Drain with P Trap Discharge pump 1 2 outlet Outlet switch Hot Cold flex hose 1 2 outlet Top View Sprayhead Switch for discharge pump optional Knob for drain On Off button for jet LED light switch ...

Page 5: ...nnections The La Lili hot and cold connections are located at the rear of the unit 1 2 Fittings 4 Electrical installation Have a qualified licensed electrician to install the wiring according to local codes The CleanJets are 1 5 hp 120V 15 AMP 60OHZ A GFI protected circuit must be used to supply power to the unit The roller back massage chair uses a 115V supply 5 Secure the base The La Lili base s...

Page 6: ...r handle This will turn on the water When you release pressure on the thumb control this will turn the water off 5 Adjustable footrest The La Lili utilizes a comfortable 3 position footrest system in which the footrest can be adjusted by pulling out the pin located at the centre of the La Lili base and placing the pin in one of the tree holes situated on the footrest stand You can also slide the f...

Page 7: ...t unless they are supervised at all times 3 Use this unit only for its intended use as described in this manual Do not use attachments that are not recommended by the manufacturer 4 Never drop or insert any object into any opening 5 Do not block jets during whirlpool operation 6 The unit must be connected to an electrical supply circuit that is protected by a ground fault circuit interrupter 7 SAV...

Page 8: ... water to just above the jets Add disinfectant Run whirlpool for 15 minutes drain and then wipe dry with clean soft cloth NOTE Cleaning or sanitizing is NOT disinfecting According to the Centers for Disease Control and Prevention CDC and the US Environmental Protection Agency EPA disinfecting occurs only when there is a reduction of pathogenic microbes at 99 999 Sanitizing is only a reduction of 9...

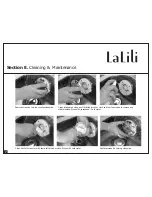
Page 9: ... bristled brush or cloth and low foam soap to remove any visible residue Rinse with sprayhead Cold water Remove screen by turning counter clockwise Clean back of screen Jet with same soft brush or cloth Rinse with cold water Replace screen by turning clockwise 7 ...

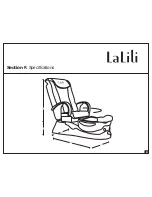
Page 10: ...Section F Specifications 8 54 xx 56 20 28 ...

Page 11: ...ble for shipping defective parts back to Gulfstream These parts must be packaged correctly in order to protect against any further damage 4 All parts are to be shipped by UPS Ground Service average 2 5 days 5 All defective parts must be shipped back to Gulfstream withing 30 days of receiving the new replacement parts or warranty will be void 6 Any warranty claim that cannot be determined over the ...

Page 12: ...cturers of Acrylic Baths Whirlpools Pedicure Foot Spas GULFSTREAM PLASTICS LTD Cambridge Ontario Canada N1R 6T4 Phone 519 622 0950 Toll Free 1 877 622 4853 Fax 519 622 6926 Website www gulfstreamplastics com ...

Reviews: