background image


50 

INSTALLATIE 

De montage dient enkel door erkende specialisten te worden uitgevoerd. 
De gebruiker dient de wetgeving en de normen van het land van zijn verblijfplaats na te leven.  

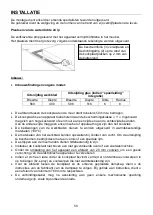
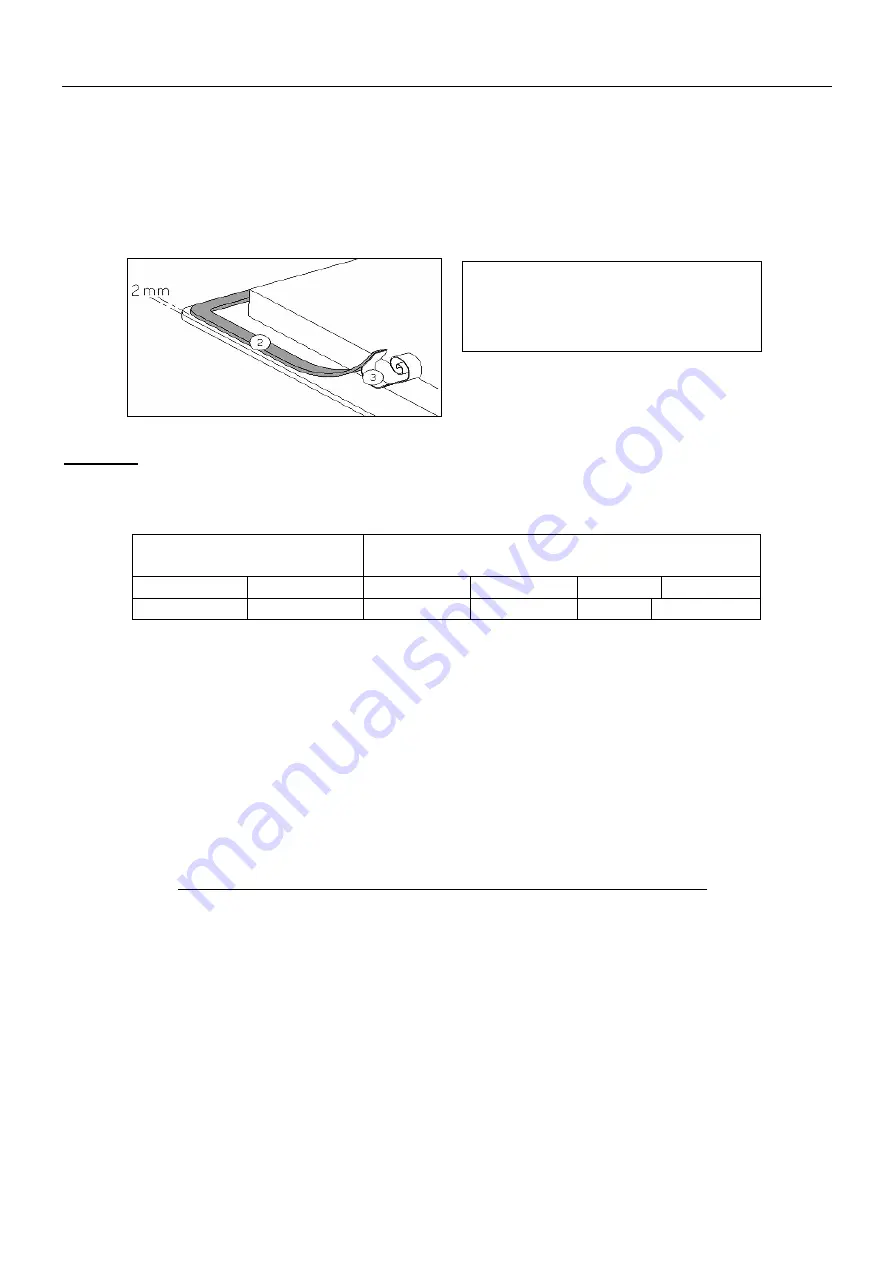
Plaatsen van de waterdichte strip  

De zelfklevende strip geleverd met het apparaat vermijdt infiltratie in het meubel. 
Het plaatsen dient met grote zorg volgens onderstaande tekening te worden uitgevoerd. 


Inbouw : 


Inbouwafmetingen volgens model:


  De afstand tussen de kookplaat en de muur dient minstens 50 mm te bedragen. 

  De kookplaat is een apparaat toebehorend aan de beschermingsklasse « Y ». Ingebouwd 

mag zich een hoge kastwand of een muur aan een zijde en aan de achterzijde bevinden. 
Aan de andere zijde mag geen enkel meubel of apparaat hoger zijn dan het kookvlak.  

  De  bekledingen  van  de  werkbladen  dienen  te  worden  uitgevoerd  in  warmtebestendige 

materialen (100°C) 

  De materialen van het werkblad kunnen opzwellen bij contact van vocht. Om de uitsnijding 

te beschermen, bestrijk deze met een vernis of een speciale lijm.  

  De strippen aan de muurranden dienen hittebestendig te zijn.  

  Installeer de kookplaat niet boven een niet geventileerde oven of een vaatwasmachine.  

  Onder  de  omkasting  van  het  apparaat  een  afstand  van  20  mm  voorzien  om  een  goede 

verluchting van de elektronische apparatuur te verzekeren 

  Indien  er  zich  een  lade  onder  de  kookplaat  bevindt,  vermijd  er  ontvlambare  voorwerpen  in 

op te bergen (bv. spray) en voorwerpen die niet warmtebestendig zijn.  

  Voor  de  afstand  tussen  de  kookplaat  en  de  erboven  geplaatste  dampkap,  dient  u  de 

instructies  van  de  fabrikant  van  de  dampkap  te  volgen.  Bij  gebrek  aan  instructies,  dient  u 
een afstand van minimum 760 mm te respecteren.  

  De  verbindingskabel  mag  na  aansluiting  aan  geen  enkele  mechanische  spanning 

onderhevig zijn, zoals bijvoorbeeld een lade. 

Uitsnijding werkblad 

Uitsnijding glas (indien “spoelleiding” 

integratie) 

Breedte 

Diepte 

Breedte 

Diepte 

Dikte 

Radius 

560 

490 

586 

516 

De beschermfolie (3) verwijderen en 
de dichtingstrip (2) op de rand van 
de kookplaat plakken op 2 mm van 
de buitenrand 


Summary of Contents for 11T580I

Page 1: ...GEBRAUCHSANWEISUNG NOTICE D UTILISATION INSTRUCTION OF USE GEBRUIKSAANWIJZING INSTRUCCIONES DE UTILIZACIÓN MANUALE D ISTRUZIONE 11T580I ...

Page 2: ......

Page 3: ...HEITS HINWEISE 3 SCHÜTZ VOR BESCHÄDIGUNG 4 VORSICHTSMASSNAHMEN BEI GERÄTEAUSFALL 4 SCHUTZ VOR WEITEREN GEFAHREN 4 GERÄTEBESCHREIBUNG 5 TECHNISCHE BESCHREIBUNG 5 BEDIENFELD 5 BEDIENUNG DES KOCHFELDES 5 SENSORTASTEN 5 ANZEIGE 6 ANZEIGE RESTWÄRME 6 BELÜFTUNG 6 INBETRIEBNAHME DES KOCHFELDES 6 VOR DEM ERSTEN AUFHEIZEN 6 INDUKTIONSPRINZIP 6 KOCHFELD EIN UND AUSSCHALTEN 7 ZEITSCHALTUHR 7 BRIDGE FUNKTION ...

Page 4: ...uch die Kochzonen aus Überhitzte Fette und Öle entzünden sich schnell Wenn Sie Speisen in Fett oder Öl zubereiten oder flambieren sollten Sie den Kochvorgang beobachten Wenn Sie kochen und braten werden die Kochzonen heiß Hüten Sie sich deshalb vor Verbrennungen während und nach der Benutzung des Geräts Achten Sie darauf dass kein elektrisches Kabel von einem freistehenden oder eingebauten Gerät i...

Page 5: ... sein Vorsichtsmassnahmen bei Geräteausfall Sollte ein Fehler festgestellt werden muss das Gerät ausgeschaltet und vom Netz getrennt werden Wenn Brüche Sprünge oder Risse auf dem Glas auftreten schalten Sie das Kochfeld sofort aus schrauben Sie die Sicherung für das Kochfeld ab bzw nehmen Sie diese heraus und wenden Sie sich an unseren Kundendienst oder an Ihren Fachhändler Reparaturen am Gerät dü...

Page 6: ... Sensortasten Das Kochfeld wird über Sensortasten gesteuert Diese reagieren auf leichte Berührungen des Glases mit dem Finger Jede Reaktion der Schaltfelder wird mit einem akustischen und oder visuellen Signal quittiert Betätigen Sie immer nur eine Taste 2xBridge links und rechts Vorne links Hinten links Hinten rechts Vorne rechts Taste Taste Ein Aus Taste Verriegelungs Taste Zeitschaltuhr Taste L...

Page 7: ...hne Gefahr berührt werden können Die Wärme kann benutzt werden um die Gerichte warm zu halten Belüftung Der Lüfter funktioniert automatisch Er startet mit kleiner Geschwindigkeit sobald die durch die Elektronik freigesetzten Werte eine gewisse Schwelle überschreiten Die höhere Geschwindigkeit wird eingelegt wenn die Induktionskochmulde intensiv benutzt wird Der Lüfter reduziert seine Geschwindigke...

Page 8: ... nach ca 10 Sekunden aus und die Nullen erlöschen Zeitschaltuhr Der Timer kann für eine Garzeit von zwischen 0 99 min eingestellt werden Einschalten oder Veränderung der Dauer Betätigung Bedienfeld Anzeige Auswählen der Kochzone Auf oder drücken 4 oder 9 Leistung auswählen Auf oder 1 9 Zeitschaltuhr auswählen Auf und gemeinsam Zeitschaltuhr 00 mn drücken der Zeitschaltuhr Leuchte blinkt Zeit verlä...

Page 9: ...ur eine Taste zu betätigen Zeitschaltuhr als Eieruhr Betätigung Bedienfeld Anzeige Einschalten der Kochmulde Auf 0 I drücken Kochzonen Anzeige 0 Zeitschaltuhr auswählen Auf und gemeinsam Zeitschaltuhr 00 mn drücken der Zeitschaltuhr Leuchte blinkt Zeit verlängern Auf drücken zeit erhöht Zeit verkürzen Auf drücken zeit abnimmt Nach ein paar Sekunden die Kontroll Leuchte blinkt nicht mehr mit Nach A...

Page 10: ...uf drücken 1 9 und Kochzone auswählen Auf oder drücken 0 Verriegelung der Kochmulde Um eine Veränderung der Kochzoneneinstellung zu vermeiden z B bei der Reinigung des Glases können die Bedienungstasten außer der Taste 0 I verriegelt werden Verriegelung des Kochfeldes aktivieren Betätigung Bedienfeld Anzeige Einschalten der Mulde Auf 0 I drücken 0 oder H Mulde verriegeln Auf drücken Verriegelungs ...

Page 11: ...ur je nach Art des Kochens anpassen Maximum Temperatur und Rauch Punkt Öl Fett Empfohlen max Temperatur C Leistung Rauch Punkt C Butter 130 4 150 Schweinefett 170 6 200 Rinderfett 180 6 210 Olivenöl 180 6 200 Sonnenblumenöle 200 7 220 Erdnussöl 200 7 235 Kokosfett 200 7 240 Kochtipps Gargut Temperatur C Leistung Fisch und Schalentiere 170 180 6 Kalbfleisch 160 180 6 Rindfleisch 200 210 8 Schweinef...

Page 12: ...ie das Kochfeld mit einem sauberen Tuch trocken in Schleifrichtung Reinigung von heißen Das Gerät ausschalten und abkühlen lassen bis 90 C Stuffe 2 Einzelne Eiswürfel auf die Grillplatte legen gleichzeitig mit der Wendesschaufel den Schmutz lösen und in die Rinne schieben Die Rückstände in der Rinne z B mit Haushaltpapier entfernen Anstelle der Eiswürfel kann auch kaltes Wasser verwendet werden Re...

Page 13: ...g ist aktiviert wenn mehrere Tasten bedeckt sind Durch eine Überhitzung hat die Elektronik automatisch die Leistung reduziert oder auch automatisch abgeschaltet Das Kühlgebläse läuft nach dem Ausschalten weiter Das ist keine Störung das Gebläse läuft so lange bis das Gerät abgekühlt ist Das Gebläse schaltet automatisch ab UMWELTSCHUTZ Die Verpackungsmaterialen sind umweltfreundlich und recyclierba...

Page 14: ...eit zu verhindern Beachten Sie das mitgelieferte Dichtungsband sorgfältig aufzukleben Das Kochfeld darf nicht über Herde ohne Lüfter Geschirrspülern Wasch oder Trockengeräten eingebaut werden Um eine ausreichende Belüftung der Elektronik im Kochfeld zu erzielen ist unter der Mulde ein Luftraum von 20 mm notwendig Befindet sich unter dem Kochfeld eine Schublade dürfen in der Schublade keine brennba...

Page 15: ...t ist müssen beim festen Einbau gemäß den Montageanweisungen andere Trennungsmöglichkeiten berücksichtigt werden Das Zuleitungskabel muss so angebracht werden dass die heißen Teile des Kochfelds nicht berührt werden Achtung Dieses Gerät ist nur für eine Strom Versorgung von 230 V 50 60 Hz ausgelegt Schließen Sie immer die Erde mit an Beachten Sie das Anschlußschema Benutzen Sie das Anschlußkabel d...

Page 16: ... 17 DESCRIPTION DE L APPAREIL 18 CARACTERISTIQUES TECHNIQUES 18 BANDEAU DE COMMANDE 18 UTILISATION DE L APPAREIL 18 TOUCHES SENSITIVES 18 AFFICHAGE 19 INDICATEUR DE CHALEUR RESIDUELLE 19 VENTILATION 19 MISE EN ROUTE ET GESTION DE L APPAREIL 19 AVANT LA PREMIERE UTILISATION 19 PRINCIPE DE L INDUCTION 19 MISE EN ROUTE 20 FONCTION MINUTERIE 20 FONCTION BRIDGE 21 VERROUILLAGE DU BANDEAU DE COMMANDE 22...

Page 17: ...rès utilisation Surveillez constamment les cuissons qui utilisent des graisses et des huiles car elles sont susceptibles de s enflammer rapidement spécialement lorsque vous flambez des aliments Prenez garde aux risques de brûlures pendant et après l utilisation de l appareil Assurez vous qu aucun câble électrique d appareil fixe ou mobile ne vienne en contact avec la zone de chaude Les objets magn...

Page 18: ...ers à couverts doivent être en matériau résistant à la chaleur Précautions en cas de défaillance de l appareil Si un défaut est constaté il faut débrancher l appareil et couper la ligne d alimentation électrique En cas de fêlure ou de fissure de la vitrocéramique il faut impérativement débrancher l appareil du réseau électrique et prévenir le service après vente Les réparations doivent être entrep...

Page 19: ...ches sensitives Votre appareil est équipé de touches sensitives permettant de commander les différentes fonctions Un effleurage de la touche active leur fonctionnement Cette activation est validée par un voyant un affichage et ou par un signal sonore N appuyez que sur une seule touche à la fois 2 bridges gauche et droite Avant gauche Arrière gauche Arrière droit Avant droit Touche Touche Marche Ar...

Page 20: ...ne posez aucun objet sensible à la chaleur Risque de brûlure et d incendie Ventilation Le ventilateur de refroidissement a un fonctionnement entièrement automatique Il se met en route à petite vitesse dès que les calories dégagées par l électronique dépassent un certain seuil La ventilation enclenche sa seconde vitesse lorsque la table de cuisson est utilisée intensivement Le ventilateur réduit sa...

Page 21: ... différents de 0 à 99 minutes pour chacune des zones Réglage ou modification de la durée de cuisson Action Bandeau de commande Afficheur Sélectionner la zone Appuyer sur ou 4 ou 9 Sélectionner la puissance Appuyer sur ou 1 9 Sélectionner Minuterie Appuyer simultanément sur 00 minutes et de la minuterie et le voyant clignote Augmenter la durée Appuyer sur 1 jusqu à 99 Diminuer la durée Appuyer sur ...

Page 22: ...ue vous démarrez avec la touche l afficheur de la minuterie indique directement 30 minutes et ensuite diminue ce temps Le voyant de contrôle clignote puis s éteint après quelques secondes la minuterie démarre Désactiver la minuterie utilisée hors cuisson Action Bandeau de commande Afficheur Activer la table de cuisson Appuyer sur 0 I Voyants de zone 0 Stopper la minuterie Appuyer simultanément sur...

Page 23: ...ur 0 l 0 ou H sur 4 afficheurs Déverrouillage Appuyer sur Voyant verrouillage éteint CONSEILS DE CUISSON Réglage des puissances de cuisson températures Puissance Température C 1 50 2 75 3 100 4 125 5 150 6 170 7 190 8 205 9 220 La cuisson des aliments peut se faire directement sur la zone de chauffe avec ou sans matières grasses huile graisse Eviter d atteindre le point de fumée température trop é...

Page 24: ...l 200 7 220 Huile d arachide 200 7 235 Graisse de noix de coco 200 7 240 Conseils de cuissons Nature du plat Température C Puissance Poisson et crustacés 170 180 6 Viande de veau 160 180 6 Viande de boeuf 200 210 8 Viande de porc 180 210 7 Agneau 180 200 7 Volaille 160 180 6 Saucisses 200 7 8 Œufs au plat 140 4 5 Crêpes omelletes 140 160 5 Fruits 140 160 5 Légumes 140 160 5 Faire revenir du riz pr...

Page 25: ...e et laisser refroidir l appareil en dessous de 90 C position 2 Posez des glaçons sur la zone de cuisson et enlever les salissures avec une spatule et poussez les dans la rigole Nettoyer la rigole avec par exemple du papier absorbant De l eau froide peut remplacer les glaçons Nettoyer ensuite vigoureusement la surface avec un chiffon propre et légèrement humide dans le sens du polissage Certaines ...

Page 26: ...s une des casseroles est vide et son fond a surchauffé l appareil dispose également d un dispositif de réduction automatique de niveau de puissance et de coupure automatique en cas de surchauffe La soufflerie de ventilation continue de tourner après l arrêt de la table ce n est pas un défaut le ventilateur continue de protéger l électronique de l appareil la soufflerie s arrête automatiquement PRO...

Page 27: ...e thermo résistantes Les matériaux des plans de travail peuvent gonfler au contact de l humidité Pour protéger le chant de la découpe appliquer un vernis ou une colle spéciale N installer pas l appareil au dessus d un four non ventilé ou d un lave vaisselle Garantir entre le fond du caisson de l appareil un espace de 20 mm pour assurer une bonne circulation de l air de refroidissement de l électro...

Page 28: ...rajoutés à l installion fixe conformément aux réglementations de l installation Le câble d alimentation doit être placé de sorte à ce qu il ne touche pas des parties chaudes de la table de cuisson Attention Cet appareil n est conçu que pour une alimentation en 230 V 50 60 Hz Raccordez toujours le fil de terre de protection Respectez le schéma de raccordement Utilisez le câble de raccordement qui e...

Page 29: ...F APPLIANCE FAILURE 30 OTHER PROTECTIONS 30 DESCRIPTION OF THE APPLIANCE 31 TECHNICAL DATA 31 CONTROL PANEL 31 USE 31 SENSITIVE TOUCHES 31 DISPLAY 32 RESIDUAL HEAT INDICATION 32 VENTILATION 32 STARTING UP AND APPLIANCE MANAGEMENT 32 BEFORE THE FIRST USE 32 INDUCTION PRINCIPLE 32 STARTING UP 33 TIMER 33 BRIDGE FUNCTION 34 CONTROL PANEL LOCKING 34 COOKING ADVICE 35 SETTING UP THE COOKING LEVELS TEMP...

Page 30: ...ppliance Make sure no cable of any fixed or moving appliance contacts with the glass or the hot saucepan Magnetically objects credit cards floppy disks calculators should not be placed near to the engaged appliance Never cover the appliance with a cloth or a protection sheet This is supposed to become very hot and catch fire This appliance is not intended for use by persons including children with...

Page 31: ... put any inflammable object ex sprays into the drawer situated under the vitroceramic hob The eventual cutlery drawers must be resistant to heat Precautions in case of appliance failure If a defect is noticed switch on the appliance and turn off the electrical supplying If the ceramic glass is cracked or fissured you must unplug the appliance and contact the after sales service Repairing has to be...

Page 32: ...ouches Your ceramic hob is equipped with electronic controls with sensitive touch keys When your finger touches the key the corresponding command is activated This activation is validated by a control light a letter or a number in the display and or a beep sound Touch only one key on the same time 2 bridges left right Front left Rear left Rear right Front right Power Display key key On Off Locking...

Page 33: ...ive object on them There are risks of burn and fire Ventilation The cooling system is fully automatic The cooling fan starts with a low speed when the calories brought out by the electronic system reach a certain level The ventilation starts his high speed when the hob is intensively used The cooling fan reduces his speed and stops automatically when the electronic circuit is cooled enough STARTIN...

Page 34: ...ing zone Press key or 1 9 To select the power level To select Timer Press simultaneous and 00 and led blinks Increase the time Press key 1 to 99 Decrease the time Press key 99 to 1 By beginning with the key the timer displays 30 After a few seconds the control light stops with blinking The time is confirmed and the cooking starts until the time reaches 00 To stop the cooking time Action Control pa...

Page 35: ...lows to use the 2 cooking zones at the left at same time with the same features as a single cooking zone Power function isn t allowed Action Control panel Display Activate the hob Press key 0 I 0 or H Activate the bridge Press key Π 0 Press or 0 Π Increase bridge Press key 4 to 9 Decrease bridge Press key 9 to 1 The power display appears on the selected front zone and Π appears on the selected rea...

Page 36: ...ture in accordance with the type of cooking required Maximum temperature and smoking point Grease Oil Maximum recommended temperature C power Smoke point C Butter 130 4 150 Lard 170 6 200 Beef fat 180 6 210 Olive oil 180 6 200 Sunflower oil 200 7 220 Peanut oil 200 7 235 Coconut oil 200 7 240 Cooking advice Type of foods Temperature C Power Fish and seafood 170 180 6 Veal 160 180 6 Beef 200 210 8 ...

Page 37: ...ural grooves of the cooking surface no circular movements Warm cooking surface Switch off the appliance and let it cool to 90 C level 2 Put icicles on the cooking surface and remove light marks with a spatula and push them into the drain Clean the drain with absorbent paper for example Cold water can replace the icicles Then dry the surface thoroughly with movements that follow the natural grooves...

Page 38: ...vered The pan is empty and its bottom overheated The appliance has an automatic reducing system of the power level and an automatic cut off system when there is overheating Continuous ventilation after cutting off the hob This is not a failure the fan continuous to protect the electronic device The fan cooling stops automatically ENVIRONMENT PROTECTION The packaging material is ecological and can ...

Page 39: ...s which are often used to make worktops expand on contact with water To protect the cut out edge apply a coat of varnish or special sealant Particular care must be given to applying the adhesive joint supplied with the hob to prevent any leakage into the supporting furniture This gasket guaranties a correct seal when used in conjunction with smooth work top surfaces Not to install the hob to the t...

Page 40: ...ed installation in accordance with the installation regulations The inlet hose must be positioned so that it does not touch any of the hot parts of the hob or oven Caution This appliance has only to be connected to a network 230 V 50 60 Hz Connect always the earth wire Respect the connection diagram Use the connecting cable that is attached to the device To open the cover use a medium screwdriver ...

Page 41: ...ELEN TEGEN BESCHADIGING 42 VOORZORGSMAATREGELEN BIJ DEFECT VAN HET APPARAAT 42 ANDERE BESCHERMINGEN 42 BESCHRIJVING VAN HET APPARAAT 43 TECHNISCHE KENMERKEN 43 BEDIENINGSPANEEL 43 GEBRUIK VAN HET APPARAAT 43 TIPTOETSEN 43 DISPLAY 44 AANDUIDING RESTWARMTE 44 VENTILATIE 44 IN WERKING STELLEN 44 VOOR HET EERSTE GEBRUIK 44 PRINCIPE VAN INDUCTIE 44 INWERKINGSTELLING 45 TIMER FUNCTIE 45 BRIDGEFUNCTIE 46...

Page 42: ...jk gebruik bereiding van voedingsmiddelen met uitsluiting van alle ander huishoudelijk commercieel of industrieel gebruik Waak steeds over bereidingen die oliën en vetten bevatten want deze kunnen vlug vlam vatten Pas op voor brandwonden tijdens en na het gebruik van het apparaat Verzeker u ervan dat geen enkele elektrische kabel van een vast of los apparaat met het warme kookvlak of met een warme...

Page 43: ...kplaat Eventuele bestekbakken dienen in warmtebestendig materiaal te zijn uitgevoerd Voorzorgsmaatregelen bij defect van het apparaat Bij het vaststellen van een defect het apparaat uitzetten en de elektrische toevoer uitschakelen Schakel onmiddellijk de elektrische stroom van het apparaat uit indien er een barst of spleet in het glas is en verwittig de dienst na verkoop De herstellingen dienen en...

Page 44: ...tsen Uw apparaat is uitgerust met tiptoetsen waarmee u de verschillende functies kan instellen Het aanraken van de toets zet de functie in werking Deze activering wordt weergegeven door een lichtje een aflezing en of een geluidssignaal Druk niet op meerdere toetsen tegelijk toets toets Aan Uit Vergrendelingstoets Timer Aanduiding van het vermogenniveau Bridge toets 2x bridge Links Rechts Links voo...

Page 45: ...rwerp op de kookzones plaatsen Gevaar voor brand of brandwonden Ventilatie De koelingsventilator functioneert helemaal automatisch Hij komt langzaam op gang zodra de door de elektronica vrijgekomen calorieën een bepaalde hoeveelheid overschrijden De ventilatie schakelt naar de tweede snelheid over wanneer het kookvlak intensief gebruikt wordt De ventilator vermindert snelheid en stopt automatisch ...

Page 46: ...n van 0 tot 99 minuten voor elke zone Instellen en wijzigen van de kooktijd van een kookzone Actie Bedieningspaneel Display Kookzone selecteren Druk op of 4 ou 9 Vermogen selecteren Druk op of 1 9 Timer selecteren Druk tegelijkertijd op en 00 en led knippert van de timer Tijd verkorten Druk op van de timer 99 tot 00 Tijd verlengen Druk op van de timer 1 tot 99 De tijd wordt weergegeven en de kookp...

Page 47: ...engen Druk op van 1 tot 99 Als de tijd op 00 komt begint hij te knipperen en te piepen Door meteen op de toets te duwen gaat de display meteen naar 30 De Eierwekker stopzetten Actie Bedieningspaneel Display Inschakelen Druk op 0 I 0 De timer stopzetten Druk tegelijkertijd op en Druk op xx 00 Bridgefunctie Deze functie maakt het mogelijk om de twee linker verhittingszones tegelijkertijd te gebruike...

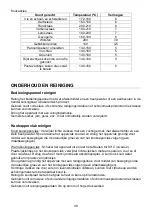
Page 48: ...t KOOKADVIES De kookstanden temperaturen instellen U kunt direct op het verwarmde oppervlak koken met of zonder vet olie Voorkom het bereiken van het rookpunt te hoge temperatuur als u aan het koken bent met olie of vet Levensmiddelen verliezen hun voedingswaarde Om de smaak en kwaliteit te behouden dient u overeenkomstig de bereidingsprocedure de juiste temperatuur in te stellen Maximale temperat...

Page 49: ... vlekken met een vochtige doek met afwasmiddel en een klein beetje water Spoel daarna het oppervlak koud af en droog het oppervlak grondig door middel van bewegingen die de natuurlijke groeven van het kookoppervlak volgen geen draaibewegingen Warm kookoppervlak Schakel het apparaat uit en laat het afkoelen tot 90 C niveau 2 Plaats ijsklontjes op het kookoppervlak verwijder lichte vlekken met een s...

Page 50: ...ekt zijn een kookpan is leeg en de bodem is oververhit de kookplaat beschikt eveneens over een automatisch verminderingsdispositief van het vermogen en van een automatische uitschakeling bij oververhitting De ventilator blijft doorwerken na het uitzetten van de kooktafel dit is geen defect de ventilator beveiligt zo de elektronische apparatuur de ventilator stopt vanzelf MILIEUBESCHERMING de verpa...

Page 51: ...cht Om de uitsnijding te beschermen bestrijk deze met een vernis of een speciale lijm De strippen aan de muurranden dienen hittebestendig te zijn Installeer de kookplaat niet boven een niet geventileerde oven of een vaatwasmachine Onder de omkasting van het apparaat een afstand van 20 mm voorzien om een goede verluchting van de elektronische apparatuur te verzekeren Indien er zich een lade onder d...

Page 52: ...ar stopcontact dan moeten middelen voor uitschakeling aan de vaste installatie toegevoegd worden inovereenstemming met de installatieregeling De voedingsslang moet zo geplaatst worden zodat deze de hete delen van de kookplaat of de oven niet raakt Let op Dit apparaat is voorzien voor een aansluiting op een netspanning van 230V 50 60 HZ Verbind steeds de aarding Respecteer het aansluitingsschema Om...

Page 53: ...DATOS TECNICOS 55 PANEL DE CONTROL 55 USO 55 TOUCH CONTROL MANDOS 55 DISPLAY VISUALIZADOR 56 INDICADOR DE CALOR RESIDUAL 56 VENTILACION 56 ENCENDIDO Y MANEJO DE SU ELECTRODOMESTICO 56 ANTES DEL PRIMER USO 56 PRINCIPIO DE INDUCCION 56 ENCENDIDO 56 RELOJ PROGRAMADOR 57 FUNCION BRIDGE 58 BLOQUEO DE LA CUBETA DE COCCION 59 CONSEJOS PARA COCINAR 60 ELECCION NIVELES DE COCCION TEMPERATURES 60 TEMPERATUR...

Page 54: ... ya que éstos pueden fácilmente prender fuego Tenga cuidado de no quemarse mientras usa el electrodoméstico y después de su uso Asegúrese de que no hay ningún cable de algún aparato fijo o móvil en contacto con la plancha cristal o las sartenes calientes Objetos magnéticos tarjetas de crédito disquete calculadoras etc no deben acercarse al electrodoméstico cuando éste esta en funcionamiento No pon...

Page 55: ... aplicación integrada asegúrese que el espacio entre el contenido del cajón y la parte inferior de la aplicación es bastante grande 2cm Esto es esencial para garantizar una ventilación correcta Nunca ponga ningún objeto inflamable en el cajón situado bajo la placa vitrocerámica Los cajones y cubertería u otros objetos que pudiera contener deben ser resistentes al calor Precauciones en caso de que ...

Page 56: ...rámica esta equipada con mandos electrónicos con teclas de toque sensibles Cuando su dedo toca la tecla el mando correspondiente es activado Esta activación es validada por una luz de control con una letra o numero en el display y emitirá un sonido de pitido Toque sólo una tecla al mismo tiempo 2xBridge izquierda y derecha Parte delantera Parte trasera izquierda Parte trasera derecha Parte delante...

Page 57: ... totalmente automático El ventilador comienza con una baja velocidad cuando las calorías publicadas por el sistema electrónico alcanzan un cierto nivel La ventilación comienza su alta velocidad cuando la placa es usada de manera intensiva El ventilador reduce su velocidad y se para automáticamente cuando el circuito electrónico esta suficientemente refrigerado ENCENDIDO Y MANEJO DE SU ELECTRODOMÉS...

Page 58: ...longar tiempo Presionar El tiempo aumenta Reducir tiempo Presionar El tiempo disminuye El piloto de control deja de parpadear tras un par de segundos El indicador se pone en marcha 30 cuando se acciona la tecla La hora se confirma y la cocción comienza hasta que llega la hora 00 Desconectar reloj programador Accionamiento Panel de control Indicación Seleccionar reloj programador Presionar y Tiempo...

Page 59: ... automáticamente al cabo de 2 minutos y o al presionar una tecla Desconectar reloj programador como reloj de arena Accionamiento Panel de control Indicación Conectar la cubeta de cocción Presionar 0 I Indicación de zonas de cocción 0 Desconectar reloj programador Presionar y conjuntamente Presionar xx 00 Función Bridge Esta función permite un puenteado de las zonas de cocción de las zonas de cocci...

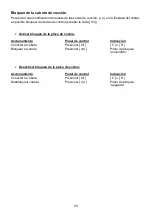
Page 60: ... excepto la tecla 0 I Activar bloqueo de la placa de cocina Accionamiento Panel de control Indicación Conectar la cubeta Presionar 0 I 0 o H Bloquear la cubeta Presionar Piloto de bloqueo encendido Desactivar bloqueo de la placa de cocina Accionamiento Panel de control Indicación Conectar la cubeta Presionar 0 I 0 o H Desbloquear cubeta Presionar Piloto de bloqueo apagado ...

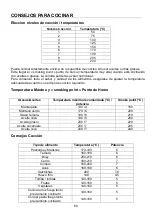
Page 61: ...n el tipo de cocción requerido Temperatura Máxima y smoking point Punto de Humo Grasas Aceites Temperatura máxima recomendada C potencia Smoke point C Mantequilla 130 4 150 Manteca cerdo 170 6 200 Grasa ternera 180 6 210 Aceite oliva 180 6 200 Aceite girasol 200 7 220 Aceite cacahuete 200 7 235 Aceite coco 200 7 240 Consejos Cocción Tipo de alimento Temperatura C Potencia Pescados y Mariscos 170 1...

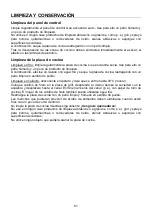
Page 62: ... lavado con agua fría y seque la placa de cocina restregando con un paño limpio en sentido de pulido Limpieza en caliente desconecte el aparato y deje que se enfríe hasta 90 C nivel 2 Coloque cubitos de hielo en la placa de grill desprenda al mismo tiempo la suciedad con la espátula y desplácela hasta el canal Elimine los restos del canal p ej con papel de rollo de cocina En lugar de los cubitos d...

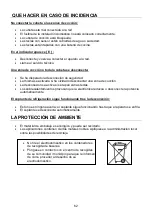
Page 63: ...na de cocción La desconexión se activa si se tapan varias teclas Los sobrecalentamientos provocan que la electrónica reduzca o desconecte la potencia automáticamente El soplante de refrigeración sigue funcionando tras la desconexión Esto no es ninguna avería el soplante sigue funcionando hasta que el aparato se enfría El soplante se desconecta automáticamente LA PROTECCIÓN DE AMBIENTE El material ...

Page 64: ...ara prevenir cualquier escape en los muebles en los que se apoya Este adhesivo garantiza un apropiado sellado cuando es usado en la conjunción con una superficie lisa de trabajo No instalar la placa encima de un horno no ventilado o un lavaplatos Hay que garantizar que bajo el inferior de la placa hay un espacio de 20 mm para asegurar una buena circulación de aire en el dispositivo electrónico Hay...

Page 65: ...nción Este aparato sólo está dimensionado para una alimentación eléctrica de 230 V 50 60 Hz Conecte siempre la tierra Respete el esquema de conexiones Use el cable de conexión que se fija en el aparato Para abrir la carcasa use un destornillador e introdúzcalo en las ranuras previstas para ello Cable alimentación Conexión diámetro Cable Cable Calibre Protección 230V 50 60Hz 1 Phase N 5 x 1 5 mm H ...

Page 66: ... 67 PROTEZIONE CONTRO ALTRI RISCHI 67 DESCRIZIONE APPARECCHIO 68 DATI TECNICI 68 PANNELLO COMANDI 68 COMANDI PIANO DI COTTURA 68 TASTI SENSIBILI AL TATTO 68 INDICAZIONI 69 INDICAZIONE CALORE RESIDUO 69 VENTILAZIONE 69 MESSA IN FUNZIONE DEL PIANO COTTURA 69 PRIMA DELL USO 69 IL PRINCIPIO DELL INDUZIONE 69 ACCENSIONE E SPEGNIMENTO DEL PIANO COTTURA 70 TIMER 70 FUNZIONE PONTE 71 BLOCCO DEL PIANO COTT...

Page 67: ...ze Dopo l uso spegnere sempre le zone di cottura Se l olio o il grasso di cottura si surriscaldano possono prendere facilmente fuoco Se si cuoce con molto olio o grasso o se si cucina alla fiamma sorvegliare sempre la cottura Quando si cucina le zone di cottura diventano molto calde Fare quindi attenzione a non scottarsi durante la cottura o dopo aver spento l apparecchio Fare attenzione che i cav...

Page 68: ...za in caso di guasti Se si nota un anomalia spegnere subito l apparecchio e staccarlo dalla rete elettrica Se sulla superficie in vetroceramica si notano rotture incrinature o altri danni spegnere il piano di cottura togliere di sede il fusibile a vite e contattare il servizio assistenza o il concessionario Miele Eventuali riparazioni vanno eseguite solo da persone qualificate AVVERTENZA Se la sup...

Page 69: ...TURA Tasti sensibili al tatto Il piano di cottura viene gestito mediante tasti sensibili al tatto che rispondono al leggero contatto del dito con il vetro Tutte le azioni vengono confermate da un segnale acustico e o visivo Azionare sempre un solo tasto alla volta Tasto Tasto Tasto on off Tasto di blocco Tasto timer Indicatore potenza Tasto ponte 2 ponti destro e sinistro Anteriore sinistra Poster...

Page 70: ...H si spegne quando è possibile toccare le zone di cottura senza pericolo Il calore residuo può essere utilizzato per tenere in caldo le pietanze Ventilazione Il sistema di ventilazione è completamente automatico Si attiva a bassa velocità non appena i valori rilasciati dall impianto elettrico raggiungono un livello specifico La velocità più elevata viene impiegata quando il piano a induzione è uti...

Page 71: ... periodo compreso tra 0 e 99 minuti Avvio o modifica della durata della cottura Azione Pannello di comando Indicatore Selezione della zona di cottura Premere o 4 o 9 Selezione della potenza Premere o 1 9 Selezione timer Premere contemporaneamente Timer 00 min e del timer La spia lampeggia Aumentare la durata Premere La durata aumenta Ridurre la durata Premere La durata si riduce Dopo qualche secon...

Page 72: ...he secondo la spia smette di lampeggiare Una volta terminata la cottura programmata l indicazione 00 lampeggia accompagnata da un segnale acustico Il segnale acustico e il lampeggiamento si interrompono automaticamente dopo 2 minuti o premendo il tasto Spegnimento funzione contaminuti per le uova Azione Pannello di comando Indicatore Accensione del piano cottura Premere 0 I Indicatore zone di cott...

Page 73: ...la spia della funzione di blocco CONSIGLI PER LA COTTURA Impostazione potenza temperatura potenza temperatura C 1 50 2 75 3 100 4 125 5 150 6 170 7 190 8 205 9 220 Gli alimenti si possono cuocere direttamente sulla superficie in acciaio con o senza grasso olio Se per la cottura si usa olio o grasso evitare si selezionare il punto di fumo temperatura troppo alta per non compromettere il contenuto d...

Page 74: ...o Pulire regolarmente il piano cottura Utilizzare un panno umido e una piccola quantità di detergente Risciacquare quindi con acqua fredda ed asciugare il piano cottura con un panno pulito seguendo l andamento della superficie Pulizia a caldo Spegnere l apparecchio e lasciare raffreddare fino a 90 C Livello 2 Collocare alcuni cubetti di ghiaccio sul piano cottura e contemporaneamente rimuovere lo ...

Page 75: ...ù tasti risultano coperti A causa di surriscaldamento il sistema elettronico ha ridotto automaticamente la potenza e attivato lo spegnimento Il ventilatore continua a funzionare anche dopo lo spegnimento Non si tratta di un guasto il ventilatore continua a funzionare fino al completo raffreddamento del piano cottura Il ventilatore si spegne automaticamente TUTELA AMBIENTALE I materiali dell imball...

Page 76: ...astoviglie lavatrici o asciugatrici Per garantire la corretta ventilazione dei dispositivi elettronici del piano di cottura lo spazio libero sotto il vano d incasso deve essere di 20 mm Se sotto il piano di cottura si trova un cassetto evitare assolutamente di riporvi oggetti o sostanze infiammabili ad es spray Tra il piano di cottura e la cappa aspirante si dovrà mantenere la distanza di sicurezz...

Page 77: ...ggio si dovrà provvedere ad installare altri dispositivi di stacco Il cavo di allacciamento deve essere sistemato in modo da non toccare le parti calde del piano di cottura Attenzione Questo piano di cottura può essere collegato solo a 230 V 50 60 Hz Il piano deve essere allacciato al collegamento di terra Attenersi ai dati dello schema di collegamento La cassetta di collegamento si trova sulla pa...

Page 78: ...77 ...

Page 79: ......

Page 80: ...15449 0 ...

Reviews: