background image

3

Requirements | Assembly instructions | Care information

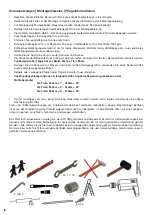
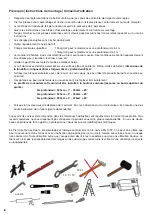
•  Observe the local building regulations and the snow load zones in your region.
•  Before the assembly sort the parts and check the contents list according to the assembly instructions.
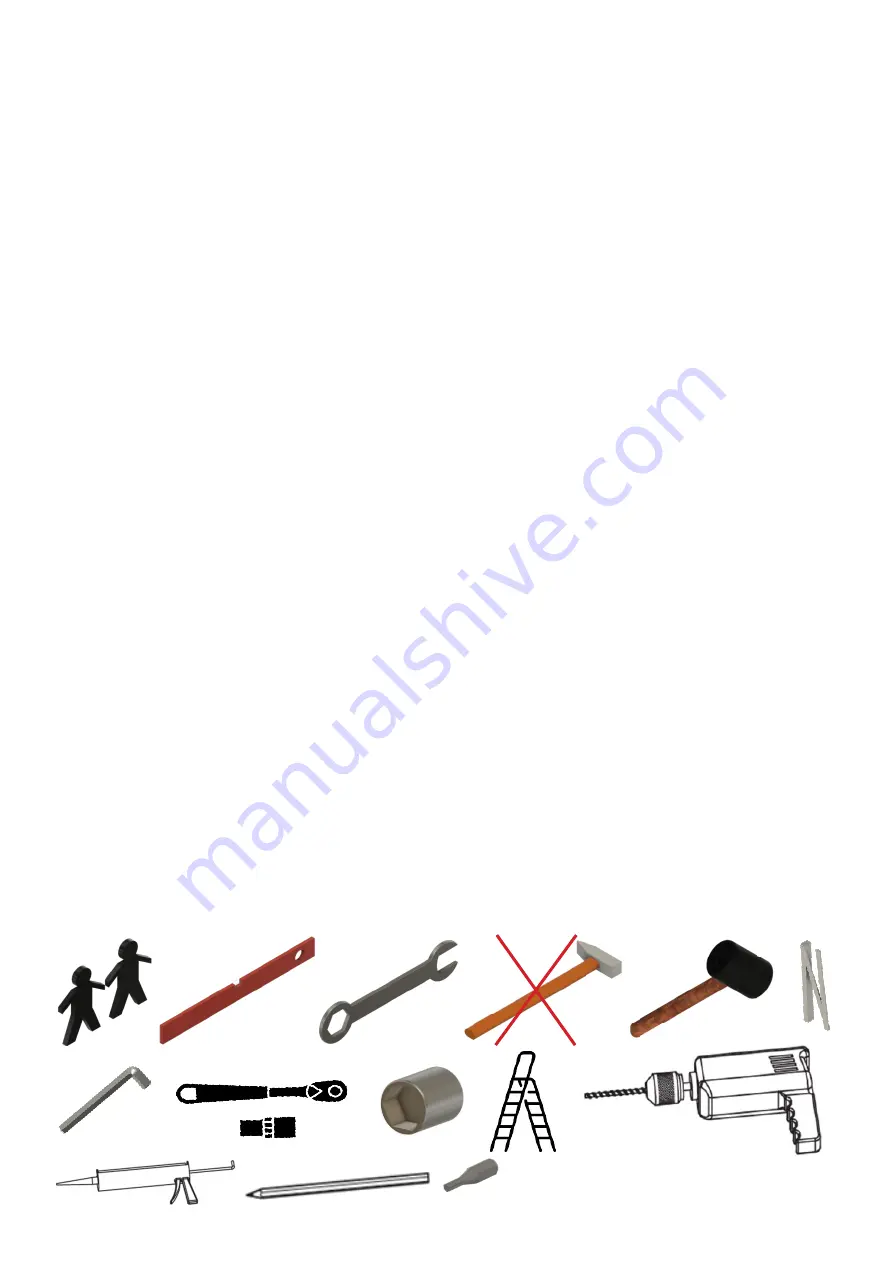
•  At least 2 persons are required to assemble the terrace roof.
•  Follow the instructions and installation steps in the assembly  instructions.
•  The Twin-Wall Sheets do not walk on transverse running boards (at least 2 rafters).
•  Point loads must be avoided absolutely
•  Regularly remove snow from the roof
•  Snow load: models with 3-4 m roof depth: 150 kg/m² and models with 5 m roof depth: 100 kg/m²
•  Included fixing material is only for solid masonry. Separate fixing materials must be used for insulation, hollow 

blocks, etc.

•  Keep the gutter free of leaves, dirt and snow.
•  The terrace roof must be installed on a flat, solid surface (for example concrete, concrete slabs). 

Foundation di-

mensions: length 40cm x width 40cm x depth 80cm

•  Clean the Twin-Wall Sheets with water and a mild detergent and do not use abrasives, acetone or solvents!
•  Defective or bent posts or beams must be replaced immediately.

•  The wall connection profile must be installed at the following height (measured at the upper edge of the 

profile) 


3m depth: 240cm = 7° - 300cm = 20°


4m depth: 240cm = 5° - 340cm = 20°


5m depth: 245cm = 5° - 375cm = 20°

•  As the cross beam can be moved by max. 60cm towards the house wall, this results in a higher roof pitch (slope). 


Colour and size deviations etc. within the usual tolerances reserved. Our recommendations do not release the custo-
mer from the obligation to check the product on his own responsibility. In case of doubt, please consult a specialist. 
Technical modifications reserved.

T

he Premium Terrace Roof has been developed and manufactured according to EN 1090. It may only be used for 

roofing over a terrace with appropriate fastening for the respective house wall and for non-commercial use. Any use 
other than the intended use described here is considered improper use. The manufacturer is not liable for any damage 
or consequential damage resulting from improper, incorrect or inappropriate use.

13, 17, 19

4 und 5

17

TX 25

3

Summary of Contents for 4295301

Page 1: ...m Terrassendach 9x3 m bis 10x5 m Art Nr 4295301 4295371 4295515 4295585 4295731 4295799 Montageanleitung Assembly instructions Instructions de montage D GB F Terrassendach 9m Breite Terrassendach 10m...

Page 2: ...sser und einem milden Reinigungsmittel verwenden Sie keine Scheuermittel Aceton oder l sungshaltige Mittel Defekte oder verbogene Pfosten oder Tr ger sind sofort auszutauschen Das Wandanschlussprofil...

Page 3: ...Wall Sheets with water and a mild detergent and do not use abrasives acetone or solvents Defective or bent posts or beams must be replaced immediately The wall connection profile must be installed at...

Page 4: ...ttoyer les plaques alv olaires avec de l eau et un savon doux ne pas utiliser de produits abrasifs d acetone ou solvants Des poteaux ou poutres d fectueux ou courb s sont remplacer imm diatement Le pr...

Page 5: ...5 A Z 1 Z 2 Z 3 Z 4 Z 6 Z 8 Z 9 Z 10 Z 11 Z 12 Z 14 Z 15 Z 16 Z 17 Z 18 Z 19 Z 20 B G F E D C H I L K J M N O P 5...

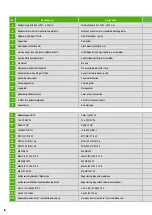
Page 6: ...bdeckung Wandanschluss Cover of wall connection O U Profil f r Hohlkammerplatten U Profil for Twinwall sheets P Regenablauf Rain drainage Z 1 Abdeckkappe SW 19 Cover cap SW 19 Z 2 10 5 VZ DIN 125 10 5...

Page 7: ...11x Profil de recouvrement des raccordements muraux 9x 9x 9x 10x 10x 10x Profil de fermeture pour plaque alv olaire 18x 18x 18x 20x 20x 20x Ecoulement d eau pluviale 2x 2x 2x 2x 2x 2x Cover cap SW 19...

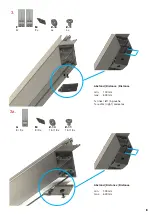
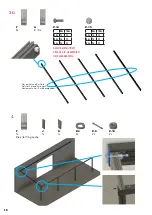
Page 8: ...8 1 B 2x Z4 20 22 x Z2 20 22 x Z3 20 22 x 1008 mm 2 48mm Z 14 16x C 3x I 4x 10 m 1008 mm 1008 mm 1008 mm 1008 mm 1008 mm 1008 mm 1008 mm 1008 mm 8...

Page 9: ...2x Z 10 4x Z 11 4x Abstand Distance Distance min 100 mm max 600 mm 1x links left gauche 1x rechts right correctes 3a G 8 9 x M 8 9 x Z 10 16 18 x Z 11 16 18 x Abstand Distance Distance min 100 mm max...

Page 10: ...10m 3m 18 20 4m 36 40 5m 36 40 Nur bei 4m und 5m Tiefe Only for 4m and 5m depth Seulement 4m 5m de profondeur G 8 9 x Z 15 9m 10m 3m 18 20 4m 36 40 5m 36 40 bereits vormontiert bereits vormontiert al...

Page 11: ...12 2x G 1x Nur bei 4m 5m Tiefe Only for 4m 5m depth Seulement 4m 5m de profondeur E 3m 1x 4m 5m 2x 6 Z 6 2x Z 9 2x Z 12 2x G 1 x Nur bei 4m 5m Tiefe Only for 4m 5m depth Seulement 4m 5m de profondeur...

Page 12: ...12 2x G 1 x Nur bei 4m 5m Tiefe Only for 4m 5m depth Seulement 4m 5m de profondeur E 3m 1x 4m 5m 2x 8 Z 6 2x Z 9 2x Z 12 2x G 1x Nur bei 4m 5m Tiefe Only for 4m 5m depth Seulement 4m 5m de profondeur...

Page 13: ...12 2x G 1 x Nur bei 4m 5m Tiefe Only for 4m 5m depth Seulement 4m 5m de profondeur E 3m 1x 4m 5m 2x 10 Z 6 2x Z 9 2x Z 12 2x G 1x Nur bei 4m 5m Tiefe Only for 4m 5m depth Seulement 4m 5m de profondeur...

Page 14: ...lle see table voir tableau 11 Z 6 2x Z 9 2x Z 12 2x G 1x Nur bei 4m 5m Tiefe Only for 4m 5m depth Seulement 4m 5m de profondeur E 3m 1x 4m 5m 2x 12 Z 6 2x Z 9 2x Z 12 2x G 1x Nur bei 4m 5m Tiefe Only...

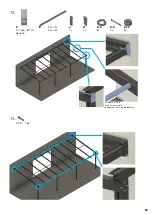
Page 15: ...15 13 F 1x links left gauche J 1x K 1x Z 6 2x Z 8 2x Z 12 2x E 3m 1x 4m 2x Nur bei 4m Tiefe Only for 4m depth Seulement 4m de profondeur 14 Z 19 16x 15...

Page 16: ...16 15 N 9 10 x Z 19 27 30 x 16 Z 2 16x Z 3 16x Z 4 16x 16...

Page 17: ...17 17 D 1 2 x Z 16 20 22 x 17...

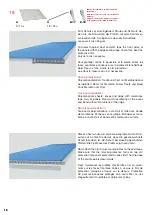
Page 18: ...ent du profil est dirig vers le bas Zum Schutz vor eindringendem Staub und Schmutz kle ben Sie die Stirnseiten der Platten mit dem Kantenver schlussband ab Schlagen Sie dazu die Schutzfolie nur so wei...

Page 19: ...ectly also make sure that the protective foils are aligned correctly Pre drill the upper part of the profile in the middle every 40 cm 7 mm the first hole is drilled after 6 cm Then place it on the su...

Page 20: ...20 20 H 10 11 x Z 20 A 10 11x 2 Platte Plate 3 Platte Plate 4 Platte Plate 5 Platte Plate 6 Platte Plate 7 Platte Plate 20...

Page 21: ...same way and screw this with cover together as in step 18 Then remove the protective films Monter les autres plaques de la m me mani re et visser ce couvercle ensemble comme l tape 18 Retirez ensuite...

Page 22: ...22 21 22 L 2x Z 19 8x Z 1 4x 22...

Page 23: ...23 23 P 1x A B C 23...

Page 24: ...Telefon 09367 98440 Telefax 09367 984429 kuernach scobalit de Scobalitwerk Wagner GmbH Hermann Ilgen Stra e 7 D 04808 Wurzen Telefon 03425 814708 Telefax 03425 814709 wurzen scobalit de Scobalitwerk W...

Reviews: