background image

2

Getting Started

Before first use

• Unpack the appliance but keep all packaging materials until you have made sure your new 

bar fridge is undamaged and in good working order. 

• Plastic wrapping can be a suffocation hazard for babies and young children, so ensure all 

packaging materials are out of their reach.

• Check to ensure you have all the parts listed on the opposite page, plus an instruction 

manual and a warranty certificate.

• Read this manual to familiarise yourself with all the parts. Pay particular attention to the 

safety instructions on the previous pages.

• Unwind the cord to its full length and inspect it for damage. Do not use the appliance if 

the appliance or its cord have been damaged. In case of damage, contact our after sales 

support line for advice on examination, repair or return of the damaged product.

• Make sure the bar fridge is disconnected from the power supply before cleaning the 

interior surfaces with lukewarm water using a soft cloth to remove any dust from transit 

and storage. Dry the appliance thoroughly.

• Your bar fridge has the capability of the door opening from the right or left side. If 

your setup requires reversal of the door swing, follow the instructions on page 

5

.

• Your new bar fridge is now ready for use – see page 

4

 for instructions.

Installing the bar fridge

• Before installing your new upright bar fridge, read all safety instructions in this manual, 

especially the sections on electrical safety and installation. Then follow the 

instructions below.

• This appliance is designed to be freestanding only and should not be recessed or built in.
• Place the bar fridge on a sturdy, level floor that is strong enough to support the unit when 

it is fully loaded.

• DO NOT install the appliance directly on carpeting or soft material. Carpeting must be 

removed or protected by a metal or wood panel beneath the appliance, which extends at 

least the full width and depth of the appliance. 

NOTE:

 Ensure that the appliance does not 

stand on the electrical supply cable. Parts which heat up should not be exposed. Whenever 

possible, the back of the appliance should be close to a wall but leaving the required 

distance for ventilation.

Overloading the fridge will affect cold air circulation and cooling performance. We 

therefore recommend you only load the fridge up to about 70% of its storage volume, 

always leave some space around food stored, and do not use containers that are too 

large and block ventilation openings.  

Summary of Contents for DF1-08

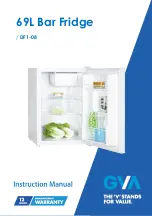
Page 1: ...69L Bar Fridge DF1 08...

Page 2: ...a potential hazard that can seriously injure you and others The instructions will tell you how to reduce the chance of injury and let you know what can happen if the instructions are not followed Read...

Page 3: ...let voltage and circuit frequency correspond to the voltage stated on the appliance rating label Plug the bar fridge into a 220 240V 50Hz 3 prong power outlet with a 15A fuse at the mains The outlet m...

Page 4: ...ectrical shock injury or death Do not connect or disconnect the electric plug when your hands are wet Flames Do not let open flames or ignition sources enter the appliance Flammable explosive substanc...

Page 5: ...Contents General Safety Instructions Parts List 1 Getting Started 2 Instructions 4 Reversing the Door Swing 5 Care and Maintenance 6 Responsible Disposal 8 Troubleshooting 9...

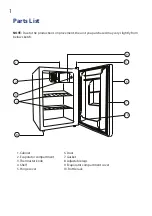
Page 6: ...provement the unit you purchased may vary slightly from below sketch 1 Cabinet 2 Evaporator compartment 3 Thermostat knob 4 Shelf 5 Hinge cover 6 Door 7 Gasket 8 Adjustable legs 9 Evaporator compartme...

Page 7: ...If your setup requires reversal of the door swing follow the instructions on page 5 Your new bar fridge is now ready for use see page 4 for instructions Installing the bar fridge Before installing yo...

Page 8: ...that there is enough spacing to open the door to 160 Before plugging in your new bar fridge let it stand upright for approximately 2 hours This will allow the refrigerant gases to settle into the comp...

Page 9: ...perature control setting all these factors have to be considered and some experimentation may be necessary NOTE If the unit is unplugged turned off or has lost power you must wait three to five minute...

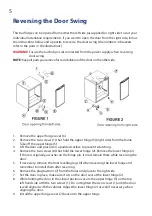
Page 10: ...5 3 Lift the door and place it on a padded surface to prevent scratching 4 Remove the two screws 8 that hold the lower hinge 2 Remove the lower hinge 2 If there is originally a washer on the hinge pi...

Page 11: ...leaning the fridge make sure to turn the temperature control to the 0 position unplug the bar fridge and remove the food and shelves Wash the inside surfaces with a warm water and baking soda solution...

Page 12: ...he door open slightly Moving the bar fridge Remove all food from inside the fridge tape the door shut and securely tape down all loose items inside Turn the levelling feet up to the base We recommend...

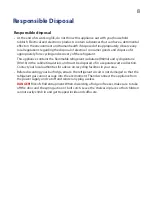
Page 13: ...ne R600a and cyclopentane R141b in the cabinet insulation and must be disposed of in a separate waste collection Contact your local authorities for advice on recycling facilities in your area Before d...

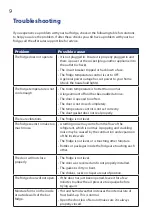
Page 14: ...normal A popping and crackling noise may be caused by the contraction and expansion of the inside walls The fridge is not level or is touching other furniture Bottles or packages inside the fridge are...

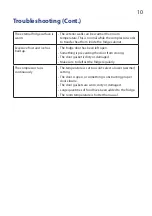
Page 15: ...ge door has been left open Something is preventing the door from closing The door gasket is dirty or damaged Make sure to defrost the fridge regularly The compressor runs continuously The temperature...

Page 16: ...C 3041 ACN 152 719 036 www gvaproducts com au While every effort has been made in the preparation of this instruction manual the publishers cannot be held responsible for the accuracy of the informati...

Reviews: