background image

about your setup,  direct any questions concerning power and/or grounding to a certified

Locate the bar fridge:

Away from sources of heat (stove, heater, radiator, dishwasher, etc.),which may increase 

In an area without extreme cold ambient temperatures,  which may affect cooling 

Away from direct sunlight,  which may affect the acrylic coating.

power consumption. 

performance.

 In a cool, well ventilated area, without excessive moisture and high humidity.

Installing the unit in the coolest area of the room will  save energy consumption and 

running costs.

To ensure correct operation,  this appliance must not be located where the temperature 

will  be below 10

°

C or above 43

°

C.

  En su re there are no obstru ctions tha t could p revent the fridge door from c losing.

To level  the bar fridge,  adjust the levelling legs at the bottom of the unit.

The refrigerator must have at least 50mm clearance between the rear of the appliance and 

the wall,  25mm between the sides and wall,  and the space above the top should be at 
least 25mm.  Ensure that there is enough spacing to open the door to 160

°

.

Before plugging in your new bar fridge, let it stand upright for approximately 2 

hours.  This will  allow the refrigerant gases to settle into the compressor and reduce the 
possibility of a malfunction in the cooling system from handling during transportation.

The Bar Fridge is suitable for connection to 220-240VAC 50Hz supply.  The Bar Fridge must 

be plugged into a dedicated individual  220-240VAC main socket outlet.

Plug the unit into an exclusive,  properly installed and earthed wall  outlet.  Do not under 

any circumstances cut or remove the third (ground)  prong from the power co rd. If in doubt 

electrician. 

Do not use an extension cord or an adapter plug.

  Secure the bar fridge’s supply cord behind the unit. Do not leave it exposed or dangling to 

prevent in ju ry an d acciden tal  dis conne ction from  the power su ppl y.

NOTE:   After plugging the appliance into a wall  outlet,  allow the unit to cool  down for two 

to 3 hours before placing food in the refrigerator compartment.

Getting Started

8

Summary of Contents for G67BFW15

Page 1: ...G67BFW15 67L Bar Fridge...

Page 2: ...1 Contents Guide to the Appliance 13 7 4 3 2 14 16 18 Caring for the Envir Safety Information and Getting Started Operation Instructions Troubleshooting Care and Maintenance Technical Specifications...

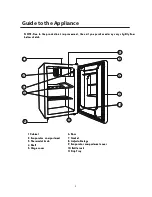
Page 3: ...r 7 Gasket 8 Adjustable legs 9 Evaporator compartment cover 10 Bottle rack 11 Drip Tray Guide to the Appliance m o r f y l t h g i l s y r a v y a m d e s a h c r u p u o y t i n u e h t t n e m e v o...

Page 4: ...ctly could be potentially hazardous on the environment and human health Observe any local regulations regarding the disposal of electrical consumer goods and dispose of it appropriately for recycling...

Page 5: ...cular attention to safety messages that follow this safety alert symbol or the words DANGER WARNING or CAUTON These words are used to alert you to a potential hazard that can seriously injure you and...

Page 6: ...Damaged cord Electrical work Electrical safety Make sure your outlet voltage and circuit frequency correspond to the voltage stated on the appliance rating label Plug the bar fridge into a 220 240V 50...

Page 7: ...l Refer all other servicing to a qualified technician Cleaning and maintenance Disconnect Unplug the bar fridge or disconnect power before cleaning or servicing Failure to do so can result in electric...

Page 8: ...m the right or left side If your setup requires reversal of the door swing follow the instructions on page 9 Installing the bar fridge Before installing your new upright bar fridge read all safety ins...

Page 9: ...between the sides and wall and the space above the top should be at least 25mm Ensure that there is enough spacing to open the door to 160 Before plugging in your new bar fridge let it stand upright...

Page 10: ...an be opened from either the left side as supplied or right side to suit your individual installation requirements If you want to open the door from the right side follow the instructions below WARNIN...

Page 11: ...ove the core cover from left side to right side And then lift the door and place it on a padded surface to prevent it from scratching 6 Remove the screws and bottom hinge Then remove the levelling fee...

Page 12: ...hinge pin Replace both levelling feet Screw 9 Place the door back on Ensure the door is aligned horizontally and vertically so that the seals are closed on all sides before finally tightening the top...

Page 13: ...cover back 13 With the door closed check that the door is aligned horizontally and vertically and that the seals are closed on all sides before finally tightening the bottom hinge Re adjust the levell...
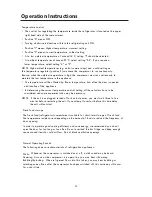
Page 14: ...minutes before restarting the unit If you attempt to restart before this time delay the unit will not start Operation Instructions The tem perature will be affected by Room tem perature how often the...

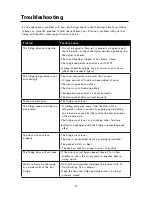
Page 15: ...e gasket is dirty or bent The shelves racks or crisper are out of position The fridge door will not open If the door has just been opened leave it for a few minutes to allow the air pressure to equali...

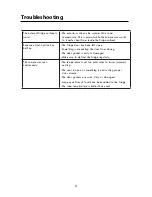
Page 16: ...open Something is preventing the door from closing The door gasket is dirty or damaged Make sure to defrost the fridge regularly The compressor runs continuously The temperature is set too cold select...

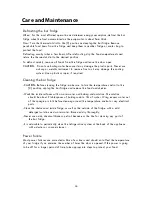
Page 17: ...leaning the fridge make sure to turn the temperature control to the 0 position unplug the bar fridge and remove the food and shelves Wash the inside surfaces with a warm water and baking soda solution...

Page 18: ...unit and thoroughly clean and dry the interior To prevent odour and mould growth block the door open slightly Moving the bar fridge Remove all food from inside the fridge tape the door shut and secur...

Page 19: ...0mm x 640mm Total gross volume 67L Total storage volume 62L Fresh food compartment storage volume 57 0L Special compartment storage volume 5 0L Climate class T Rated voltage 220 240V Rated Frequency 5...

Page 20: ...M E W Australia Pty Ltd 15 Vaughan Street Essendon Fields VIC 3041 ACN 152 719 036 1300 725 885 customercare gvaproducts com au gvaproducts com au CKGVA B01 G...

Reviews: