background image

 GDM-8245 

User 

Manual 

48


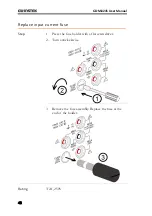
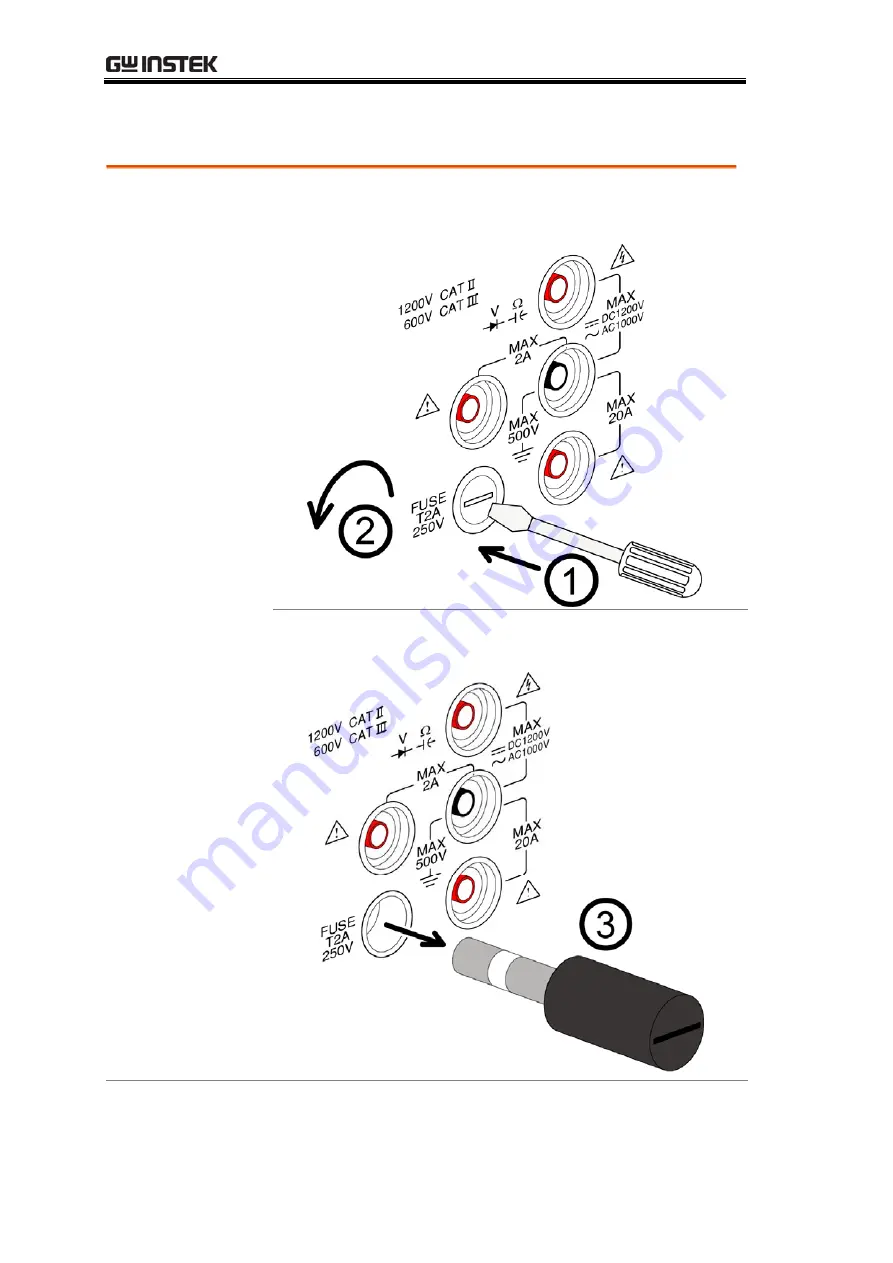
Replace input current fuse 


Step 

1.


Press the fuse holder with a flat screwdriver. 

2.


Turn anticlockwise.   


3.


Remove the fuse assembly. Replace the fuse at the 
end of  the holder. 


Rating 

T2A, 250V 

Summary of Contents for GDM-8245

Page 1: ...Digital Multimeter GDM 8245 USER MANUAL GW INSTEK PART NO 82DM 82450E01 ISO 9001 CERTIFIED MANUFACTURER...

Page 2: ...language without prior written consent of the Good Will company The information in this manual was correct at the time of printing However Good Will continues to improve products and reserves the rig...

Page 3: ...urement Overview 21 AC AC mV DC DC mV AC DC Voltage Measurement 22 DC DC 20A AC AC 20A AC DC Current Measurement 28 Resistance Measurement 31 Diode Test 33 Continuity Test 34 Capacitance Measurement 3...

Page 4: ...GDM 8245 User Manual 4 Specifications 49 Declaration of Conformity 55 INDEX 56...

Page 5: ...y appear in this manual or on the GDM 8245 WARNING Warning Identifies conditions or practices that could result in injury or loss of life CAUTION Caution Identifies conditions or practices that could...

Page 6: ...ess you are qualified as service personnel Note EN 61010 1 2001 specifies the measurement categories and their requirements as follows The GDM 8245 falls under category II 1200V and III 600V Measureme...

Page 7: ...ion Note EN 61010 1 2001 specifies the pollution degrees and their requirements as follows The GDM 8245 falls under degree 2 Pollution refers to addition of foreign matter solid liquid or gaseous ioni...

Page 8: ...this instrument as unsorted municipal waste Please use a separate collection facility or contact the supplier from which this instrument was purchased Please make sure discarded electrical waste is pr...

Page 9: ...cted to the terminal which is marked with the letter N or coloured Blue or Black The wire which is coloured Brown must be connected to the terminal marked with the letter L or P or coloured Brown or R...

Page 10: ...DMM Please note the information in this manual was correct at the time of printing However as GW Instek continues to improve its products changes can occur at any time without notice Please see the GW...

Page 11: ...as production testing research and field verification Performance High DCV accuracy 0 03 4 High current range 20A High Voltage range 1000V High ACV frequency response 50kHz Features 50000 count displa...

Page 12: ...ent results and parameters Secondary Display Shows the secondary measurement results and parameters Fuse Fuse protection for the instrument from over current Rating T2A 250V For the fuse replacement p...

Page 13: ...w DCV Measures DC Voltage page 22 SHIFT DCV DC mV DCV DC mV Measures DC Voltage mV page 22 ACV Measures AC Voltage page 22 SHIFT ACV AC mV ACV AC mV Measures AC Voltage mV page 22 Measures resistance...

Page 14: ...sures AC Current page 28 SHIFT ACA AC 20A Measures AC Current 20A page 28 AC DC AC DC Measures AC DC Voltage page 22 or AC DC Current page 28 SHIFT AC DC A C Hz Measures AC Frequency and page 43 Capac...

Page 15: ...GETTING STARTED 15 SHIFT The Shift key selects the second function assigned to each panel key When pressed the indicator appears in the display...

Page 16: ...iew 120 Power Cord Socket Accepts the power cord AC 100 120V or 230V 50 60Hz For the power on sequence see page 18 Fuse Socket 100 230 120 Holds the main fuse 100 120V T0 1A 250V 230V T0 08A 250V For...

Page 17: ...GETTING STARTED 17 Set Up Tilt Stand Steps 1 Pull handle base away from the casing 2 Turn handle into any of the preset positions Stand Position Carry Position...

Page 18: ...the rear panel 100V 120V 230V 100 230 120 100 230 120 100 230 120 Steps 2 Connect the power cord to the AC Voltage input 230 1 0 0 120 Note Ensure the ground connector of the power cord is connected t...

Page 19: ...ill light up and show the default range of DC 1000V and auto range Example ACV Auto A V k M Hz F n m SHIFT REL AC DC MAX mV kHz MIN AUTO AC ERROR dBm RMT HOLD A V k M Hz F n m SHIFT REL AC DC MAX mV k...

Page 20: ...ect Voltage range 24 Voltage conversion table 25 Crest factor table 27 Current DC DC 20A AC AC 20A AC DC Current Measurement 28 Select Current range 30 Resistance Resistance Measurement 31 Select Resi...

Page 21: ...vanced measurements see page 37 Measurement type DCV DC mV DC Voltage ACV AC mV AC Voltage Resistance Diode Continuity DCA DC20A DC Current ACA AC20A AC Current AC DC AC DC Voltage Current Capacitance...

Page 22: ...0V AC mV 0 500mV DC 0 1000V DC mV 0 500mV AC DC 0 1000V AC2 DC2 AC DC AC true RMS 1 Select a voltage type and range 1 Choose a type of voltage measurement ACV ACV AC mV DCV DCV DC mV AC DC 2 ACV DCV m...

Page 23: ...s between the V and the COM port The display updates the reading V COM Note When measuring in the maximum range 1000V range immediately followed by lowest range 500mV an error might occur due to extre...

Page 24: ...Press the Up or Down keys to increase or decrease the range Note If ACmV or DCmV voltages are selected the range cannot be changed with the Up or Down keys Switch to DCV or ACV mode first Selection li...

Page 25: ...AC component only DC component only True RMS 2 2 dc ac RMS CAL AC true RMS Sine PK PK 2 828 1 414 1 000 1 000 0 000 1 000 Rectified Sine full wave PK PK 1 414 1 414 0 421 0 435 0 900 1 000 Rectified...

Page 26: ...8245 User Manual 26 Triangle Sawtooth PK PK 3 464 1 732 0 960 1 000 0 000 1 000 RMS CAL is the displayed value for average responding meters that are calibrated to display RMS for sine waves K D D2 D...

Page 27: ...al is less than 3 0 voltage measurements will not result in error due to dynamic range limitations at full scale If the crest factor is more than 3 0 it usually indicates an abnormal waveform as seen...

Page 28: ...0 2A AC 20A 0 20A AC DC 0 20A AC2 DC2 AC DC AC true RMS 1 Select a current type and range 1 Choose a type of current measurement ACA ACA AC 20A SHIFT DCA DC 20A SHIFT AC DC ACA AC DC 3 DCA ACA mode di...

Page 29: ...20A The terminal that is used depends on the current For current 2A use the MAX 2A port for current up to 20A use the MAX 20A port The display updates the reading 20A 2A Connect the test lead between...

Page 30: ...th the Up or Down keys Switch to DCA or ACA mode first Selection list Range 500 A 5mA 50mA 500mA 2A 20A Protection Fuse protection for 500 A 5mA 50mA 500mA and 2A ranges Note To obtain accurate measur...

Page 31: ...the reciprocal of Resistance and measures how easily electricity flows 1 Activate resistance measurement Press key 2 resistance measurement appears Indicates Resistance AUTO Indicates Automatic range...

Page 32: ...Down keys to increase or decrease the range Selection list Range RESOLUTION ACCURACY 500 0 01 0 1 4 5k 0 1 0 1 2 50k 1 0 1 2 500k 10 0 1 2 5M 100 0 2 2 20M 1k 0 3 2 Open circuit Voltage 3 2 volts max...

Page 33: ...running a constant forward bias current through the diode 1 Activate diode test Press the SHIFT key and then press key 2 Diode mode display appears DC V Indicates Diode test 3 Connect the test lead an...

Page 34: ...ature The built in buzzer sounds when resistance is less than 5 ohms Open Voltage 3 volts maximum Protection 450V dc or peak ac continuous 1 Activate continuity test Press the key 2 Continuity mode di...

Page 35: ...Press the key 2 Capacitance mode display appears F Indicates capacitance measurement AUTO Indicates Automatic range selection n Indicates nanofarads 10 9 3 Connect the test lead and measure Connect t...

Page 36: ...GDM 8245 User Manual 36 Calibration button Background Calibration button is not supported for the end user If you need to calibrate this device please contact your distributor for details AUTO MAN CAL...

Page 37: ...ANCED MEASUREMENT Overview Advanced Measurement Overview 38 dBm dBm Measurement 39 Measure dBm 39 Max Min Max Min Measurement 40 Relative Relative Value Measurement 41 Hold Hold Measurement 42 AC Hz A...

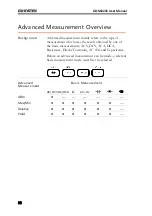
Page 38: ...ement which uses the result obtained by one of the basic measurements ACV DCV ACA DCA Resistance Diode Continuity AC Hz and Capacitance Before an advanced measurement can be made a relevant basic meas...

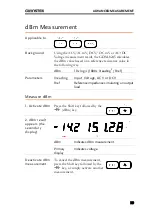
Page 39: ...log10 1000 x Vreading2 Rref Parameters Vreading Input Voltage ACV or DCV Rref Reference impedance simulating an output load Measure dBm 1 Activate dBm Press the Shift key followed by the dBm key 2 dBm...

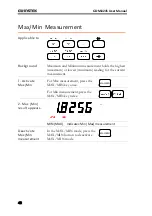
Page 40: ...inimum reading for the current measurement 1 Activate Max Min For Max measurement press the MAX MIN key once MAX MIN For Min measurement press the MAX MIN key twice 2 Max Min result appears MIN MAX In...

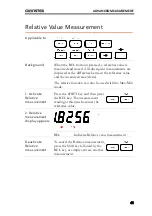
Page 41: ...ed value delta The relative function can also be used with the Max Min mode 1 Activate Relative measurement Press the SHIFT key and then press the REL key The measurement reading at this time becomes...

Page 42: ...ep the measured value on the primary display 1 Activate Hold measurement Press the HOLD key 2 Hold measurement display appears HOLD Indicates Hold measurement Deactivate Hold measurement To cancel the...

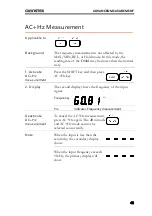
Page 43: ...ss the SHIFT key and then press AC Hz key SHIFT 2 Display The second display shows the frequency of the input signal Frequency Hz Hz Indicates Frequency measurement Deactivate AC Hz measurement To can...

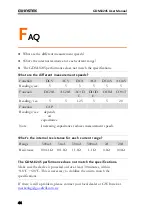
Page 44: ...5 5 5 20 Function CAP Readings sec depends on capacitance Note Increasing capacitance reduces measurement speeds What s the internal resistance for each current range Range 500uA 5mA 50mA 500mA 2A 20A...

Page 45: ...Appendix 45 APPENDIX Fuse Replacement Replace the AC source fuse 46 Replace input current fuse 48 Specifications Specifications 49...

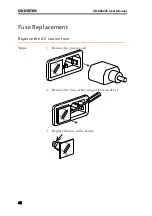
Page 46: ...er Manual 46 Fuse Replacement Replace the AC source fuse Steps 1 Remove the power cord 230 1 0 0 120 2 Remove the fuse socket using a flat screwdriver 230 1 0 0 120 3 Replace the fuse in the holder 23...

Page 47: ...Appendix 47 4 Ensure the correct line voltage is lined up with the arrow on the fuse holder Insert the fuse socket 230 1 0 0 120 230 1 0 0 120 Rating 100V 120V T0 1A 250V 230V T0 08A 250V...

Page 48: ...245 User Manual 48 Replace input current fuse Step 1 Press the fuse holder with a flat screwdriver 2 Turn anticlockwise 3 Remove the fuse assembly Replace the fuse at the end of the holder Rating T2A...

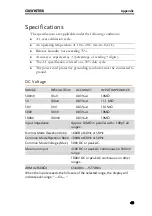
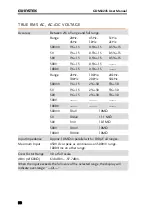
Page 49: ...age RANGE RESOLUTION ACCURACY INPUT IMPEDANCE 500mV 10uV 0 03 4 10M 5V 100uV 0 03 4 11 1 M 50V 1mV 0 03 4 10 1M 500V 10mV 0 03 4 10M 1000V 100mV 0 03 9 10M Input Impedance Approx 10M in parallel with...

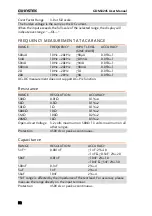
Page 50: ...0kHz 50kHz 500mV 1 15 2 30 5 30 5V 1 15 2 30 5 30 50V 1 15 2 30 5 30 500V 1000V 500mV 10uV 10M 5V 100uV 11 1 M 50V 1mV 10 1M 500V 10mV 10M 1000V 100mV 10M Input Impedance Approx 10M in parallel with 1...

Page 51: ...3 2 0 9Vmax Protection Fuse protection for 500uA 5mA 50mA 500mA and 2A ranges To obtain accurate measurement results please refrain from using the 20A terminal for more than 15 seconds when measuring...

Page 52: ...10Hz 2kHz 9A 0 05 1 AC DC measurement does not support AC Hz function Resistance RANGE RESOLUTION ACCURACY 500 0 01 0 1 4 5k 0 1 0 1 2 50k 1 0 1 2 500k 10 0 1 2 5M 100 0 2 2 20M 1k 0 3 2 Open circuit...

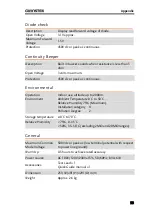
Page 53: ...Environment Indoor use altitude up to 2000m Ambient Temperature 0 C to 50 C Relative Humidity 75 Maximum Installation category II Pollution Degree 2 Storage temperature 40 C to 70 C Relative Humidity...

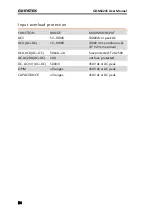
Page 54: ...V 1000V 1000Vdc or peak AC ACV AC DC 5V 1000V 1000V rms continuous 107 V Hz maximum DCA ACA AC DC 500uA 2A fuse protected T2A 250V DC AC20A AC DC 20A not fuse protected DC ACmV AC DC 500mV 450V dc or...

Page 55: ...Low Voltage Directive the following standards were applied EMC Electrical equipment for measurement control and laboratory use EMC requirements 2004 108 EC Harmonized Standard EN 61326 1 2006 EN 61326...

Page 56: ...fuse replacement 46 current fuse replacement 48 safety instructions 7 Getting Started chapter 10 Hold measurement 42 Max Min setting 40 Measurement advanced 38 Measurement keys 13 Overview measurement...

Reviews: