background image

HANDLING YOUR TREADMILL 

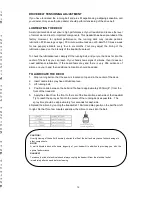
LIFT THE TREADMILL     

Use the manual incline to incline the treadmill.   

FOLDING THE TREADMILL       

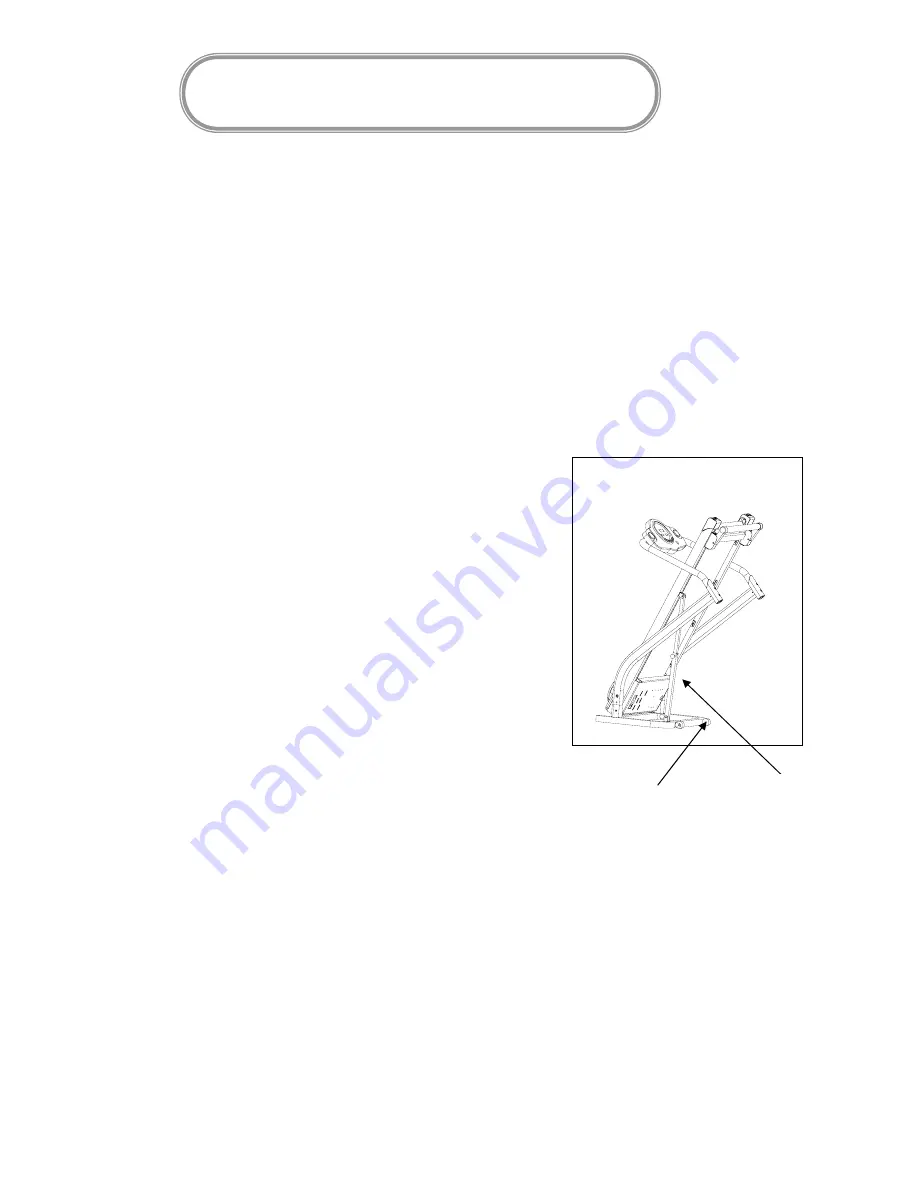
Folding and unfolding of this treadmill is made easy with the assistance of extension tube. 
( the picture below) After the treadmill has come to a complete stop, unplug the treadmill 
from the power source, fold up the deck slowly with both hands. Use the safety lock to lock 
the item. 

UNFOLDING THE TREADMILL 

The release handle is located on the end of left Main Frame, To unfold the treadmill, use 
your hands to push Main Frame gently, then the treadmill will be folding down with hand 
free by itself slowly to the ground. 

MOVING THE TREADMILL 

This treadmill is easy to move around safety.

To move the treadmill 

A

ǃ

 Foldable the machine 

B

ǃ

   Unplug the power cord

˗

C

ǃ

  Moving the treadmill by using the PU transportation Wheel

extension tube 

Wheel

Owner’s Manual                                                                                                        9 

CÓMO MANIPULAR LA TROT

ADORA


Cómo levantar la trotadora 

Utilice el inclinador manual para inclinar el equipo. 

Cómo plegar la trotadora 

Plegar y desplegar la trotadora se hace fácil con la ayuda del tubo de extensión. 

(Véase la figura de abajo). Una vez que el equipo se haya detenido totalmente, 

desenchufelo y pliegue la base lentamente con ambas manos. Utilice el seguro 

para cerrar.

Cómo desplegar la trotadora 

El mango para soltar se encuentra ubicado en el extremo izquierdo del armazón 

HA

ND

LING

 YO

UR

 TR

EA

DM

ILL


LIF

T T

HE 

TR

EA

DM

ILL


Use the 

manual incline 

to incline 

the treadmill. 


FOLDING THE 

TREADMILL  


Fol

din

g a

nd 

unf

old

ing

 of

 th

is 

tre

adm

ill 

is 

mad

e e

asy

 w

ith

 th

e a

ssistance 

of extension 

tube. 

( the 

picture below) 

After 

the treadm

ill has 

com

e to

 a 

com

ple

te 

sto

p, u

npl

ug 

the

 tre

adm

ill 

from the 

power 

source, fold 

up the 

deck 

slo

wly w

ith

 bo

th 

han

ds.

 U

se 

the

 sa

fet

y lo

ck 

to 

loc

the item. 

UN

FO

LD

IN

G T

HE 

TR

EA

DM

ILL


The

 re

lea

se 

han

dle

 is

 lo

cat

ed 

on 

the

 en

d o

f le

ft M

ain

 Fr

am

e, T

o unfold 

the treadmill, 

use 

you

r h

and

s to

 pu

sh 

Mai

n F

ram

e g

ent

ly,

 th

en 

the

 tre

adm

ill 

will 

be 

fol

din

g d

ow

n w

ith

 ha

nd 

fre

e b

y it

sel

f s

low

ly 

to 

the

 gr

oun

d. 

MOVING THE 

TREADMILL 

This treadmill 

is easy 

to move 

around safety

.

To 

move the 

treadmill 

A

ǃ

 Fo

lda

ble

 th

e m

ach

ine


B

ǃ

  U

npl

ug 

the

 po

wer

 co

rd

˗

C

ǃ

 M

ovi

ng 

the

 tre

adm

ill 

by 

usi

ng 

the

 P

U tr

ans

por

tat

ion

 W

hee

l

ext

ens

ion

 tu

be 

Whe

el

Own

er’

s M

anu

al 


 9


principal. Para desplegar el equipo, utilice sus 

manos empujando el armazón principal con 

cuidado. Luego la trotadora se desplegará 

hacia abajo por sí sola con la ayuda de la otra 

mano hasta llegar al piso.

Cómo trasladar la trotadora 

Este equipo es fácil de trasladar de manera 

segura.

Para trasladar la trotadora:

A.Pliegue el equipo 

B.Desenchufe

C.Traslade la trotadora utilizando la rueda de 

transporte PU

Tubo de extensión

Rueda 

8

8

Summary of Contents for GM97816

Page 1: ...MODEL GM97816 INSTRUCTION MANUAL MOTORIZED TREADMILL...

Page 2: ...IAN IF YOU FEEL CHEST PAINS NAUSEA DIZZINESS OR SHORTNESS OF BREATH STOP EXERCISE AND CONSULT YOUR PHYSICIAN BEFORE CONTINUING Console with LED windows Handle pulse sensors Owner s Manual 1 Extension...

Page 3: ...w impact design with cushions and PU roller so that your joints are protected against possible injury Foldable design for convenient storage Mobility wheels for easy moving and relocation Hand contact...

Page 4: ...of burns fire electrical shock or injury to persons take the following precautions When plugged in do not leave the treadmill unattended at any time Unplug the treadmill from the power source when it...

Page 5: ...ing Do not wear clothing that might catch on any part of this treadmill Always wear non slippery shoes while working with the treadmill Do not wear shoes with heels or leather soles Check the soles of...

Page 6: ...ll 2 3 ASSEMBLY THE HANDLE BAR as picture 3 Put the handle bar on the upright posts then connect the wires of the well Fix the handle bar with two bolts M10X50 like the picture 3 3 Owner s Manual 5 4...

Page 7: ...alls or furniture gAllow the safety area of 2m x1m behind the treadmill so that you can easily get on and off the treadmill without getting trapped during an emergency Occasionally after extended use...

Page 8: ...For your safety never use the treadmill without securing the safety key clipped to your clothing Pull on the safety key clip to make turn it will not come off your clothing GETTING ON AND OFF THE TREA...

Page 9: ...tem UNFOLDING THE TREADMILL The release handle is located on the end of left Main Frame To unfold the treadmill use your hands to push Main Frame gently then the treadmill will be folding down with ha...

Page 10: ...flicker when you choose that window 2 Fuction key Program mode power supply start pause speed speed Speed Key 3 6 9 A program key when the machine stops press the program key can enter the circle cho...

Page 11: ...s flashing 30 00 press or can set the time count down which can be designed in the range of the time is 8 00 99 00 C In the mode of time countdown press the mode key can enter the distance countdown m...

Page 12: ...he motor stop moving Body fat function When the treadmill stops press the Program key to select the body fat function key and enter into body fat function The handle pulse window displays the set para...

Page 13: ...99 00 0 0 99 99 calorie term 50 10 9990 0 9999 0 I program speed diagram P1 P2 P3 P4 P5 P6 1 1 0 1 0 1 0 1 0 1 0 1 0 Program Speed section 2 1 5 2 0 3 0 4 0 3 0 3 0 3 2 5 2 0 6 0 6 0 6 0 6 0 4 3 5 3 0...

Page 14: ...EXERCISE You should exercise three to four times a week to improve your cardiovascular and muscle fitness HOW HARD SHOULD YOU EXERCISE Intensify of exercise is reflected in your heart rate Exercise mu...

Page 15: ...er with more frequent exercise Whether it is three days or six days remember that your ultimate goal should be to make exercise a lifetime habit HOW LONG For aerobic exercise benefits it is recommende...

Page 16: ...g the belt 4 Run the treadmill Adjust belt while the treadmill is running at 4 Mi H 6 4 Km H with no person on the belt After making the adjustment walk on the belt for five minutes to test If necessa...

Page 17: ...and there is very little evidence of silicone on your hand then additional lubrication should be added TO LUBRICATE THE DECK 1 Stop running belt so that the seam is located on top and in the center of...

Page 18: ...Use the wrench adjust electrical engineering stud bolt the agreeable hour hand turns to move Adjust the scope with take the load and don t beat slippery for precise Attention Please turn off the mach...

Page 19: ...e ERROR CODES AND ITS SOLUTIONS According to different errors BS N06 display different error code the details as following 1 Err01 controller error it generally caused by reasons as below A the import...

Page 20: ...r replace fuse 4 Lubricate treadmill deck and reset 5 Turn on Off switch to ON Running belt slips 1 Running belt not tight enough 2 Drive belt not tight enough 1 Adjust running belt tension 2 Adjust d...

Page 21: ...EXPLODED DRAWING Owner s Manual 21 20...

Page 22: ...ASSEMBLE PARTS Owner s Manual 22 21...

Page 23: ...300mm in length 1 5mm2 1 19 Filter 1 Connection wire red 300mm in length 1 5mm2 1 Connection wire black 300mm in length 1 5mm2 1 Connection wire ground wire 300mm in length 1 5mm2 1 20 Power lead 1500...

Page 24: ...M8X45 4 52 Inside 6Corner Screw M8X45 1 53 Inside 6Corner Screw M8X40 1 54 Inside 6Corner Screw M8X40 2 55 Inside 6Corner Screw M8X45 1 56 Inside 6Corner Screw M8X30 2 57 Inside 6Corner Screw M8X35 1...

Page 25: ...MANUAL DEL USUARIO MODELO GM97816 TROTADORA DE MOTOR...

Page 26: ......

Page 27: ...e le permite medir la grasa en su cuerpo Dise o de bajo impacto con cojines y con rodillos que protegen sus articulaciones contra posibles lesiones Dise o plegable para un f cil almacenamiento Ruedas...

Page 28: ...G T a e w D el t t E T p T c t s...

Page 29: ...pueda atracarse en la tratadora Siempre utilice zapatos no resbalosos para trotar en el equipo No utilice zapatos con tacones o suelas de cuero Revise las suelas de sus zapatos y retire cualquier rast...

Page 30: ......

Page 31: ...otadora por lo menos a cuatro pies de las paredes o de muebles Deje un rea de seguridad de 2m x 1m detr s de la tratadora para facilitar el acceso a la hora de subirse y bajarse de ella y no quedar at...

Page 32: ...T T m S T th u sa co Y mi cl st wi it G H or th th D ar ex co...

Page 33: ...power source fold up the deck slowly with both hands Use the safety lock to lock the item UNFOLDING THE TREADMILL The release handle is located on the end of left Main Frame To unfold the treadmill u...

Page 34: ...1 DI 1 Di A T B T C I corr sho D E I dist The 2 F Spe A pro ha B tim C key win D mo E F G...

Page 35: ...esar a las opciones de manejo B Durante la opci n normal manual presione el bot n mode para ingresar a la opci n de conteo regresivo de tiempo El tiempo se mostrar intermitente as 30 00 Presione o par...

Page 36: ...Pre 5 pre 6 the 7 the 8 Wh unchan 9 the one sec increas 10 Pu buzzer 11 Pr S P other wi When body fat The paramet After gender the bod Press Press s Press Press s Press press s Press function paramet...

Page 37: ...si ticos si la grasa es de 18 esto significa que uno se encuentra algo delegado Es ptimo cuando la grasa se encuentra entre 18 y 23 Si est entre 23 y 28 esto sugiere que uno se encuentra con algo de s...

Page 38: ...TA Th The You hea Am 75 bel Lo Up A you HO You HO Inte stre pre phy HO Sus exe min WE WE WE WE WE WE WE O...

Page 39: ...s frecuente Bien sean tres o seis d as recuerde que su meta final debe ser la de hacer que los ejercicios sean un h bito de por vida Durante cu nto tiempo Para obtener beneficios de los ejercicios aer...

Page 40: ...Own...

Page 41: ...30 minutos a 5 6km h tres veces por semana para dos personas lubrique cada cuatro seis meses Se puede variar el tiempo de lubricaci n en base a la intensidad de nivel de uso del equipo Para revisar el...

Page 42: ...T ru b sli Own...

Page 43: ...s soluciones Dependiendo de los diferentes errores se mostrar un c digo diferente para cada error como sigue 1 Err01 Error de controlador generalmente causado por las siguientes razones a Hay un mal c...

Page 44: ...Tr st R R h st R c...

Page 45: ...DIAGRAMA EXPLODED DRAWING Owner s Manual 21 20...

Page 46: ...O...

Page 47: ...m de longitud 1 5mm2 1 19 Filtro 1 Cable de conexi n rojo 300mm de longitud 1 5mm2 1 Cable de conexi n negro 300mm de longitud 1 5mm2 1 Cable de conexi n tierra 300mm de longitud 1 5mm2 1 20 Gu a de e...

Page 48: ......

Reviews: