background image

1. Pressing H1 key once and loosing (H1 yellow LED lamp is lighting

constantly)

2. Pressing keyboard / mouse key once

3. Pressing Joypad key once (the Joypad is connected with P1 APEX by cable)

4. After finishing the setting, pressing H1 key once to quit from the setting

model (H1 yellow LED lamp is extinguished)(you also could exist the setting

model by pressing H1 after setting all)

Clear All: pressing H1 key(H1 blue LED lamp is lighting constantly);then

holding(3 seconds)H1 key to clear all mappings and to quit from setting model

(H1 blue LED light extinguished)

For example:

Keyboard and Joypad Key:after pressing H1 key, please firstly press the K key

of keyboard, the Joypad A key and then press the H1 key to quit from the

setting model. Hence, the K key would be equipped with the functions of A key.

Keyboard and Joypad Left Rocker:after pressing H1 key, please firstly press

keyboard W key, push the Joypad rocker upward and then press the H1 key to

quit from setting model. Hence, the keyboard W key is armed with the function

of Joypad left rocker pushing upward.

Mouse Camera Movement and Joypad Right Rocker:after pressing H1 key,

please move the mouse, and then rotate Joypad right rocker. Hence, the

mouse movement could be with the movement functions of Joypad rocker.

Mouse Key and Joypad Key:after pressing H1 key, please firstly press the

mouse left key, Joypad L2 key and finally press H1 key to quit from the setting

model. Hence, the mouse left key is with the functions of Joypad L2 key.

H2: Combo Setting Key / Combination Setting Key

The Combo Setting Key could record a series of actions so as to realize the

combo attack and combination function as well as to carry out the combo

attack by designed key.

1.Pressing H2 key and loosing to enter into the Combo Setting Key setting

model (H2 green LED lamp is lighting constantly)

2.Implementing the combo attack operation, and the equipment would record

the operation automatically.

3.After finishing recording, re-pressing H2 key (H2 green LED lamp would light

constantly) and then setting the key for this combo attack / combination. After

setting successfully, it will carry forward the combo attack and the quit from the

setting model(H2 green LED lamp extinguishes)

4.Clear All: pressing H2 key (H2 green LED lamp is lighting constantly), and

the pressing (3 seconds) H2 key to clear all and quit from the setting model

(H2 green LED lamp extinguishes)

For example: after pressing H2 key, then pressing A, B, C, D four keys , H2 key

in succession and finally pressing E key to end the recording. E key is the

execute key for launching A, B, C, D combo attack.

Supporting Key:

a.All keys could be used to trigger except from HOME key and rocker.

Summary of Contents for Winbox P1 APEX

Page 1: ...IV Application Method of Switch Console V Application Method of X1 Console VI Instruction of Function Keys VII COOV Manager of IOS Android VIII PC COOV Assistant IX Automatic On hook Function X Doubl...

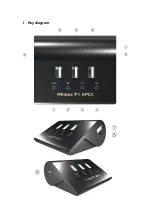
Page 2: ...I Key diagram...

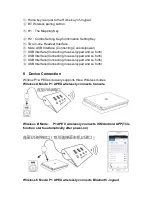
Page 3: ...rth USB Interface Connecting mouse Joypad and so forth USB Interface Connecting mouse Joypad and so forth USB Interface Connecting mouse Joypad and so forth II Device Connection Winbox P1 APEX exclusi...

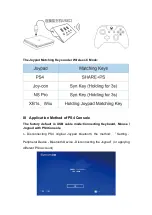
Page 4: ...hod of PS4 Console The factory default is USB cable mode Connecting Keyboard Mouse Joypad with PS4 Console A Disconnecting PS4 original Joypad bluetooth the method Setting Peripheral Device Bluetooth...

Page 5: ...ireless C Mode functions could be ran And the Joypad could be connected with P1 APEX wirelessly as following method A Disconnecting PS4 original Joypad bluetooth the method Setting Peripheral Device B...

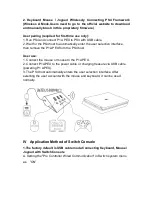
Page 6: ...ace then remove the P1 APEX from the PS4 host User use 1 Connect the mouse or mouse to the P1 APEX 2 Connect P1 APEX to the power cable or charging treasure via USB cable powering P1 APEX 3 The PS4 ho...

Page 7: ...d mouse into the USB interface of Winbox P1 APEX D Connecting the Winbox P1 APEX with Switch USB interface by presented special cable or USB interface of OTG wire E After the indicator cycle flashing...

Page 8: ...ng original C Connecting the Winbox P1 APEX with Switch USB interface by presented special cable or USB interface of OTG wire D After the indicator light flashes wait 3 5 seconds Press the Home button...

Page 9: ...nfirm ie the mapped handle A button you can use it normally V Application Method of X1 Console 1 The factory default is USB cable mode Keyboard mouse Joypad wired connection X1 Console A Inserting ori...

Page 10: ...g Press BT button BT button LED blue light flashes after pairing is successful BT button LED blue light is always on Re pairing Press the BT button again BT button LED blue light flashes after the pai...

Page 11: ...ent functions of Joypad rocker Mouse Key and Joypad Key after pressing H1 key please firstly press the mouse left key Joypad L2 key and finally press H1 key to quit from the setting model Hence the mo...

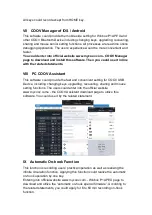
Page 12: ...t This software could provide the fast and convenient setting for COOV USB Device including changing keys upgrading recovering sharing and mouse setting functions The users could enter into the offici...

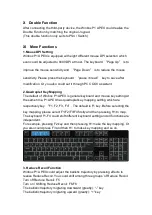
Page 13: ...eral keyboard and mouse key setting At the same time P1 APEX has quadruplet key mapping setting which are respectively key F1 F2 F3 F4 The default is F1 key Before selecting the key mapping please sel...

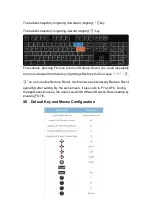
Page 14: ...ould repeatedly turn on and adjust the trajectory migrating effects by the four keys so as to realize Reduce Recoil It will reserve automatically Reduce Recoil operating after setting By the same mean...

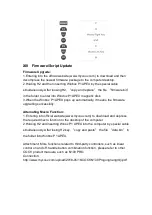
Page 15: ...e firmware upgrading successfully Alternating Macro Function 1 Entering into official website www mycoov com to download and depress the required macro function to the desktop of the computer 2 Holdin...

Reviews:

Related manuals for Winbox P1 APEX