ELECTRO FREEZE Soft Serve Model GEN-5099
28
185242
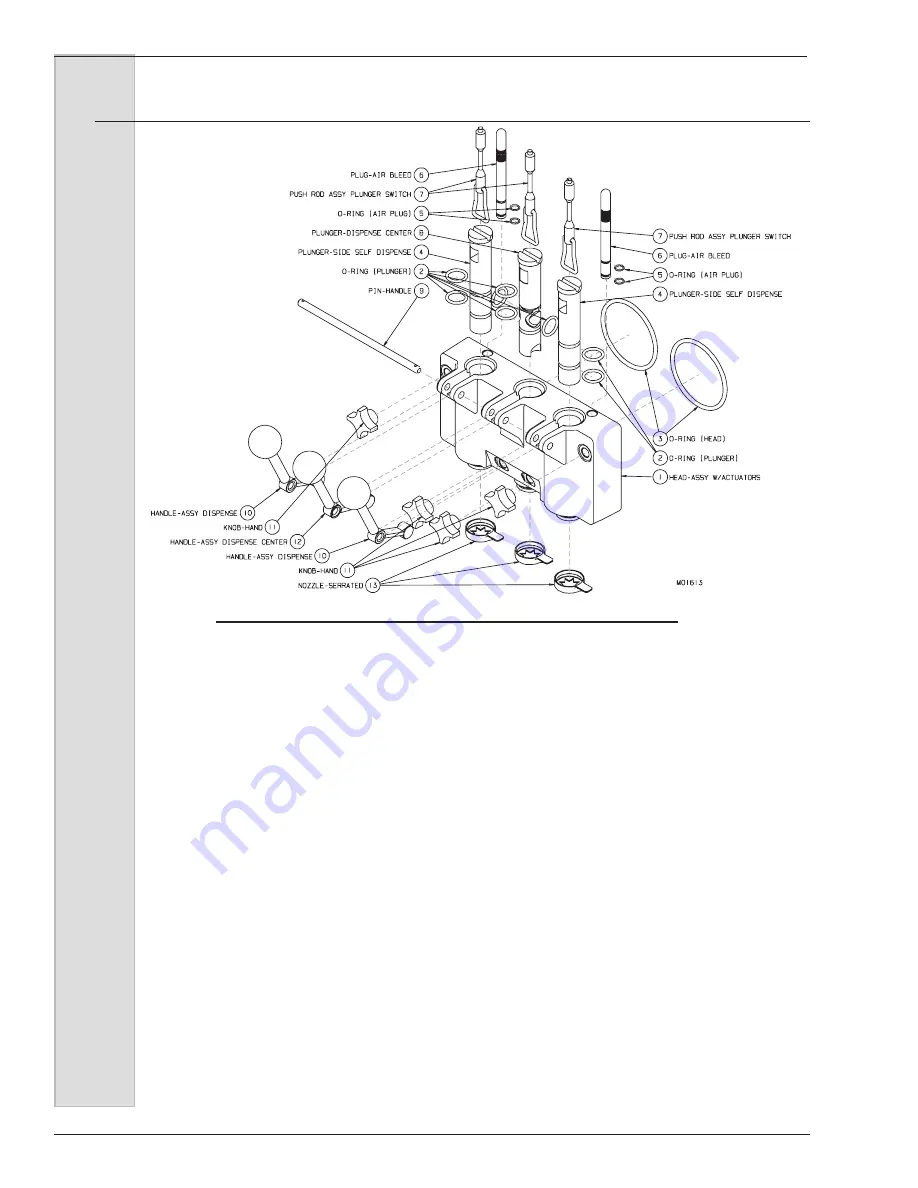
5. (Refer to figure 8-4.) Install and
then lubricate the O-rings (2) on the
plungers (4&8) and insert plunger halfway
into dispensing head (1).
6. Install and then lubricate the
4-inch head O-rings (3).
7. Position the handle (10&12) in the
plungers (4&8) and dispensing head (1).
Lock in place with the handle pin (9).
8. Install and lubricate O-rings (5) on
the air bleed plug (6). Insert plug in the
dispensing head (1) assembly.
9. Lubricate the inside bearing
surface of the cylinder bushing and place
on the end of the beater shaft.
Important:
ALWAYS make sure the cylinder
bushing is positioned on the beater
shaft properly. Operating the freezer
with a missing or badly worn bushing
will damage the beater and cylinder.
Important:
Excessive force will damage the head.
Do not use tools to tighten.
10. Install the dispensing head onto
the freezer by aligning the studs with the
holes in the head and sliding toward the
freezer. Evenly tighten the hand knobs,
finger tight only. Repeat for second head
assembly.
11. Install the plunger rods (7). The
nozzle (13) will be installed on the mix
outlet at the bottom of the head after
sanitizing.
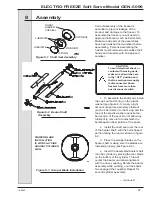
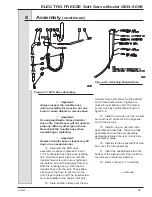
Figure 8-4 Head Assembly
8 Assembly
(continued)
– continued
Summary of Contents for Electro Freeze GENESIS GEN-5099
Page 2: ......
Page 10: ......
Page 18: ...ELECTRO FREEZE Soft Serve Model GEN 5099 8 185242 4 Part Names and Functions...
Page 74: ......
Page 76: ......
Page 88: ...ELECTRO FREEZE Soft Serve Model GEN 5099 12 185242 Figure 11 Side Back View Breakdown...
Page 94: ......
Page 95: ...ELECTRO FREEZE Soft Serve Model GEN 5099 185242 19 O Ring Chart...

