background image

24

Leipzig

H.

WINTER HP-11 PB DELUXE

For more informa on visit h p://www.winter-holztechnik.de


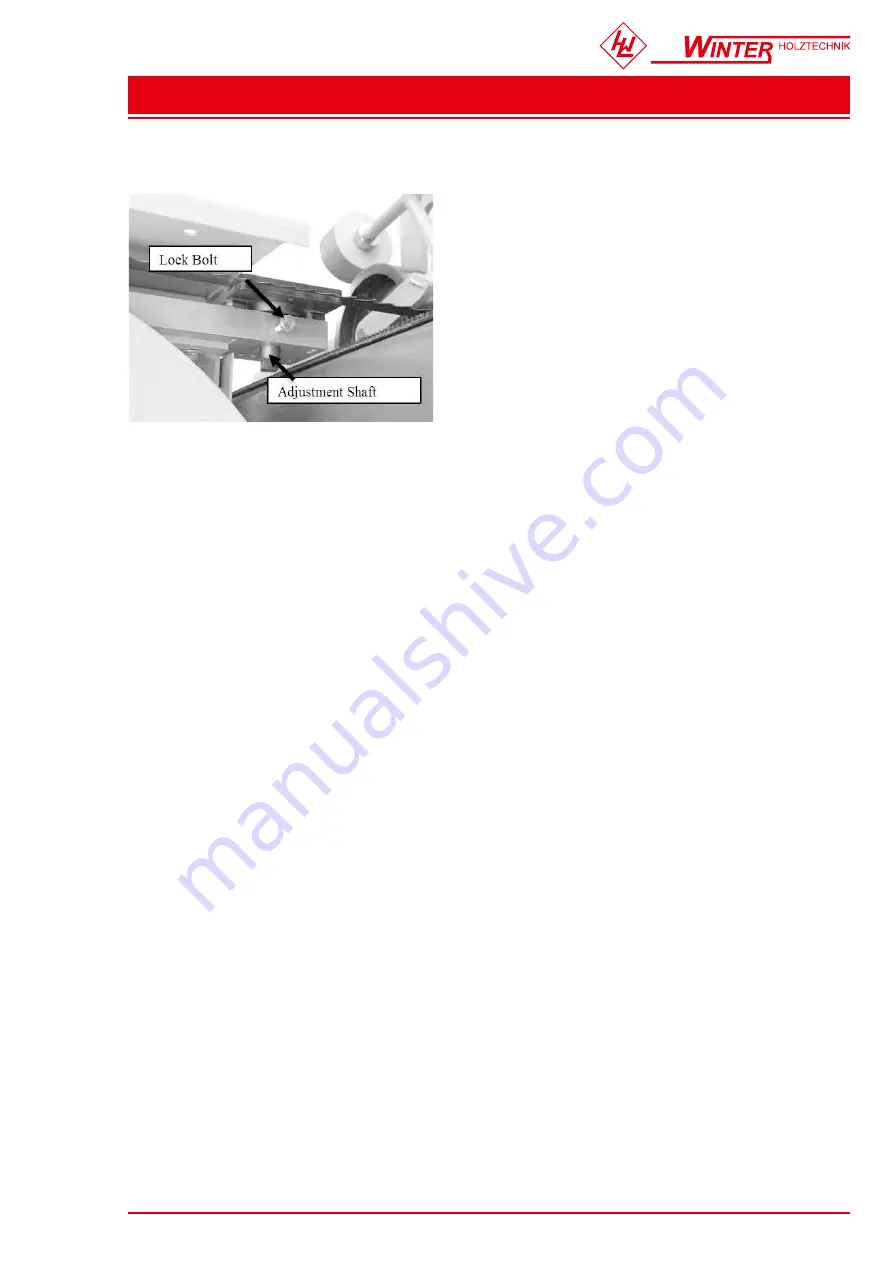
To adjust the support wheel


1. Loosen the


lock bolt.


2.  Rotate  the  adjustment  shaft  until  the  support  wheel  is  approximately  0.016"  behind  the  back  of  the 

blade. Check with a feeler gauge or four thicknesses of a dollar bill.


3. Tighten the lock bolt.


4. Spin the wheels clockwise by hand. If the support wheels turn, increase the spacing between the


blade 

and the bearing (the bearings should only turn when cutting).


Note

To prevent the blade from wearing a groove into the support wheel adjust the height


periodically. 

Move the adjustment shaft up or down until the blade contacts the support wheel


in a new place.


Summary of Contents for HP-11 PB DELUXE

Page 1: ...HNIK GmbH Druckereistr 8 D 04159 Leipzig Stahmeln info winter holztechnik de 49 0 341 461 90 21 49 0 341 461 83 58 Skype winterholztechnik www winter holztechnik de WINTER horizontal band resaw Typ HP...

Page 2: ...reproductive harm Some examples of these chemicals are Lead from lead based paints Crystalline silica from bricks cement and other masonry products Arsenic and chromium from chemically treated lumber...

Page 3: ...1 SPECIFICATION 3 SECTION 2 SAFETY 4 8 SECTION 3 CIRCUIT REQUIREMENTS 9 SECTION 4 GENERAL INFORMATION 10 SECTION 5 MACHINE FEATURES 11 12 SECTION 6 INSTALLATION 13 15 SECTION 7 CONTROL PANEL SYSTEM 16...

Page 4: ...pe CH 525 In feed Speed 5 25M m Controlling Blade Tension Hydraulic System Main Motor Horsepower 20HP Voltage Cycle Phase Hydraulic System Motor In feed Speed OMP200 Horsepower 2HP Construction Base C...

Page 5: ...oderate injury It may also be used to alert against unsafe practices NOTICE This symbol is used to alert the user to useful information about proper operation of the equipment WARNING Safety Instructi...

Page 6: ...an for best and safest performance Follow instructions for lubricating and changing accessories 15 Use recommended accessories Consult the instruction manual for recommended accessories The use of imp...

Page 7: ...e conveyor speeds during a cut 9 This machine is not designed to cut metal or other material except wood 10 Do not manually stop or slow blade after turning the saw off Allow it to come to a complete...

Page 8: ...rom leaks until you can depressurize the system 4 Stop the machine if you notice a hydraulic leak Allowing the machine to continue running with a leak may increase the hazard of the situation 5 Depres...

Page 9: ...H WINTER HP 11 PB DELUXE For more informa on visit h p www winter holztechnik de 5 Do not raise the machine too high as this will cause poor stability 6 Forklift should be driven by experienced perso...

Page 10: ...Type Because of the high amperage draw from this machine we recommend that you hardwire it directly to your circuit breaker and install a locking shut off lever near the machine as a way to quickly di...

Page 11: ...to offer the Model HP 11PB Horizontal Band resaw This band resaw is part of WINTER s growing family of ne woodworking machinery When used according to the guidelines stated in this manual you can exp...

Page 12: ...nforma on visit h p www winter holztechnik de SECTION 5 MACHINE FEATURES Main Features A Control Panel Digital Readout B Front Pressure Roller For front pressure roller go down C 4 Dust Port Allows th...

Page 13: ...Control the saw blade tension for hydraulic J Electrical Control Box Main area for wiring rewiring and changing the fuses Should never be opened when the machine was connected with the power source K...

Page 14: ...hor studs may be substituted for lag bolts but they will stick out of the oor if you decide to move your machine at a later point To mount the re saw machine to the oor 1 Put on safety glasses and a d...

Page 15: ...ok under the conveyor for the carriage bolts Place the at washers and lock nuts on the carriage bolts and tighten 6 Re install the blade guard in the wheel housing Connect power wires 1 Before connect...

Page 16: ...nsion button off Please note that if lower saw blade lower than 40mm the button can not be changed to off Prevent saw wheel from hitting conveyor table 3 Put on protective gloves 4 Open the wheel cove...

Page 17: ...necessary to check out the electrical equipment or electrical wiring 8 Take extra precautions in damp environments to protect you from accidental grounding 9 Be fore applying power to any equipment en...

Page 18: ...is switch to stop all motions Before restarting the machine remember to reset this emergency stop switch by turning it clockwise C MOTOR START ON OFF Controls motor for start or stop D TIGHT LOOSE ON...

Page 19: ...r the right side of the saw blade head or move the left side of the saw blade head down 3 Loosen the cap screw shown below 4 The adjusting nut shown in raises or lowers the non drive side of the bands...

Page 20: ...1 Lossen the two roller bracket cap screws on the both side of the conveyor about 3 4 of a turn 2 Loosen the rear adjustment nuts on both side of the conveyor 3 Start conveyor belt 4 Adjust the rolle...

Page 21: ...step 9 7 Adjust the out feed end of the conveyor by loosening the bolts on the out feed bearing housing similar to the bearing housing and sliding it forward or backwards 8 Retighten the bearing hous...

Page 22: ...ber is an important part of the re assembly process 6 Slide the roller brackets toward the body of the re saw to loosen the belt 7 Remove the stiff cable from the center of the seam to separate the co...

Page 23: ...saw blade inner To loosen the screw 2 and lock screw 1 will make the saw blade outer OPPOSITE To loosen the screw 2 and lock screw 1 will make the saw blade inner To loosen the screw 1 and lock screw...

Page 24: ...he guide slot 3 Shift the blade guide adjusting bracket until the blade is centered in the guide slot 4 Tighten the vertical adjustment bolts and repeat step 1 5 Loosen the lower two vertical adjustme...

Page 25: ...e Check with a feeler gauge or four thicknesses of a dollar bill 3 Tighten the lock bolt 4 Spin the wheels clockwise by hand If the support wheels turn increase the spacing between the blade and the b...

Page 26: ...emove sawdust from the hydraulic elevation rams and then wipe the rams down with a light coat of hydraulic uid Painted Surfaces These areas may be cleaned with a dry or damp rag however make sure you...

Page 27: ...quivalent of 1 month of regular use Hydraulic Fluid Schedule Check the hydraulic fluid level daily The hydraulic system controls the movement of the conveyor belts In order for this system to function...

Page 28: ...ppearance then the hydraulic uid is contaminated with water If the uid is dark brown or opaque then the hydraulic uid is severing contaminated 2 Smell the hydraulic uid remove breather cap If the uid...

Page 29: ...allow it to dry 3 Re install the tank screen after you clean the bottom of the tank To clean the bottom of the tank 1 Use a lint free rag to wipe up and remove the sludge from the bottom of the tank...

Page 30: ...Maintenance Log Date Approximate Hours Of Use Maintenance Performed 29 Leipzig H WINTER HP 11 PB DELUXE For more informa on visit h p www winter holztechnik de...

Page 31: ...30 Leipzig H WINTER HP 11 PB DELUXE For more informa on visit h p www winter holztechnik de SECTION 10 OPTIONAL MIST COOLANT SYSTEM...

Page 32: ...31 Leipzig H WINTER HP 11 PB DELUXE For more informa on visit h p www winter holztechnik de OIL TYPE ESTOL 1545...

Reviews: