WINTER TIMBERMAX 4 – 23 ECO
25
8.8
Left spindle adjustment
8.8.1
Radial adjustment of left spindle
See
(
Figure17
)
:
①
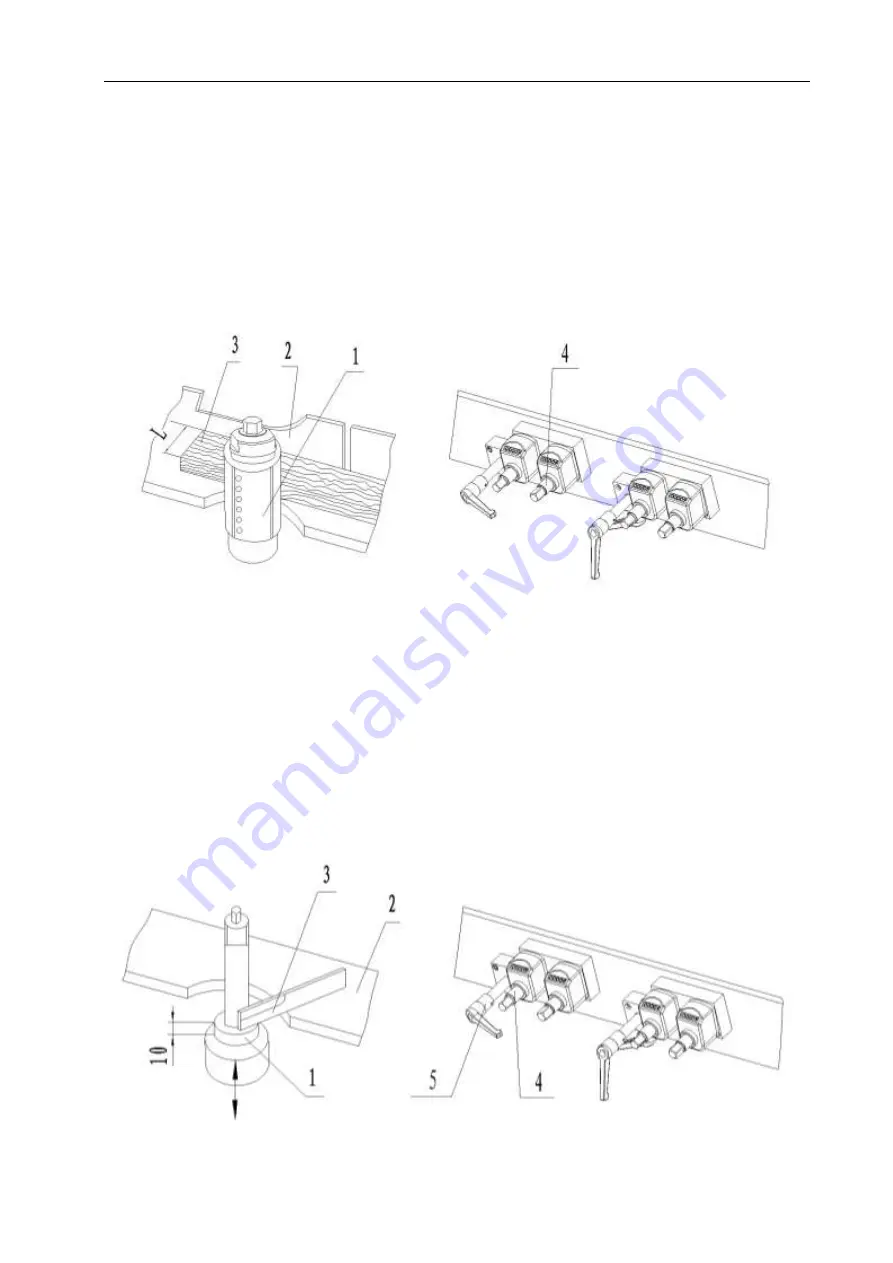
Choose a standard test piece 3, measured the width L of test piece.
②
Put test piece 3 between guiding board 2 and cutter 1.
③
Rotate radial adjusting bar 4, radial adjust the spindle and let cutter blade clings to test piece
3.
④
Set the value of digital indicator into L
(
Figure17
)
8.8.2
Axial adjustment of left spindle
The axial adjustment of left spindle please see
(
Figure18
):
①
Put a spindle ring 1 of 10mm thickness onto the spindle.
②
Put cutter adjusting ruler 3 onto the board 2.
③
Loosen axial locking bar 5, rotate axial adjusting bar 4, axial adjusting the spindle until the
top of spindle ring 1 touches the cutter adjusting ruler 3.
④
Screw axial locking bar 5.
⑤
Set the value of digital indicator into 10mm.
(
Figure18
)


