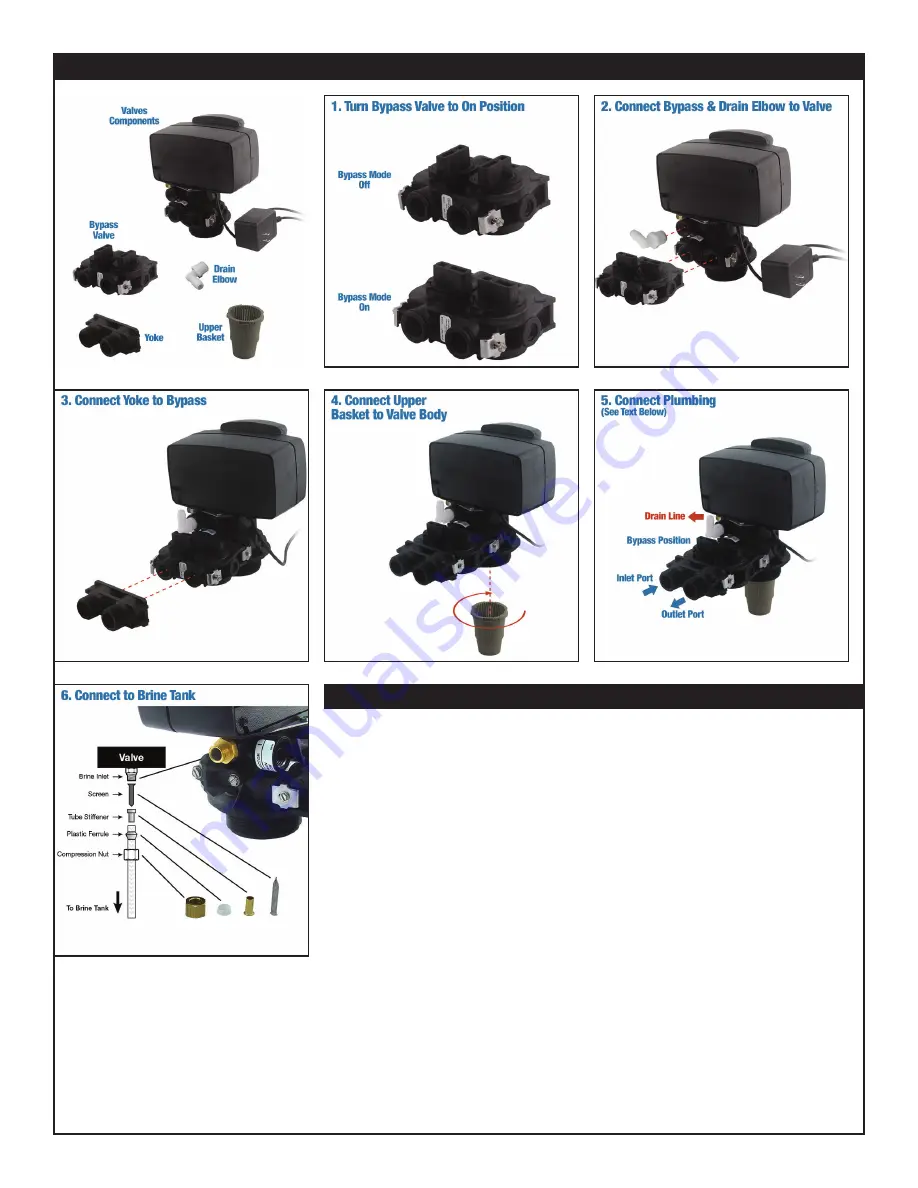
2. Valve & Bypass Components
3. Plumbing Connection & Startup
1. Connect plumbing to the system with the bypass knobs in the bypass
position (perpendicular to the plumbing). Turn on the water to the house and
check all connections for leaks.
2.
,QLWLDWHWKHEDFNZDVKF\FOHRQWKH¿OWHUYDOYH7KLVLVGRQHE\SUHVVLQJWKH
GLDPRQGVKDSHGEXWWRQRQWKHIDFHRIDGLJLWDOYDOYH7KHEDFNZDVKF\FOH
LVLQLWLDWHGRQDPHFKDQLFDOYDOYHE\WXUQLQJWKHGLDOFORFNZLVHWRWKH¿UVW
position.
3.
2QFHWKHYDOYHLVLQWKHEDFNZDVKPRGHRSHQWKHE\SDVVKDQGOHVKDOIZD\
DQGDOORZWKHWDQNWR¿OOZLWKZDWHU
4.
2SHQWKHE\SDVVYDOYHVDOOWKHZD\RQFHZDWHUEHJLQVWRÀRZWKURXJKWKH
drain tube.
5. Allow system to complete the backwash and regeneration cycles on its own.
,WZLOOUHWXUQWRVHUYLFHRQFHWKLVLVGRQH
*Note:
The system should be ready for use once the backwash cycle is
FRPSOHWH<RXPD\KDYHWRLQLWLDWHDVHFRQGEDFNZDVKF\FOHRQYHU\ODUJH
V\VWHPVLIWKHUHLVDGLVFRORUDWLRQWRWKHZDWHU,WLVQRUPDOWRVHHYHU\VPDOODLU
bubbles in the water when new systems are installed. These tiny bubbles can
JLYHWKHZDWHUDJUH\RZHYHUWKH\GRTXLFNO\GLVVLSDWHLQDFOHDUJODVV
These bubbles will go away once the system becomes thoroughly saturated. This
FRXOGWDNHVHYHUDOGD\VGHSHQGLQJXSRQZDWHUXVDJH


