6
3.
Unpack the hard disk.
4.
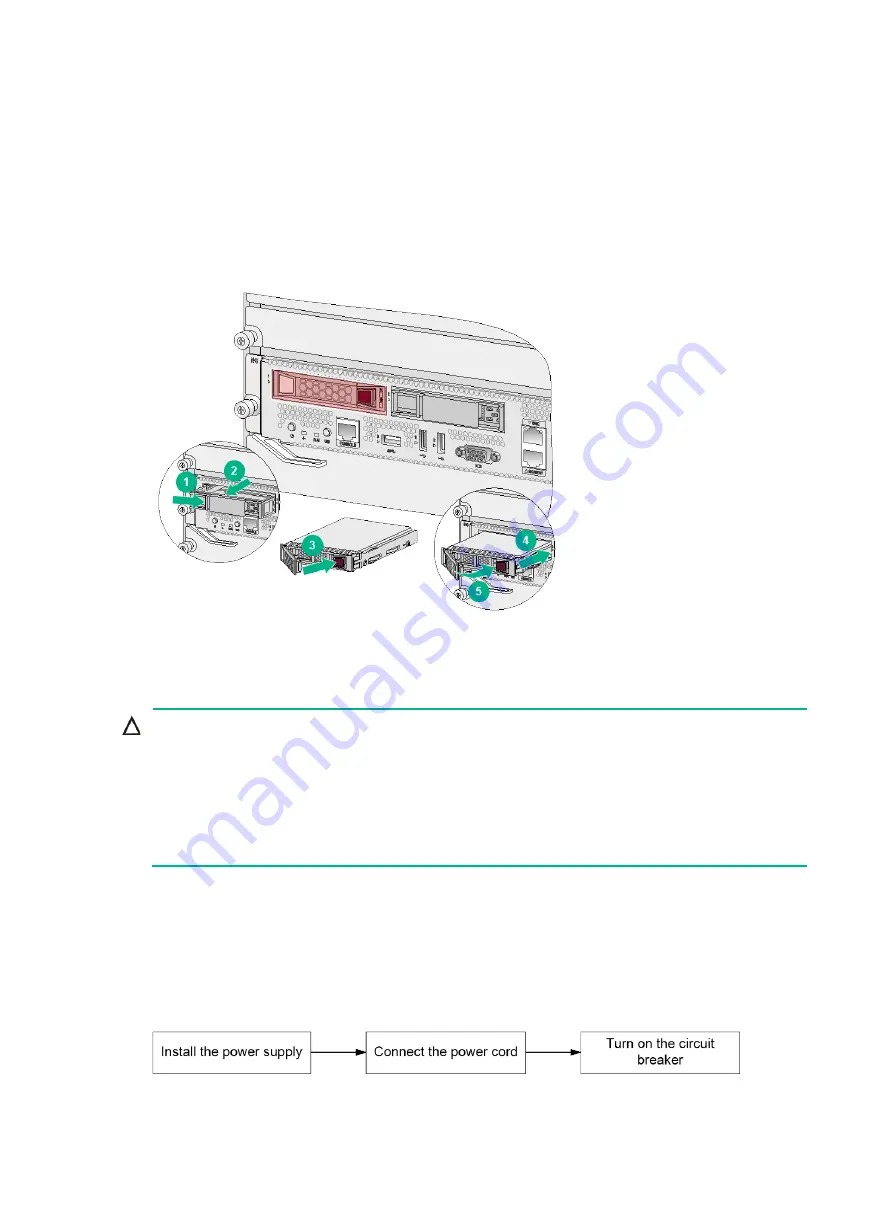
Remove the filler panel from the slot to be used.
5.
Press the button on the filler panel to the right and pull the filler panel outward.
Keep the removed filler panels for future use.
6.
Press the button on the hard disk panel. The hard disk panel will open automatically.
7.
Gently push the hard disk in along the guide rails.
8.
Close the hard disk panel after the hard disk clicks into place.
Figure 7 Installing the hard disk
Installing a power supply
CAUTION:
•
Provide a circuit breaker for each power supply and make sure the circuit breaker is off before
installation.
•
Do not install power supplies of different models on the same router.
•
When moving the power supply, support the bottom of the power supply, instead of holding its
handle to avoid damaging the power supply.
•
To avoid bodily injury, strictly follow the procedure in
The CR16000-F router uses N + 1 or N + N power redundancy and supports AC or DC power input.
CR16000-F routers provide the following types of power supply slots:
•
Horizontal slots: CR16006-F and CR16005E-F.
•
Vertical slots: CR16010-F, CR16014-F, CR16010H-F, CR16010H-FA, CR16018-F,
CR16018-FA, and CR16010E-F.
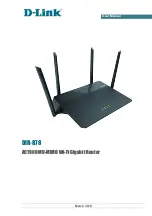
Figure 8 Power supply installation flow
Summary of Contents for CR16000-F
Page 40: ...9 Figure 11 Securing the power cord method one Figure 12 Securing the power cord method two...
Page 47: ...16 Figure 22 Installing an SMB coaxial clock cable...
Page 66: ...5 Figure 5 Removing a common card Figure 6 Removing a card with a locking clip 1 3 2...
Page 76: ...15 Figure 19 Replacing an SMB coaxial clock cable...
Page 89: ...12 Figure 14 Example of a device label...


