3-21
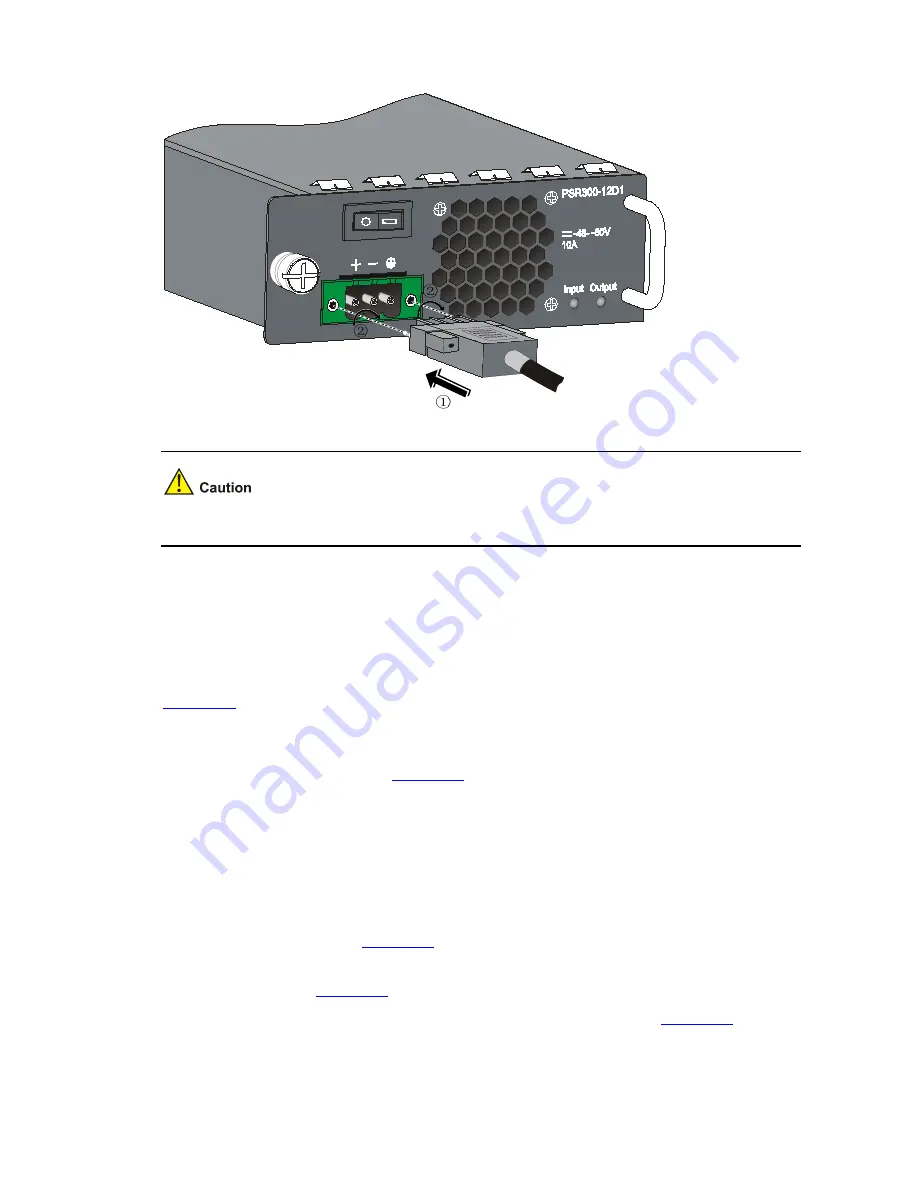
Figure 3-34
Connect a DC power cord
Pay attention to the positive (+) and negative (-) marks on the power cord to avoid connection mistakes.
Connecting a power cord to the PSR300-12D1 (–54 VDC RPS power supply)
The PSR300-12D1 supports –54 VDC RPS power supply. Follow these steps to connect the power
cord:
Step1
Keep the upside of the –54 VDC RPS plug on top and plug it in the RPS DC receptacle (see callout 1 in
Figure 3-34
). (If you plug it with the upside down, the insertion is not smooth because of the specific
structure design of the RPS DC receptacle and the RPS plug.)
Step2
Use a flat-blade screwdriver to fix the two screws on the RPS plug clockwise to secure the plug to the
RPS DC receptacle (see callout 2 in
Figure 3-34
).
Step3
Connect the other end of the RPS DC power cord to the external –54 VDC RPS power supply system.
Connecting a Power Cord to the PSR750-A&PSR750-D
Connecting a power cord to the PSR750-A
Step1
Switch off the AC power module.
Step2
Pull the bail latch upwards (see
Figure 3-35
).
Step3
Connect one end of the AC power cord shipped with the device to the AC receptacle on the power
module (see callout 1 in
Figure 3-36
).
Step4
Pull the bail latch down to secure the plug to the AC receptacle (see callout 2 in
Figure 3-36
).
Step5
Connect the other end of the AC power cord to the external AC power supply system.


