3-9
IMPORTANT:
Captive screws are required to install a fabric module on the device. As a best practice, fasten a
captive screw to a torque of 5.5 kgf-cm (4.77 lbf-in).
For the compatibility between the device and the fabric modules, see
H3C S12500R Switch Router
Series Hardware Reference
.
The device has six vertically-oriented fabric module slots at the chassis rear. The device comes with
all fabric module slots empty. You can install two to six fabric modules for the device. Install fabric
module slot filler panels in the empty fabric module slots.
Installing a fabric module:
1.
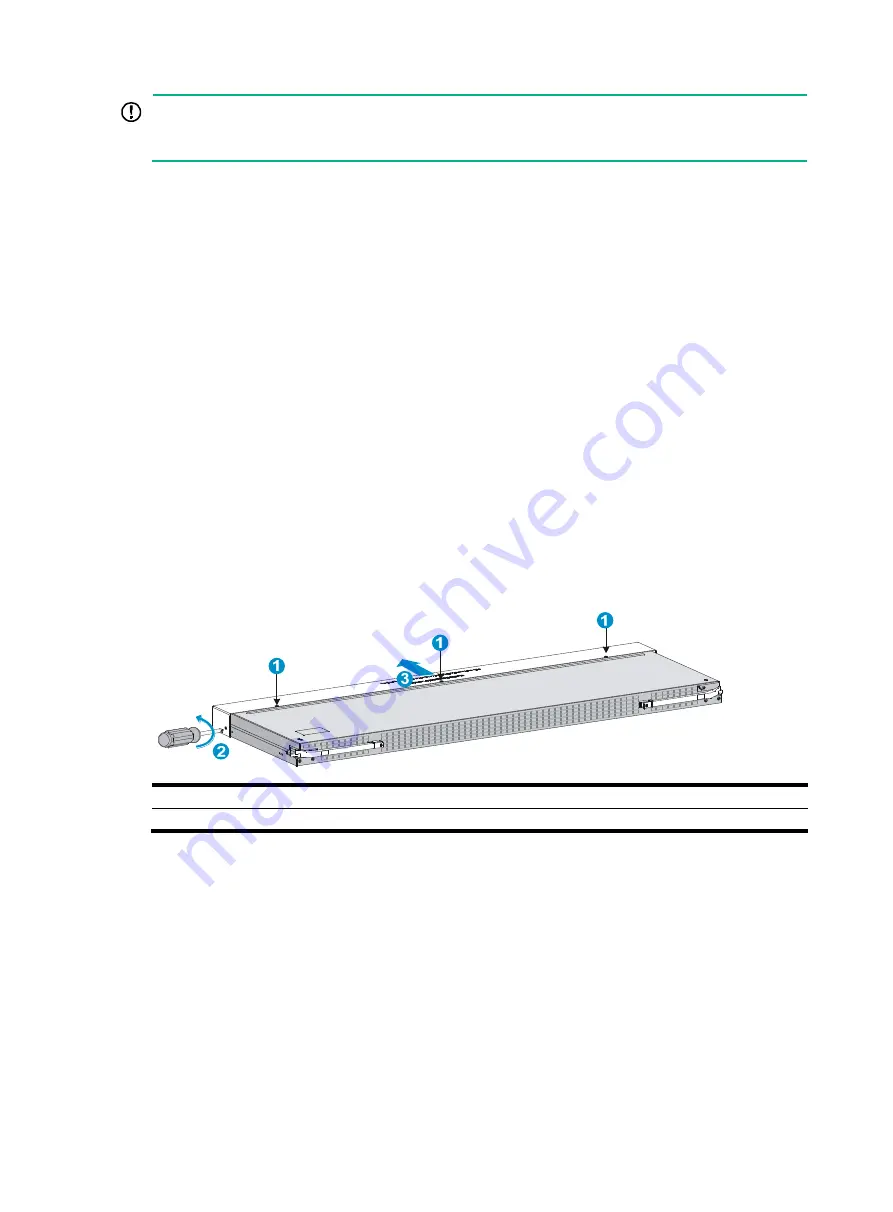
Place the fabric module on a workbench and remove the protection box from the connector side
of the fabric module. See
2.
Release the ejector levers by pressing the spring clips.
3.
Orient the fabric module with the side marked "Up" up. Hold the fabric module front panel near
the ejector levers with one hand and support the module bottom with the other. Place the
module bottom on the guide rails at the chassis bottom. Align the fabric module with the target
slot and insert it into the slot along the guide rails. See callout 1 in
.
Keep the module parallel to the slot to avoid touching other components in the chassis.
4.
As shown by callout 2 in
, continue to push the fabric module until the brakes on its
ejector levers touch the slot edges tightly. Simultaneously rotate the ejector levers inward until
the spring clips lock the ejector levers in place and the fabric module is completely seated in the
slot.
Figure 3-6 Removing the fabric module from the protection box (S12516R fabric module)
(1) Five screws to secure the protection box to the fabric module
(2) Loosen the captive screws
(3) Hold the protection box to disengage it from the connector side of the fabric module


