17
Installing a fan tray
CAUTION:
To prevent damage to the fan tray or the connectors in the chassis, insert the fan tray gently. If you
encounter a hard resistance while inserting the fan tray, pull out the fan tray and insert it again.
To install a fan tray:
1.
Wear an ESD wrist strap and make sure it makes good skin contact and is reliably grounded.
2.
Unpack the fan tray and verify that the fan tray model is correct.
3.
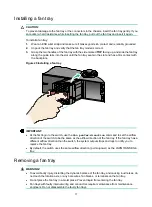
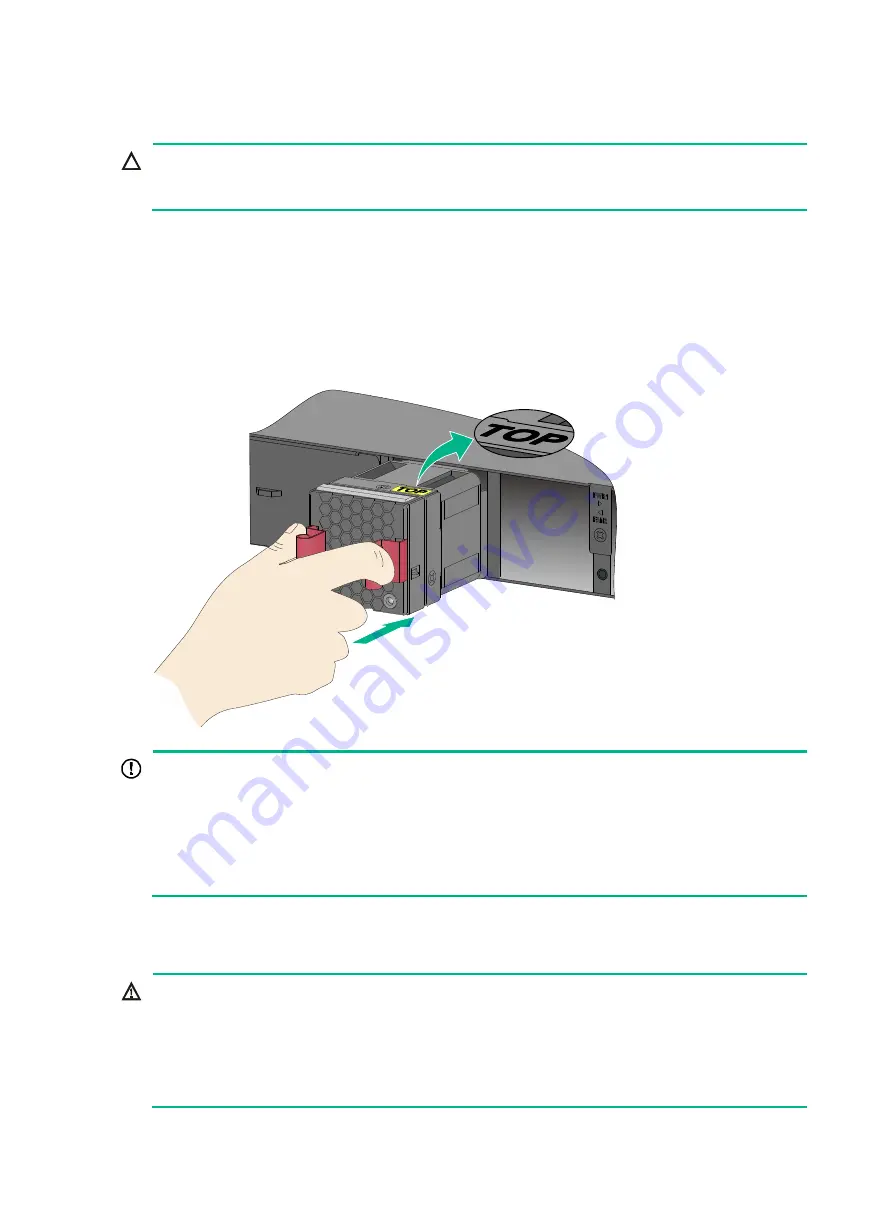
Grasp the two handles of the fan tray with the side marked
TOP
facing up, and slide the fan tray
along the guide rails into the slot until the fan tray seats in the slot and has a firm contact with
the backplane.
Figure 20 Installing a fan tray
IMPORTANT:
•
At the first login to the switch, use the
fan prefer-direction
command to set the airflow
direction of the switch to be the same as the airflow direction of the fan tray. If the fan tray has a
different airflow direction than the switch, the system outputs traps and logs to notify you to
replace the fan tray.
•
By default, the switch uses the same airflow direction (port-to-power) as the LSPM1FANSB fan
tray.
Removing a fan tray
WARNING!
•
To avoid bodily injury, disturbing the dynamic balance of the fan tray, and causing loud noises, do
not touch the rotation axis, or any bare wires, fan blades, or terminals on the fan tray.
•
Do not place the fan tray in a moist place. Prevent liquid from entering the fan tray.
•
Fan trays with faulty internal wiring and conductors require maintenance from maintenance
engineers. Do not disassemble the faulty fan trays.


