2-10
Attaching the mounting brackets to the chassis
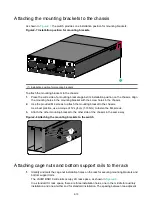
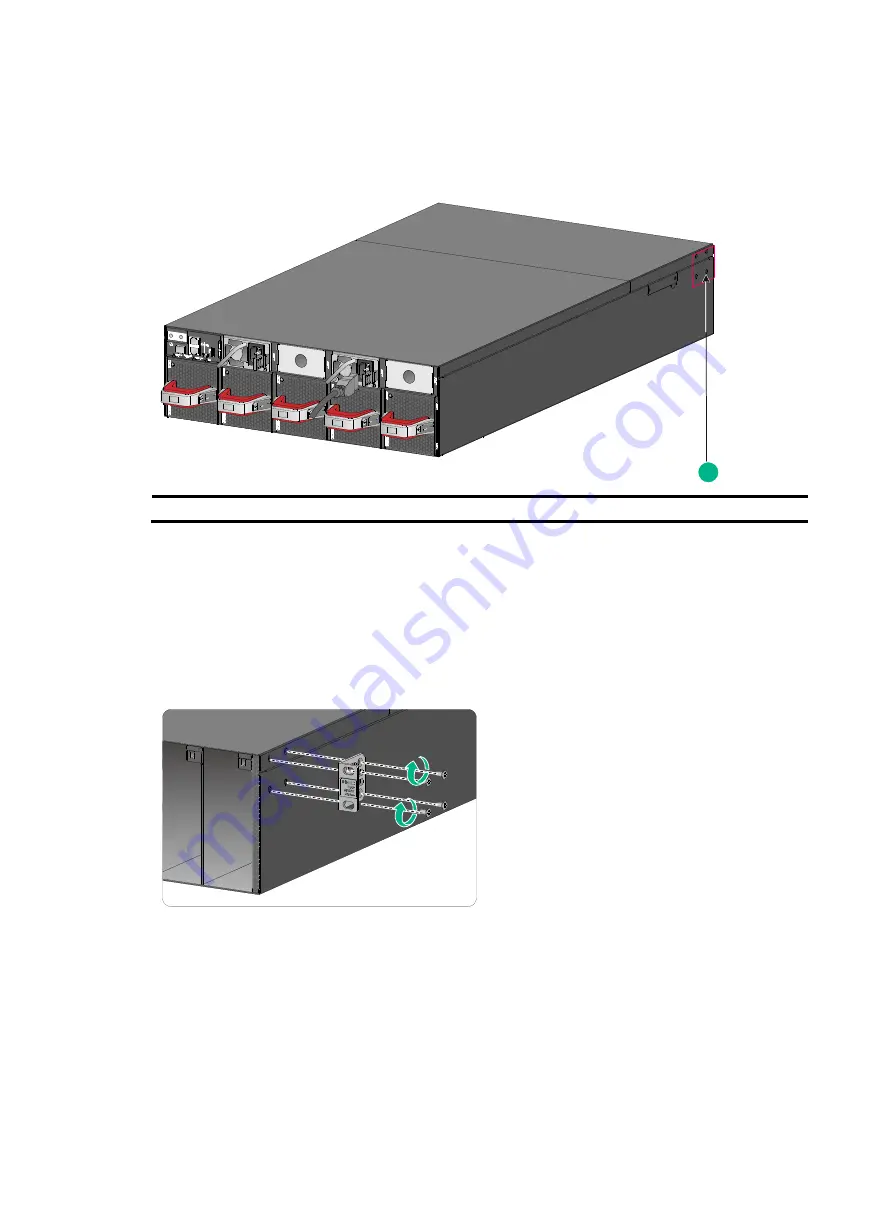
As shown in
, the switch provides one installation position for mounting brackets.
Figure2-7 Installation position for mounting brackets
(1) Installation position for mounting brackets
To attach the mounting brackets to the chassis:
1.
Place the wide side of a mounting bracket against its installation position on the chassis. Align
the mounting holes in the mounting bracket with the screw holes in the chassis.
2.
Use the provided M4 screws to attach the mounting bracket to the chassis.
As a best practice, use a torque of 12 kgf-cm (1.18 Nm) to fasten the M4 screws.
3.
Attach the other mounting bracket to the other side of the chassis in the same way.
Figure2-8 Attaching the mounting brackets to the switch
Attaching cage nuts and bottom support rails to the rack
1.
Identify and mark the cage nut installation holes on the rack for securing mounting brackets and
bottom support rails.
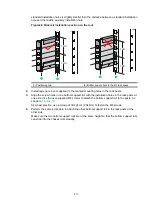
The LSVM1BSR10 slide rails occupy 2U rack space, as shown in
In a standard 1U rack space, there are three installation holes, one in the middle for auxiliary
installation and one at either end for standard installation. The spacing between two adjacent
1
Summary of Contents for S9820-8C-SAN
Page 37: ...3 30...


