3-29
7.
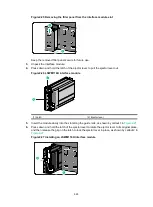
Connect the RJ-45 connector of the cable to the console port of the switch.
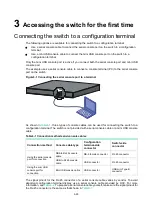
Connecting a mini USB console cable
A mini USB console cable has a USB mini-Type B connector at one end to connect to the mini USB
console port of the switch, and a standard USB Type A connector at the other end to connect to the
USB port on the configuration terminal.
To connect to the mini USB console port on the switch to a configuration terminal:
1.
Connect the standard USB Type A connector to the USB port of the configuration terminal.
2.
Click the following link, or copy it to the address bar on the browser to log in to download page
of the USB console driver, and download the driver.
http://www.h3c.com/en/home/USB_Console/
3.
Run Installer to preinstall the driver. After the preinstallation finishes, the system pops up a
dialog box to indicate a successful preinstallation.
4.
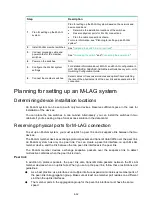
Connect the USB mini-Type B connector to the Mini USB console port on the switch. The
system installs the driver automatically.
Setting terminal parameters
To configure and manage the switch through the console port, you must run a terminal emulator
program, TeraTermPro or PuTTY, on your configuration terminal. You can use the emulator program
to connect a network device, a Telnet site, or an SSH site. For more information about the terminal
emulator programs, see the user guides for these programs
The following are the required terminal settings:
•
Bits per second
—9600.
•
Data bits
—8.
•
Stop bits
—1.
•
Parity
—None.
•
Flow control
—None.
Powering on the switch
1.
Before powering on the switch, verify that the following conditions are met:
All the fan module slots have a fan module installed.
The power cords are connected correctly.
The input power voltage is as required by the switch.
The console cable is connected correctly.
The configuration terminal (a PC, for example) has started, and its serial port settings are
consistent with the console port settings on the switch.
2.
Power on the switch.
During the startup process, you can access BootWare menus to perform tasks such as
software upgrade and file management. The BootWare interface and menu options vary by
software version. For more information about BootWare menu options, see the
software-matching release notes for the device.
3.
After the startup completes, you can access the CLI to configure the switch.
For more information about the configuration commands and CLI, see
H3C S9820-8C &
S9820-8C-SAN
Ethernet Switches Configuration Guides
and
H3C S9820-8C & S9820-8C-SAN
Ethernet Switches Command References
.
Summary of Contents for S9820-8C-SAN
Page 37: ...3 30...


