30
To replace a transceiver module:
1.
Use the
shutdown
command in interface view at the CLI to shut down the port.
2.
Remove the LC connectors of the optical fiber from the transceiver module.
Install dust caps for the LC connectors to prevent contamination and ESD damage.
3.
Pivot the clasp of the transceiver module down to the horizontal position, and then gently pull
the transceiver module out.
Figure 24 Removing a transceiver module
4.
Install dust caps for the removed transceiver module, and then put it into the package.
5.
Install a new transceiver module. For the installation procedure, see "
."
Replacing the fan tray
WARNING!
The fan tray blades will keep rotating at a high speed for a while after being removed from the
operating device. To avoid bodily injury, do not touch the rotating fan tray blades.
CAUTION:
•
To avoid device failure caused by insufficient cooling, do not leave the device operating without a
fan tray for more than 2 minutes.
•
Place the removed fan tray in an ESD bag to protect it from ESD damage.
The device supports automatic fan speed adjustment and hot swapping of the fan tray.
To replace the fan tray:
1.
Face the rear of the device.
2.
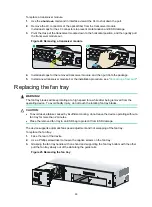
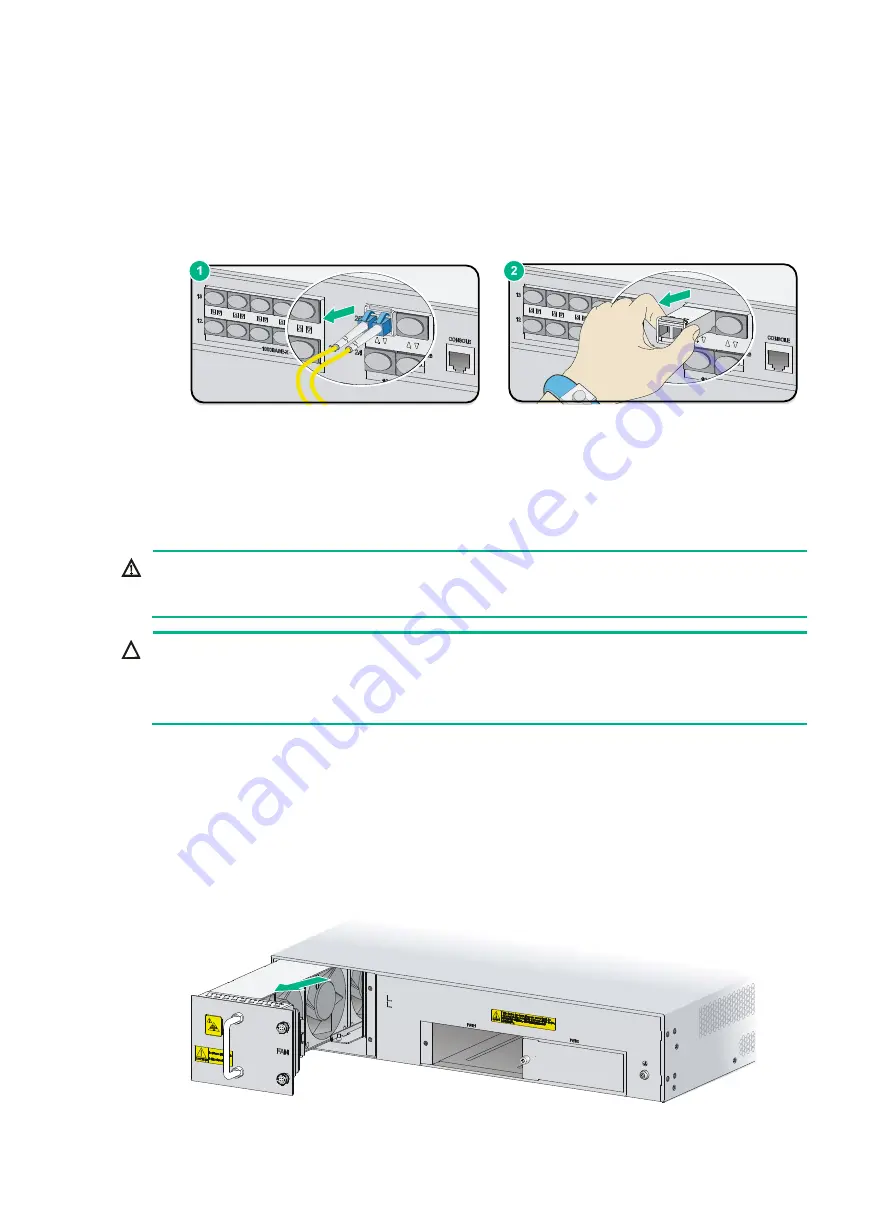
Use a Phillips screwdriver to loosen the captive screws on the fan tray.
3.
Grasping the fan tray handle with one hand and supporting the fan tray bottom with the other,
pull the fan tray slowly out of the slot along the guide rails.
Figure 25 Removing the fan tray

