10-2
Replacing a fan tray
WARNING!
•
Ensure electricity safety when replacing a fan tray during device operation.
•
To avoid injury, do not touch the rotating fan blades.
CAUTION:
•
To avoid disturbing the dynamic balance of a fan tray and causing loud noises, do not touch the
fan blades and rotation axis even if the fan tray stops rotating.
•
When a fan tray fails during device operation, replace the fan tray immediately. Keep the failed
fan tray in position until you start the replacement.
•
When an internal circuit or component of a fan tray is faulty, contact H3C Support for repair. Do
not remove the components yourself.
The device has three fan tray slots. Slot FAN3 is reserved for future use. As a best practice, install a
fan tray in both the FAN1 and FAN2 slots. When two fan trays are installed on the device, you can hot
swap one of them.
To replace a fan tray:
1.
Wear an ESD wrist strap. Make sure it makes good skin contact and is reliably grounded.
2.
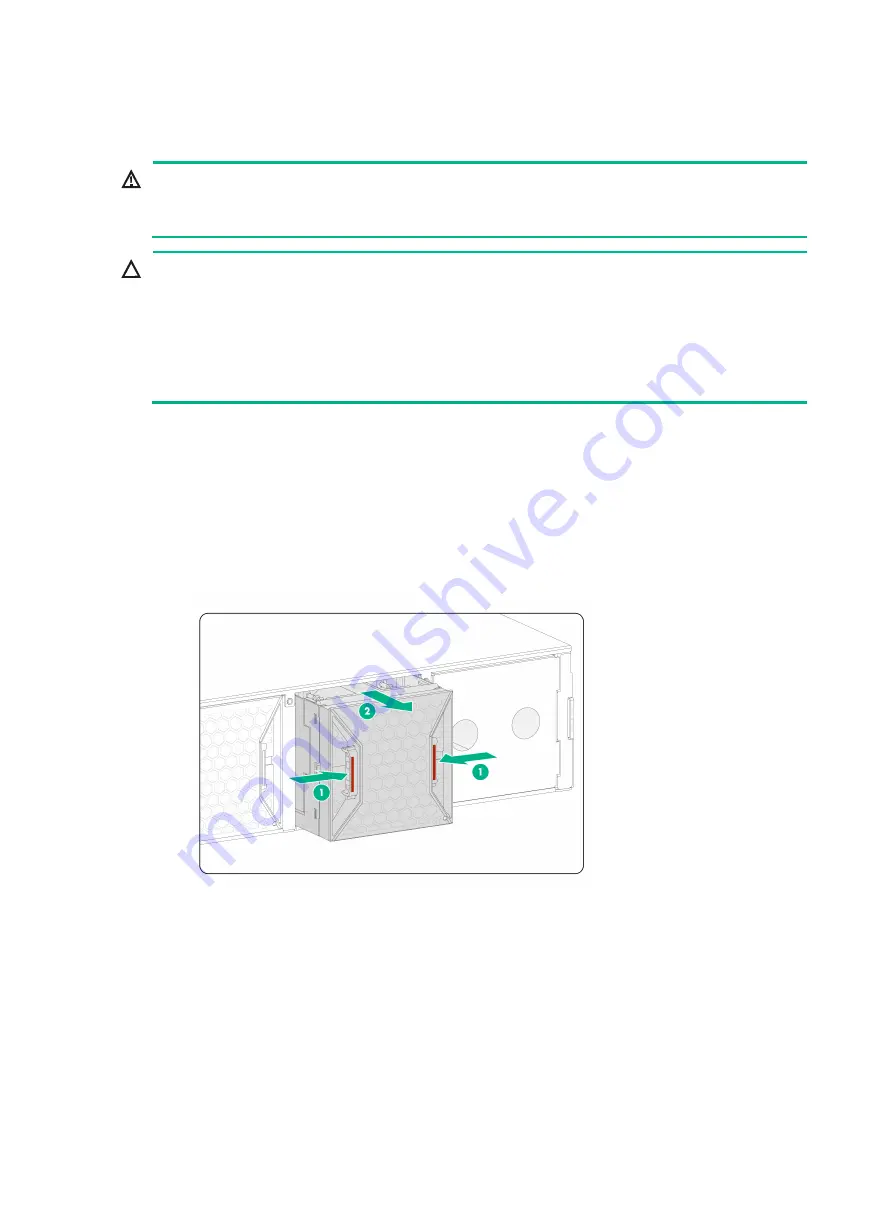
As shown in
, pressing the two release buttons on the fan tray, pull the fan tray slowly
out of the slot. Place the removed fan tray on an antistatic mat.
Figure10-3 Removing a fan tray
3.
Install a new fan tray.
Insert the fan tray slowly into the slot along the guide rails until the fan tray is fully inserted into
the slot and makes good contact with the device connectors.
The fan tray and fan tray slot form an anti-misinsertion structure. If the fan tray is oriented
incorrectly, you cannot insert it into the slot.


