10
Figure 10
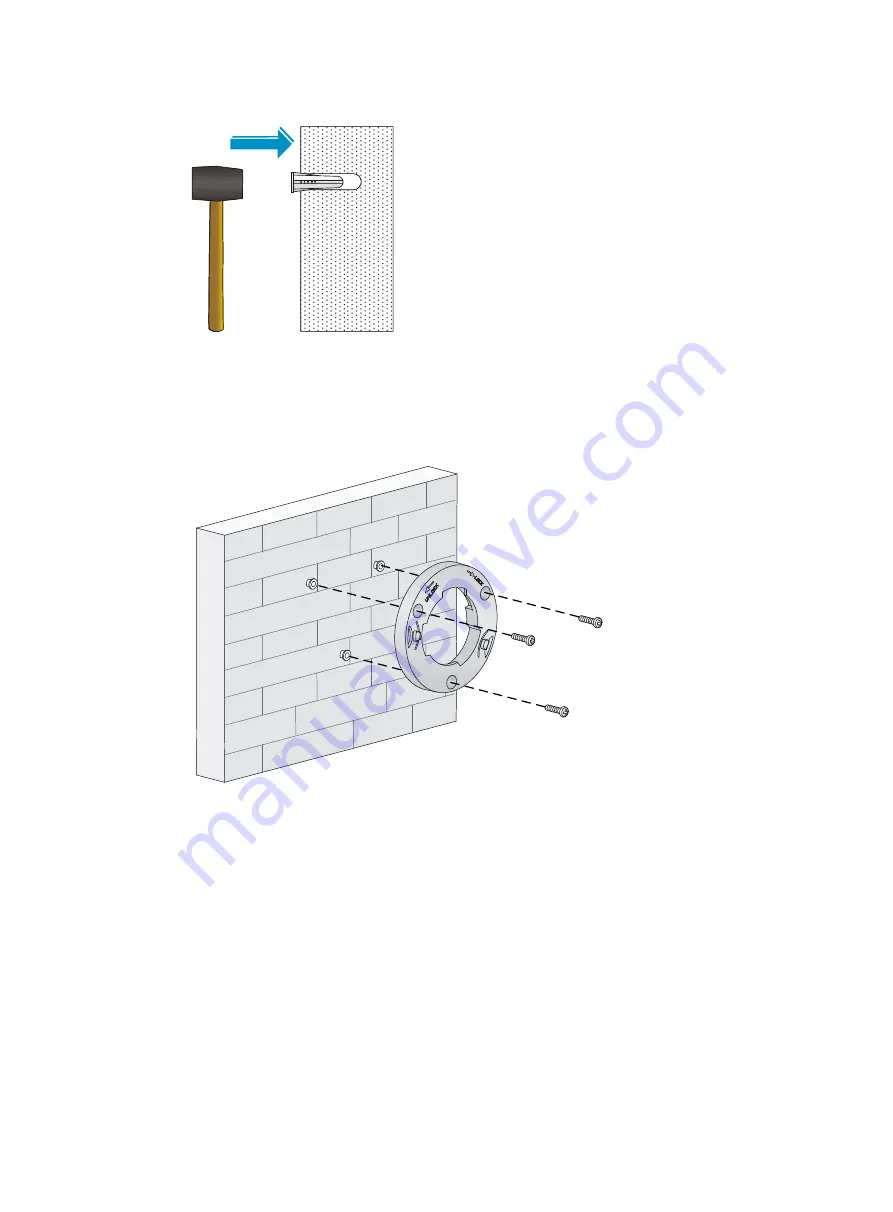
Hammering the anchor
5.
Align the holes in the wall/ceiling bracket with the anchors and insert screws through the
installation holes into the wall anchors. Adjust the position of the mounting bracket and tighten the
screws.
Figure 11
Attaching the wall/ceiling bracket to the wall
6.
Connect the AP to the LAN by using Ethernet cables.
7.
As shown in
, align the AP at a 45 degree angle with the wall/ceiling
bracket and rotate the AP clockwise until the AP clicks into place. If the AP is installed securely, the
wall/ceiling bracket tab fits into the AP bracket groove, as shown in
.


