2-3
The workbench-mounting procedure is similar for WX1800H series access controllers. The following
procedure uses the WX1804H-PWR access controller as an example.
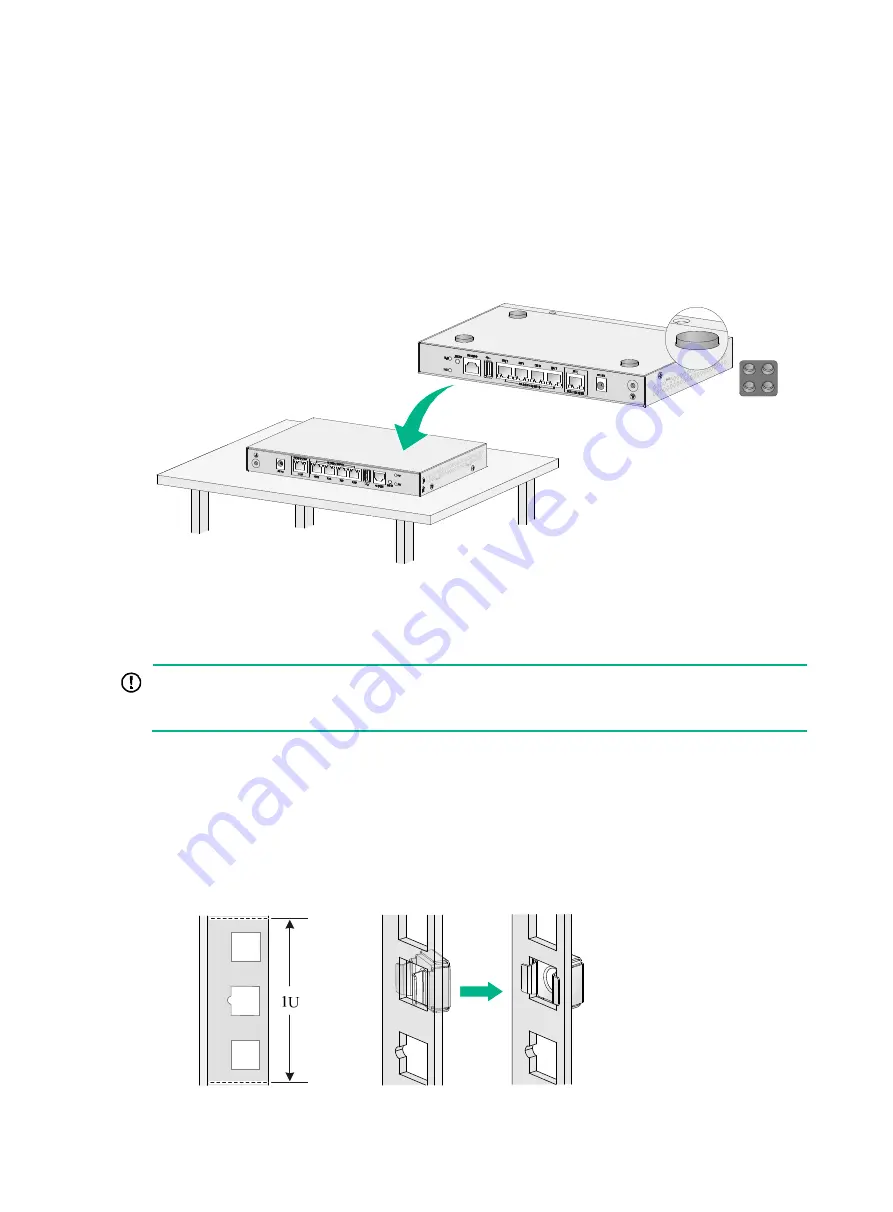
To mount the device on an anti-static workbench:
1.
Place the device upside down on the workbench. Use a cloth to clean the recessed areas on
the bottom.
2.
Attach rubber feet to the four recessed areas.
3.
Place the device upside up on the workbench. Make sure the four rubber feet stand firmly on
the workbench.
Figure2-3 Mounting the device on a workbench
Mounting the device in a 19-inch rack
IMPORTANT:
As a best practice, reserve a clearance of 1U/44.45 mm (1.75 in) between adjacent devices for
adequate heat dissipation.
Only the WX1810H-PWR and WX1840H access controllers support rack mounting. The following
procedure uses the WX1840H access controller as an example.
To mount the device in a 19-inch rack:
1.
Wear an ESD wrist strap. Make sure the rack is sturdy and is reliably grounded.
2.
Use a mounting bracket to mark the cage nut installation positions on the front rack posts.
Install cage nuts.
Figure2-4 Installing cage nuts


