Connecting
the
IR
Receiver:
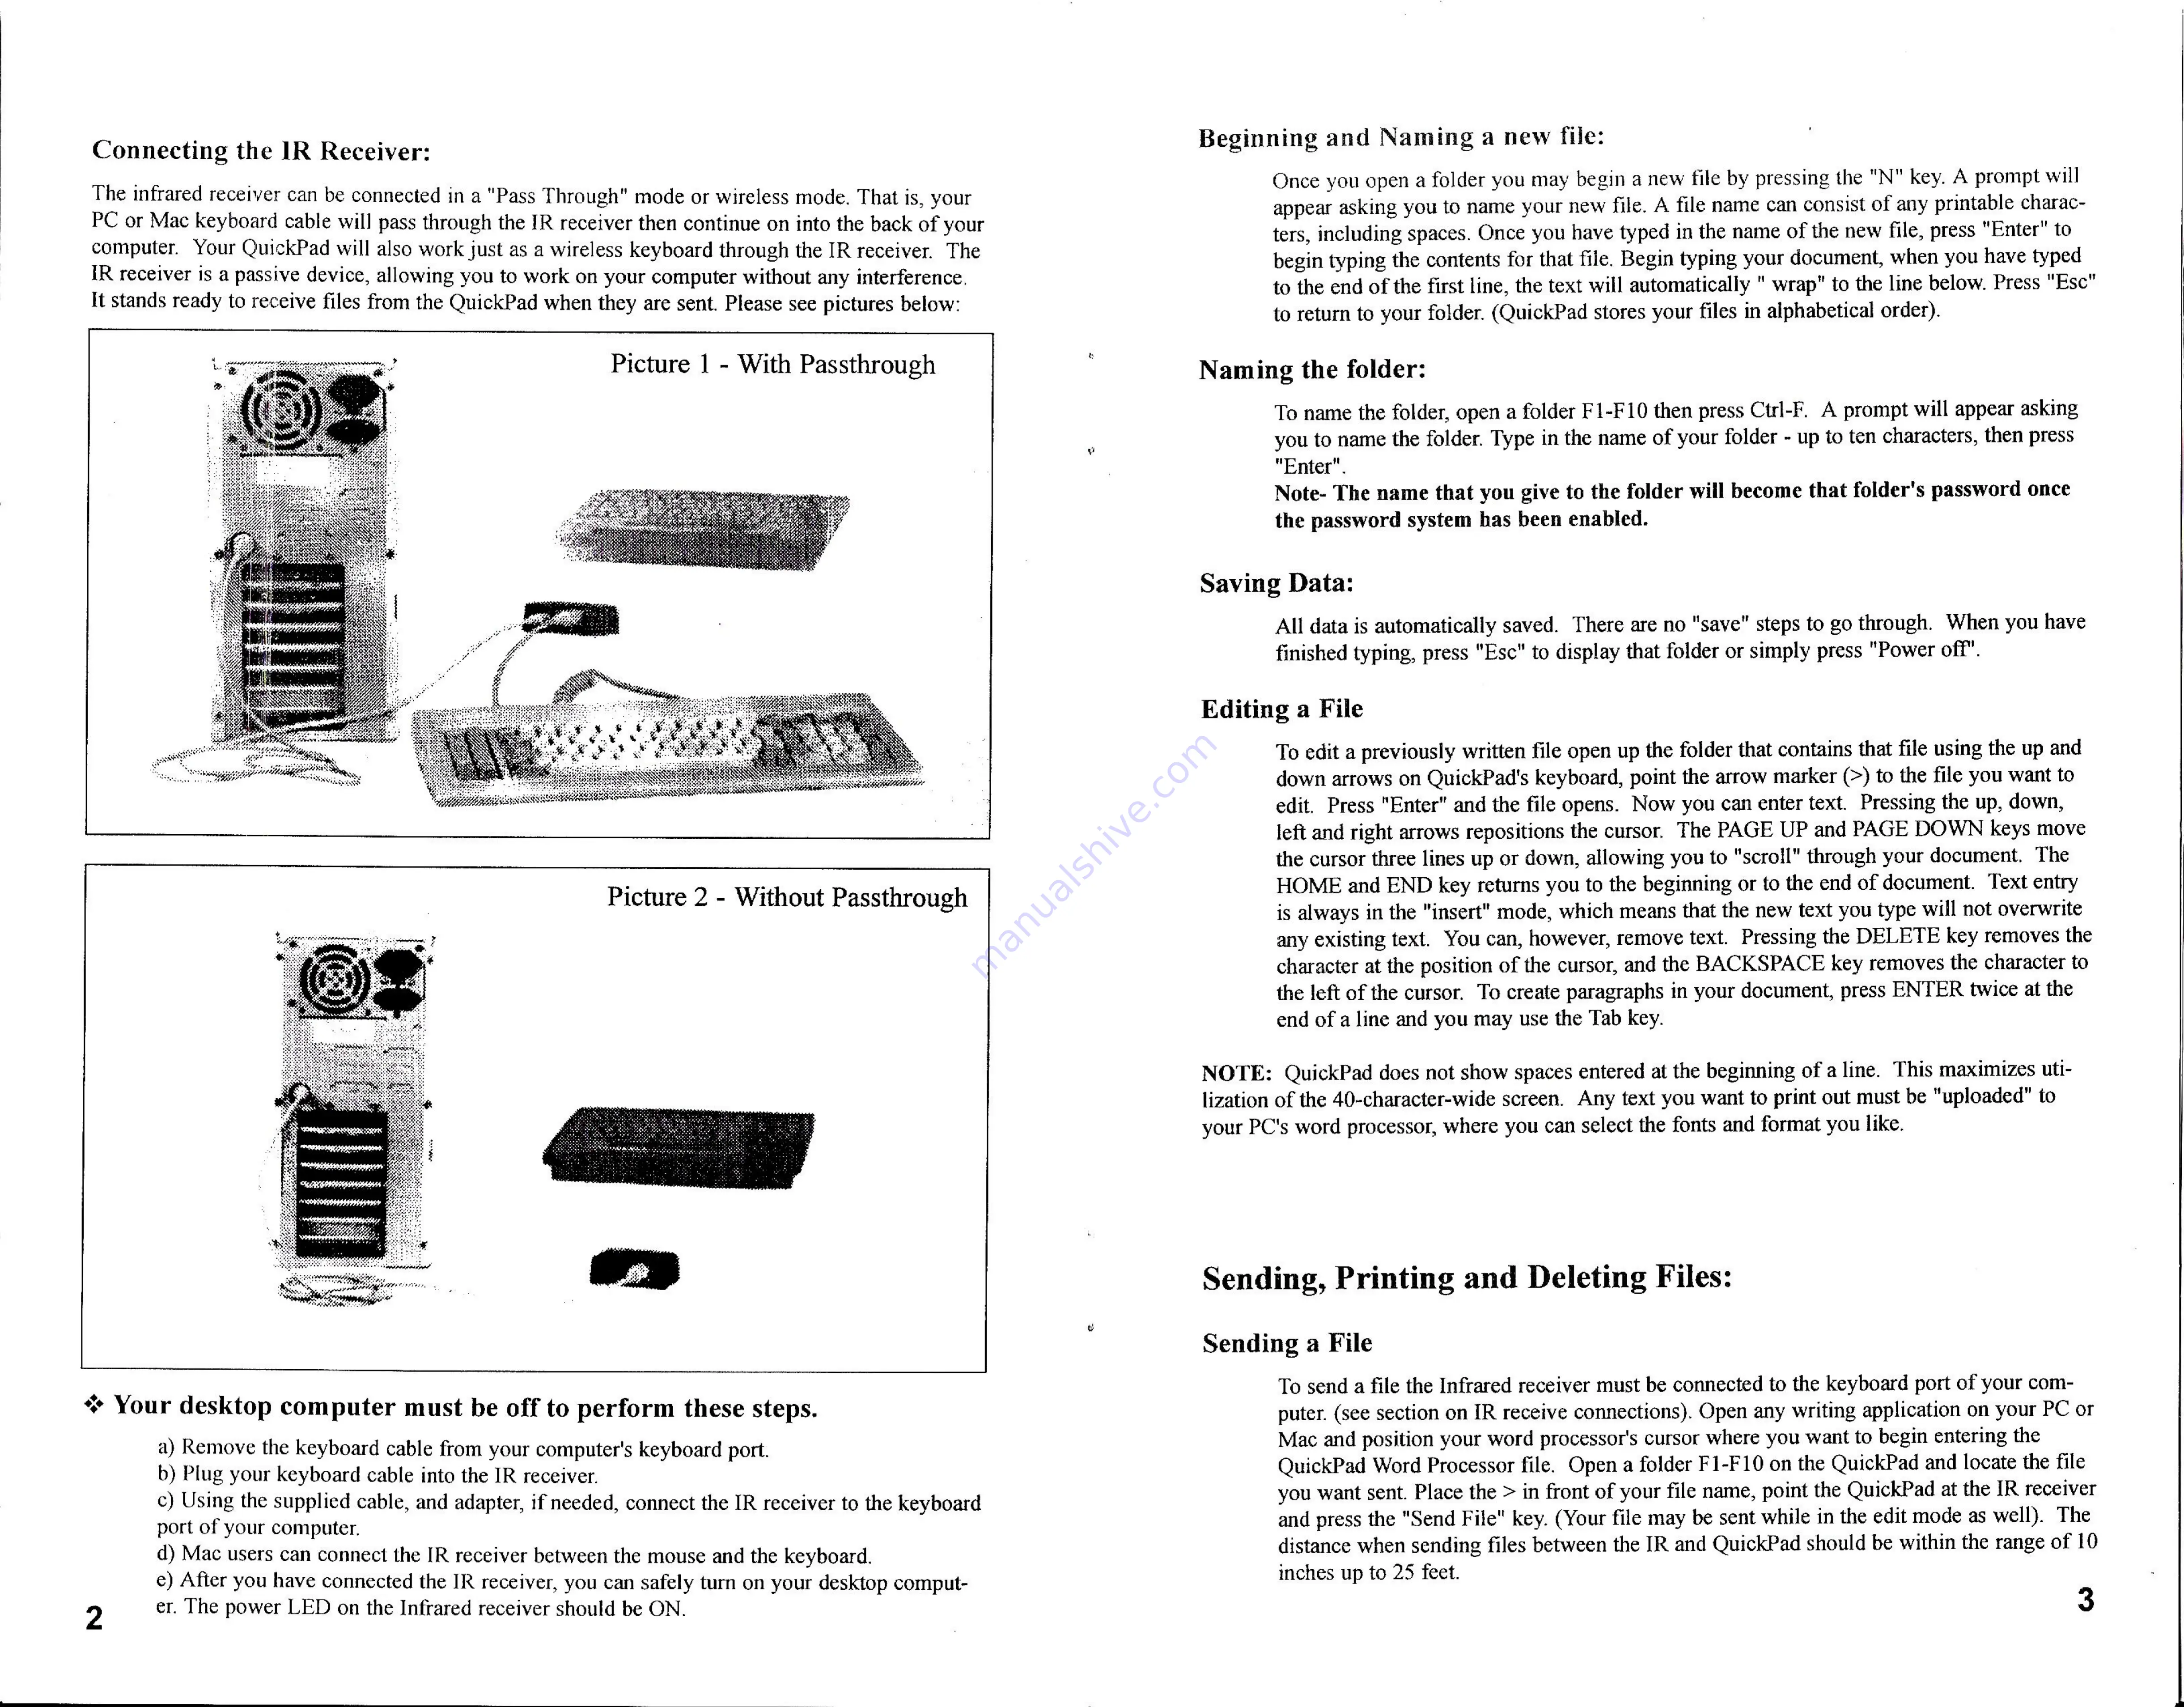
The
infrared
receiver
can
be connected
in
a
"Pass
Through"
mode
or
wireless
mode.
That
is,
your
PC
or
Mac
keyboard
cable
will
pass
through
the
IR
receiver
then
continue
on
into
the
back
of
your
computer.
Your
QuickPad
will
also
work
just
as
a
wireless
keyboard
through
the
IR
receiver.
The
IR receiver
is
a
passive
device,
allowing
you
to
work
on
your
computer
without
any
interference,
It stands
ready
to
receive
files
from
the
QuickPad
when
they
are
sent.
Please
see
pictures
below:
Picture
|
-
With
Passthrough
Picture
2
-
Without
Passthrough
“> Your
desktop
computer
must
be
off
to
perform
these
steps.
a)
Remove
the
keyboard
cable
from
your
computer's keyboard
port.
b) Plug
your
keyboard
cable
into
the
IR receiver.
c)
Using
the
supplied
cable,
and
adapter,
if
needed,
connect
the
IR
receiver
to
the
keyboard
port
of
your
computer.
d)
Mac
users
can
connect
the
IR receiver
between
the
mouse
and
the
keyboard.
e)
After
you
have
connected
the
IR
receiver,
you
can
safely
turn
on
your
desktop
comput-
2
er.
The
power
LED
on
the
Infrared
receiver
should
be
ON.
Beginning
and
Naming
a
new
file:
Once
you
open
a
folder
you
may
begin
a
new
file
by
pressing
the
"N"
key.
A
prompt
will
appear
asking
you
to
name
your
new
file.
A
file
name
can
consist
of
any
printable
charac-
ters,
including
spaces.
Once
you
have
typed
in the
name
of the
new
file,
press
"Enter"
to
begin
typing
the
contents
for
that
file.
Begin typing
your
document,
when
you
have
typed
to
the
end
of the
first
line,
the
text
will
automatically
"
wrap"
to
the
line
below.
Press
"Esc”
to
return
to
your
folder.
(QuickPad
stores
your
files
in
alphabetical
order).
Naming
the
folder:
To
name
the
folder,
open
a
folder
F1-F10
then
press
Ctrl-F.
A
prompt
will
appear
asking
you
to
name
the
folder.
Type
in
the
name
of
your
folder
-
up
to
ten
characters,
then
press
"Enter".
Note-
The
name
that
you
give
to
the
folder
will
become
that
folder's
password
once
the
password
system
has
been
enabled.
Saving
Data:
All
data
is
automatically
saved.
There
are
no
"save"
steps
to
go
through.
When
you
have
finished
typing,
press
"Esc"
to
display
that
folder
or
simply
press
"Power
off”.
Editing
a
File
To
edit
a
previously
written
file
open
up
the folder
that
contains
that
file
using
the
up and
down
arrows
on
QuickPad's keyboard,
point
the
arrow
marker
(>)
to
the
file
you
want
to
edit.
Press
"Enter"
and
the
file
opens.
Now
you
can
enter
text.
Pressing
the
up,
down,
left and
right
arrows
repositions
the
cursor.
The
PAGE
UP and
PAGE
DOWN
keys
move
the
cursor
three
lines
up
or
down,
allowing
you
to
"scroll"
through
your
document.
The
HOME
and
END
key
returns
you
to
the
beginning
or
to
the
end
of document.
Text
entry
is
always
in the
"insert"
mode,
which
means
that
the
new
text
you
type
will
not
overwrite
any
existing
text.
You
can,
however,
remove
text.
Pressing
the DELETE
key
removes
the
character
at
the
position
of the
cursor,
and the BACKSPACE
key
removes
the
character
to
the
left of the
cursor.
To
create
paragraphs
in
your
document,
press
ENTER
twice
at
the
end of
a
line
and
you
may
use
the Tab
key.
NOTE:
QuickPad
does
not
show
spaces
entered
at
the
beginning
of
a
line.
This
maximizes
uti-
lization
of the
40-character-wide
screen.
Any
text
you
want
to
out
must
be
“uploaded”
to
your
PC's
word
processor,
where
you
can
select
the
fonts
and
format
you
like.
Sending,
Printing
and
Deleting
Files:
Sending
a
File
To
send
a
file the Infrared
receiver
must
be
connected
to
the
keyboard
port
of
your
com-
puter.
(see
section
on
IR
receive
connections). Open
any
writing application
on
your
PC
or
Mac
and
position
your
word
processor's
cursor
where
you
want
to
begin entering
the
QuickPad
Word
Processor
file.
Open
a
folder
F1-F10
on
the
QuickPad
and
locate
the file
you
want
sent.
Place
the
>
in
front
of
your
file
name,
point
the
QuickPad
at
the
IR
receiver
and
press
the
"Send
File"
key.
(Your
file
may
be
sent
while
in
the edit
mode
as
well).
The
distance
when
sending
files
between
the
IR and
QuickPad
should
be within
the
range
of 10
inches
up
to
25 feet.
3
Summary of Contents for Quickpad IR
Page 6: ......


