1-15-96
96-8100
HAAS
AUTOMATION, INC.
87
MECHANICAL SERVICE
S E R V I C E M A N U A L
VF-S
ERIES
5. Loosen the SHCS on the clamp nut at the motor end, then remove the clamp nut.
6. Loosen the six SHCS and remove the bearing sleeve from the motor housing. Push on the mill
table or the opposite end of the lead screw to loosen.
CAUTION:
DO NOT PRY THE BEARING SLEEVE AWAY FROM THE HOUSING. DAMAGE TO THE SLEEVE,
BEARING, OR LEAD SCREW WILL RESULT.
7. Disconnect the oil line at the ball nut.
8. Loosen and remove the six SHCS attaching the ball nut to the nut housing.
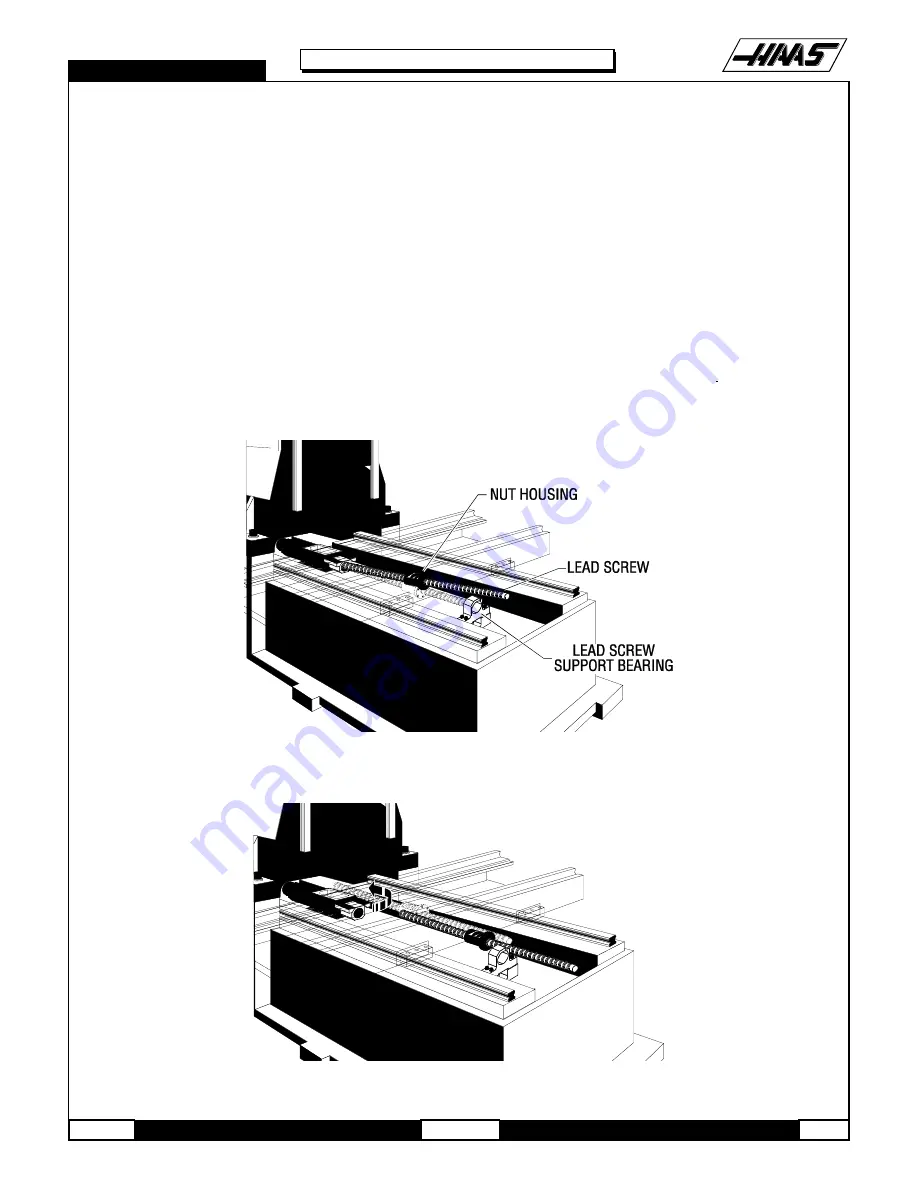
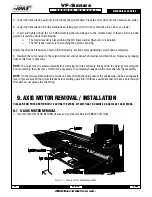
9. Hand-turn the lead screw toward the rear of the machine until the front end of the lead screw clears the
bearing by approximately six inches (6").
Fig. 10-6 Pull lead screw forward around bearing support,...
Summary of Contents for VF-SERIES
Page 180: ...1 15 96 96 8100 177 TABLEOFCONTENTS TECHNICAL REFERENCE SERVICE M A N U A L VF SERIES ...
Page 235: ...96 8100 1 15 96 232 VF SERIES S E R V I C E M A N U A L ASSEMBLY DRAWINGS VF 1 COLUMN ...
Page 237: ...96 8100 1 15 96 234 VF SERIES S E R V I C E M A N U A L ASSEMBLY DRAWINGS VF 1 LEADSCREW ...
Page 239: ...96 8100 1 15 96 236 VF SERIES S E R V I C E M A N U A L ASSEMBLY DRAWINGS VF 3 COLUMN ...
Page 241: ...96 8100 1 15 96 238 VF SERIES S E R V I C E M A N U A L ASSEMBLY DRAWINGS VF 3 LEADSCREW ...
Page 245: ...96 8100 1 15 96 242 VF SERIES S E R V I C E M A N U A L ASSEMBLY DRAWINGS 3 4 2 1 ...


