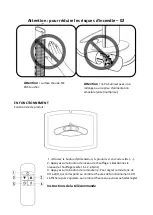
Remote Control Instructions
1.
POWER BUTTON:
Turn the heater off.
2.
UP BUTTON:
Increase timer or power level.
3.
DOWN BUTTON:
Decrease timer or power level.
4.
LEVEL BUTTON:
Use to adjust the heat levels(L1
-
L2).
Press the
Level button then use the up and down buttons(buttons 2 and 3) to
increase or decrease the heating level.
5.
TIMER BUTTON:
To set the timer from 0H
-
24H, which is the
number of hours it will run. 0H will display and then adjust to the
number of hours you would like to set, using the up and down
buttons(2 and 3).
Noted: All heaters and their remote controls have the same
frequency, so it is possible to control several heaters with just one remote.
Inserting Batteries(not included)
Insert 2 AAA/ Alkaline type batteries into your remote control
1.
Flip the backside of your remote control and pull out battery cover. Insert the batteries in
accordance with the instructions and polarity the batteries.
2.
Change the batteries in the same way depicted above.
NOTICE:
1.
Replace the old batteries with the same type batteries. Otherwise, your heater may not
function well.
2.
Pull out the batteries in case of long terms of disuse to prevent leakage which may impair your
remote control.
3.
Do not allow water or liquid to get into the remote control.
CAUTION:
When the appliance is not operated for a long period of time, cleaning or maintenance is
conducted or when the location of the heater is changed, the heater should be turned to OFF and
unplugged from the electrical connection.
Periodic inspection and removal of dirt and contaminants will ensure that equipment can be
operated safely.
Troubleshooting
1. Check if the power cord is plugged into an electrical outlet, if not, plug in.
2. Check if electricity to the main fuse is working
3. Error code shows on display
E1 Error on display: Control unit overheat. Check installation clearances.
E2 Error on Display: Tip over function, Make heater less than 60°working angel and restart heate
MAINTENANCE
Summary of Contents for 1536 128811
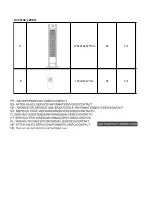
Page 1: ...Ref 1536_128811 2022 2023...
Page 2: ...A 174x210x977mm X1 1 1 B 135x45x17mm X1 1 1 Ref 1536_128811...
Page 6: ......


