
Hub cap
Enjoliveur
Embellecedor
Universal adapter
Raccord universel
Adaptador universal
1
2
3
5
6
7
8
9
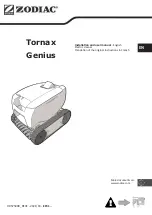
Cleaner head
Aspirateur
Aspirador
Hose sections
Tuyaux
Mangueras
Lock shaft
Cheville de maintien
Pasador
Shoe
Patin
Zapata
Disk
Disque
Disco
Flow regulator
Régulateur de débit
Regulador de caudal
ENG
FRA
ESP
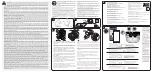
Parts · Éléments · Elementos
1
2
3
x 12
5
8
7
6
9
MIN.
MAX.
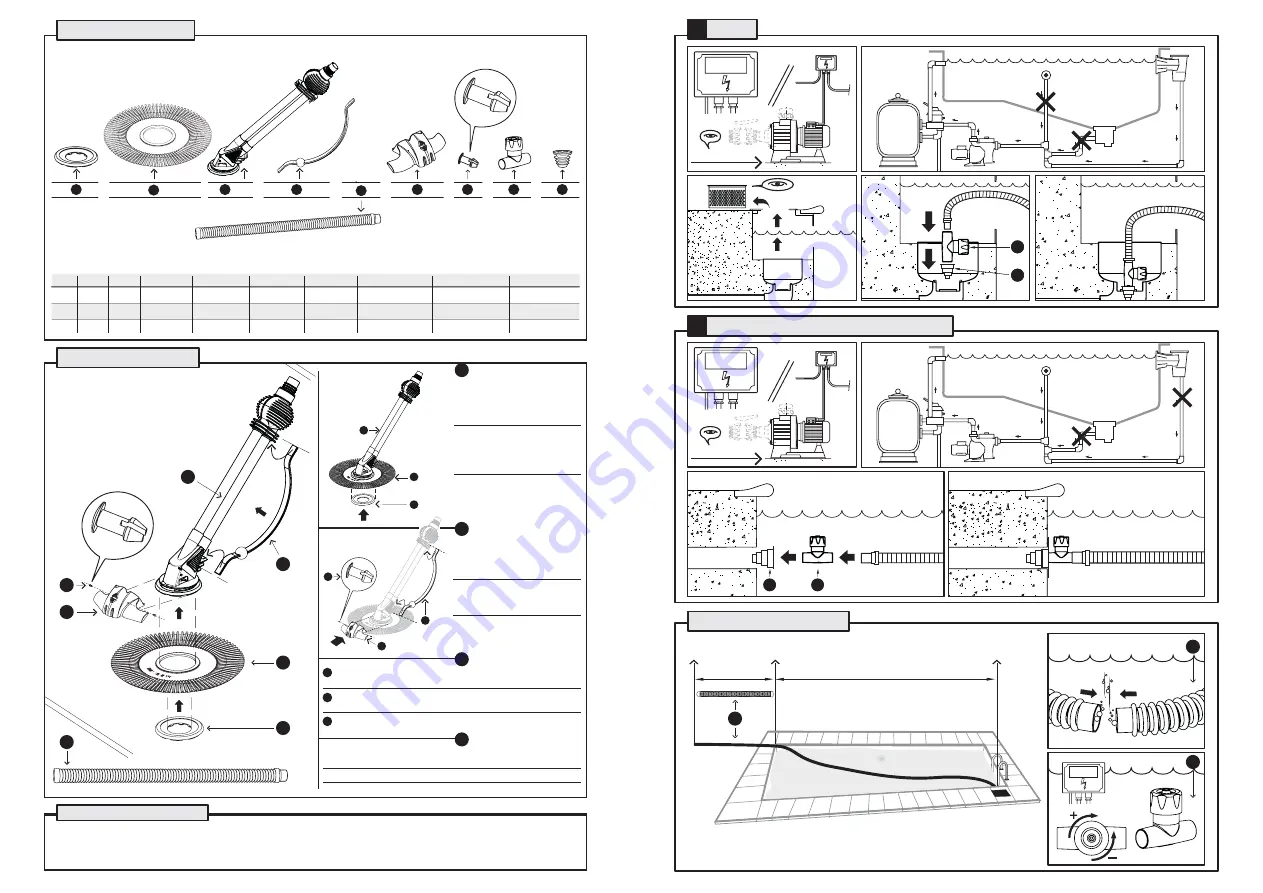
Important · Important · Importante
Before connecting the X100 to the filtration system,
the product must be underwater to avoid air. The
hoses must be full of water. Adjust the flow regulator
to achieve the cleaners best performance.
Avant de connecter le X100 au système de filtration,
lensemble doit être submergé dans leau pour
éviter lentrée dair. Les tuyaux doivent être pleins
deau. Ajuster le régulateur de débit pour atteindre
un déplacement optimal de laspirateur.
Antes de conectar el X100 al sistema de filtración, el
producto debe estar sumergido en el agua para evitar
la entrada de aire. Las mangueras deben estar llenas
de agua. Ajustar el regulador de caudal para conseguir
un desplazamiento óptimo del limpiafondos.
4
4
Counterweight
Contrepoids
Contrapeso
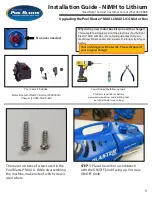
Assembly · Montage · Montaje
Fix the blue flexible disk (part 2) to
the cleaner head (part 3).
Fix the grey shoe (part 1) as shown
to stabilize the blue disk during the
cleaning process.
Fixer le disque flexible bleu (nº 2)
à laspirateur (nº 3).
Fixer le patin gris (nº 1) pour
stabiliser le disque bleu pendant le
procès de nettoyage.
Fijar el disco flexible azul (nº 2) al
aspirador (nº 3).
Fijar la zapata gris (nº 1) para
estabilizar el disco azul durante el
proceso de limpieza.
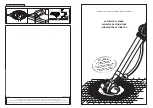
Fix the counterweight (part 4) on the
back of the cleaner head (part 3).
Fix the hub cap (part 6) with the two
lock shafts (part 7), one on each
side of the cleaner head.
Fixer le contrepoids (nº 4) à la partie
posterieure de l'aspirateur. Fixer
lenjoliveur (nº 6) avec les deux
chevilles (nº 7), une de chaque côté.
Fijar el contrapeso (nº4) en la parte
posterior del aspirador (nº3). Fijar
el embellecedor (nº 6) con los dos
pasadores (nº 7), uno a cada lado.
Connect the X100 to the filtration system, either to the
Skimmer-DA
or to
the
Suction nozzle-DB
and regulate the water flow.
Connecter lensemble au
Skimmer-DA
ou à la
Bouche daspiration-DB
.
Conectar el conjunto al
Skimmer-DA
o a la
Boquilla de aspiración-DB
.
Connect a hose section and introduce it vertically in the water trying to
take out all air and carry on connecting the remaining hose sections.
Connecter une travée de tuyau en lintroduisant verticalement dans leau
et en enlevant tout lair, et continuer avec les autres travées de tuyau.
Conectar un tramo de manguera, introducirlo verticalmente dentro del
agua intentando sacar todo el aire y seguir conectando los otros tramos.
5
5
5
3
2
1
4
6
7
5
A
D
3
2
1
B
C
6
7
4
9
10
Skimmer
OFF
8
9
Hose sections · Tuyaux · Mangueras
MIN.
MAX.
ON
+1
OFF
560 W MIN.
560 W MIN.
9
8
5
5
8
DA
Suction nozzle · Bouche daspiration · Boquilla aspiración
DB