background image

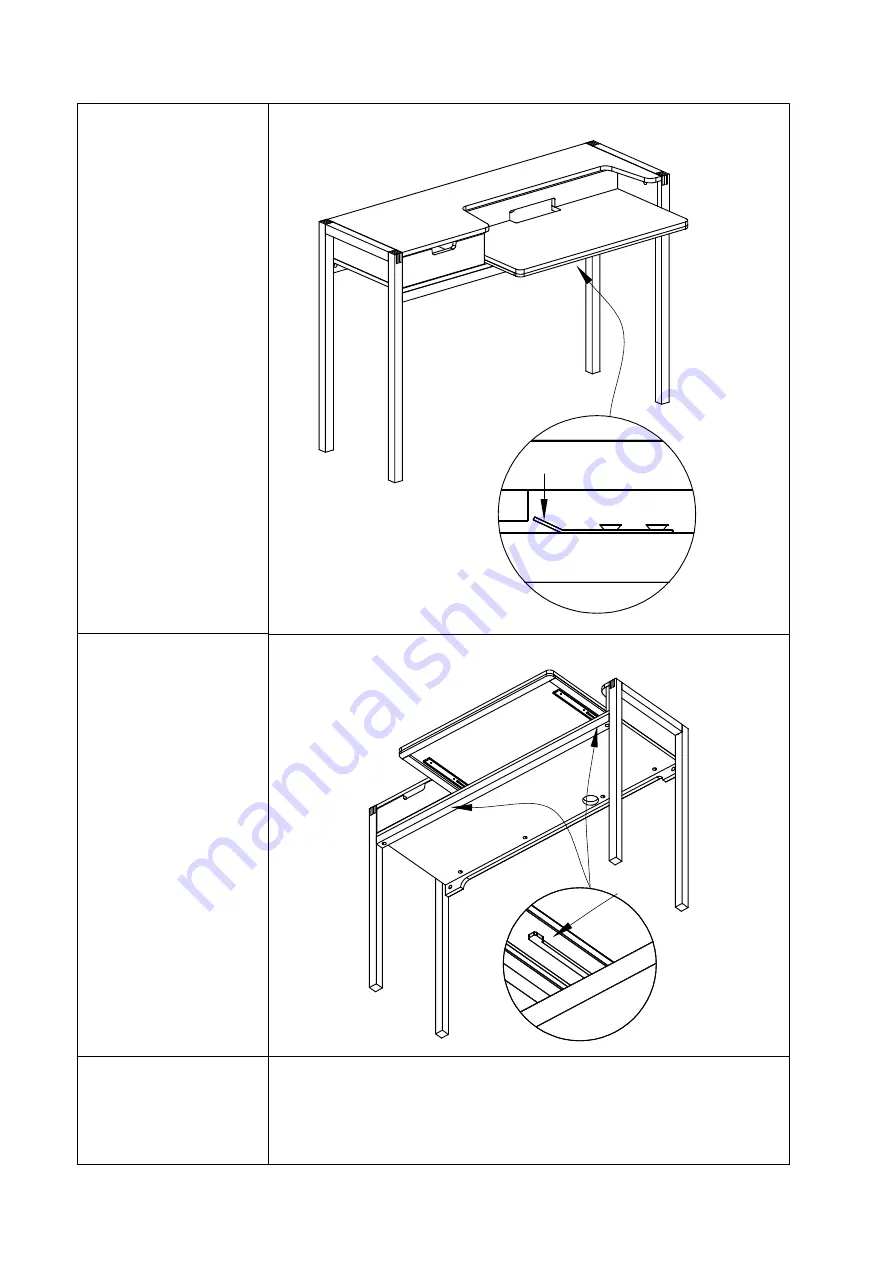
Maintenance- To remove the Worktop

Step 1

a: Push spring clip 

down with suitable 
flat tools eg. ruler

.

Step 3

a: Refit the worktop

as per step 8.

8

Step 2

a: Pull out the worktop 

until the end, push 2 

black nobs to the side 

and pull it out.

Summary of Contents for Quint QUIN-1D-S13-A

Page 1: ...Quint Quint Laptop Desk 204215 QUIN 1D S13 A 1 ...

Page 2: ...Components Please check you have all the parts listed below Leg Frame Left Leg Frame Right Body Crossbar Worktop Retain batch code label BC BC 2 ...

Page 3: ...he work area small parts could choke if swallowed Assemble the item as close to its final position in the same room as possible Make sure you have enough space to layout the parts before starting Assemble on a soft level surface to avoid damaging the unit or your floor We do not recommend the use of power drill drivers for inserting screws as this could damage the unit Only use hand screwdrivers D...

Page 4: ... reference Step 2 a Insert wooden dowels A into Body 3 b Take the drawer out To do that pull it out and lift it off the rails Step 1 a Insert wooden dowels A into Crossbar 4 b Push cam locks C into Crossbar 4 c Screw cam bolts B into Leg Frames 1 2 4 ...

Page 5: ...Step 3 a Attach Body 3 to Crossbar 4 with screws D To do this use hex key G b Turn the table gently onto the backside Assembly Instructions Step 4 a Attach Body and Legs frames 5 ...

Page 6: ...Assembly Instructions Step 5 a Tighten cam locks 12 pieces as shown using hex key H Step 6 a Gently lift the table on its legs b Use the hex key G to attach screw D to the right side of the table 6 C ...

Page 7: ...Assembley Instructions Step 7 a Attach Caps E F on the screws and cam locks b Put the drawer back on the rails and close it Step 8 7 a Align worktop 5 with runners on body 3 and close ...

Page 8: ...remove the Worktop Step 1 a Push spring clip down with suitable flat tools eg ruler Step 3 a Refit the worktop as per step 8 8 Step 2 a Pull out the worktop until the end push 2 black nobs to the side and pull it out ...

Page 9: ...th the anti topple wall strap provided Warning The wall fixings are not supplied with this product For fixing please seek the advice of a professional builder Before you drill check to ensure there are no hidden pipes or service cables in the wall 9 ...

Page 10: ...soda drain and oven cleaners Use place mats to protect the surface from moisture and heat If for any reason you should have problems with your Habitat product pleace contact the store from which you purchased it Please retain your receipt as proof of purchase If you have any comments or suggestions regarding this product assembly instructions or service pleace contact the store or Habitat Head Off...

Reviews: