Option Description
rCL
Shows the last 10 measurements recorded. Push to show the
recorded measurements (01—most recent measurement, 10—
oldest measurement). Push to scroll through the measurements.
To select a measurement by number, push to select the number
and then . Push to go out of this option.
SCA
Refer to the expanded user manual on the manufacturer's website.
3.
Push to go back to measurement mode.
Run a test
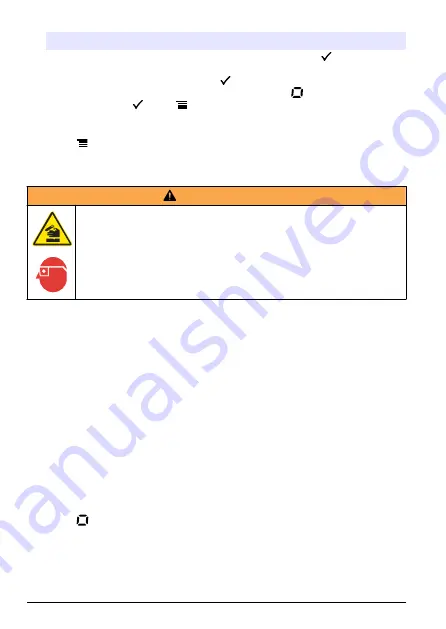
W A R N I N G
Chemical exposure hazard. Obey laboratory safety procedures and
wear all of the personal protective equipment appropriate to the
chemicals that are handled. Refer to the current safety data sheets
(MSDS/SDS) for safety protocols.
The basic measurement steps necessary to run a test follow. Refer to
the applicable method to run a specific test.
1.
Select the applicable measurement range or parameter. Refer to
on page 11.
2.
Prepare the blank according to the method document. Make sure to
use the correct sample cell size. Rinse the sample cell and cap with
the blank before the sample cell is filled.
3.
Close the sample cell and clean the optical faces of the sample cell
with a lint-free cloth.
4.
Insert the blank sample cell into the cell holder. Make sure to install
the blank sample cell in the correct and consistent orientation so
that the results are more repeatable and precise. Refer to
.
5.
Install the instrument cap over the cell holder. Refer to
6.
Push to set the instrument zero. The display shows "0.000", or
the degree of resolution that was previously selected.
7.
Prepare the sample. Rinse the sample cell and cap with the sample
three times before the sample cell is filled. Add reagents as
specified by the method document.
12
English
Summary of Contents for Pocket Colorimeter II
Page 2: ...English 3 Dansk 20 Polski 37 Svenska 55 Suomi 72 89 T rk e 108 125 2...
Page 8: ...Figure 2 Install the batteries 8 English...
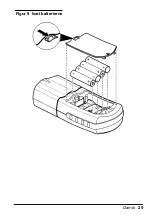
Page 25: ...Figur 9 Is t batterierne Dansk 25...
Page 43: ...Rysunek 16 Instalowanie baterii Polski 43...
Page 60: ...Figur 23 Installera batterierna 60 Svenska...
Page 77: ...Kuva 30 Paristojen asentaminen Suomi 77...
Page 89: ...89 98 90 103 94 104 96 106 x x 6 1 x 3 2 x 15 2 2 4 x 1 25 x 6 IP67 1 3 3 30 0 2 0 43 2 I 3 89...
Page 91: ...91...
Page 93: ...1 2 15 FCC 1 2 3 36 93...
Page 94: ...36 1 3 1 1 5 2 4 1 37 94...
Page 95: ...37 95...
Page 96: ...38 38 39 96...
Page 97: ...39 1 1 3 2 4 40 97...
Page 98: ...40 1 4 2 5 3 6 10 1 2 98...
Page 99: ...SEL 00 00 24 rCL 10 01 10 SCA 3 MSDS SDS 1 98 2 3 99...
Page 100: ...4 41 5 42 6 0 000 7 8 9 41 10 42 11 12 13 100...
Page 101: ...41 1 2 25 10 3 1 10 101...
Page 102: ...42 rCL 98 102...
Page 103: ...MSDS SDS Liquinox 103...
Page 104: ...94 E 0 E 1 1 E 2 1 104...
Page 105: ...E 3 E 6 Abs E 7 E 9 105...
Page 106: ...Reading 2 1 E 1 E 2 _ __ E 1 E 2 2 10 106...
Page 107: ...AAA 4 4674300 1 5955900 1 5954800 25 10 6 2427606 1 10 2 4864302 107...
Page 113: ...ekil 44 Pillerin tak lmas T rk e 113...
Page 127: ...127...
Page 129: ...1 2 3 50 129...
Page 130: ...50 1 3 1 cm1 5 2 4 1 51 130...
Page 131: ...51 131...
Page 132: ...52 52 53 132...
Page 133: ...53 1 1 3 2 4 54 133...
Page 134: ...54 1 4 2 5 3 6 10 1 2 134...
Page 135: ...SEL 00 00 24 rCL 10 01 10 SCA 3 MSDS SDS 1 134 2 135...
Page 136: ...3 4 55 5 56 6 0 000 7 8 9 55 10 56 11 12 13 136...
Page 137: ...55 1 2 25 mm 10 mL 3 1 cm 10 mL 137...
Page 138: ...56 rCL 134 138...
Page 139: ...MSDS SDS Liquinox 139...
Page 140: ...130 E 0 E 1 1 E 2 LED1 LED LED 140...
Page 141: ...E 3 E 6 E 7 E 9 flash 141...
Page 142: ...2 1 E 1 E 2 _ __ E 1 E 2 2 10 142...
Page 143: ...4 4674300 1 5955900 1 5954800 25 mm 10 mL 6 2427606 1 cm 10 mL 2 4864302 143...
Page 144: ......
Page 145: ......


