Maintenance & Calibration
Battery Replacement
Page 27
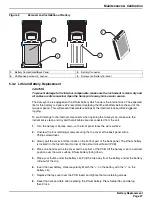
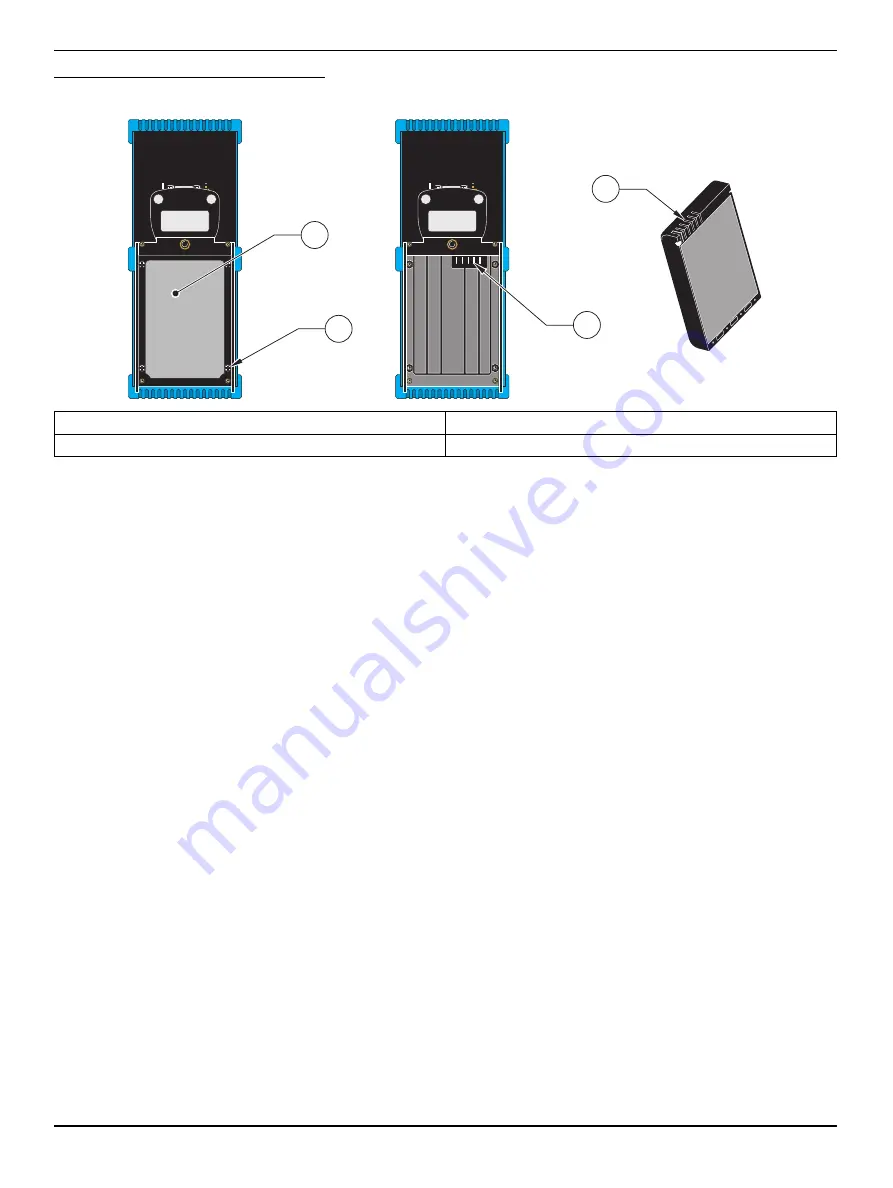
Figure 3
Removal and Installation of Battery
5.3.2 Lithium Battery Replacement
CAUTION
To prevent damage to the internal components, make sure the instrument is clean, dry and
all cables are disconnected. Open the Surveyor 4a away from a water source.
The Surveyor 4a is equipped with a lithium battery which powers the internal clock. The expected
life for this battery is 2 years. We recommend replacing the lithium battery before the end of the
two-year period. This will prevent inaccurate readings of the internal clock and time-triggered
logging.
To avoid damage to the internal components when opening the Surveyor 4a, make sure the
instrument is clean and dry and that all cables are disconnected from the unit.
1.
Turn the Surveyor 4a face down, so the front panel faces the work surface.
2.
Unscrew the four retaining screws securing the top cover of the back panel with a
Phillips screwdriver.
3.
Slowly pull the cover, and flip it back on the bottom part of the back panel. The lithium battery
is located on the top left-hand corner of the printed circuit board (PCB).
4.
Place one hand over the top cover and the bottom of the PCB. Lift the Surveyor 4a to a vertical
position over the work surface, lithium battery facing down.
5.
Place your thumb under the battery clip. Pull the clip away from the battery and let the battery
slide out of the clip.
6.
Insert the new battery. Observe polarity. Match the “+” on the battery with the “+” on the
battery clip.
7.
Replace the top cover over the PCB, insert and tighten the four retaining screws.
8.
Reset the time and date after replacing the lithium battery. Press Setup/Cal, and Setup,
then Clock.
1.
Battery Compartment/Back Panel
3.
Battery Connector
2.
Phillips-head screws (4) captive
4.
Surveyor 4a Battery Terminal
3
4
1
2
Summary of Contents for 003070HY
Page 2: ......
Page 8: ...Visit us at www hachenvironmental com ...


