background image

Clean the meter

The meter is designed to be maintenance-free and does not require
regular cleaning for normal operation. Exterior surfaces of the meter may
be cleaned as necessary.

Note: Do not clean the meter with solvents to avoid damaging the material.

1.

Clean the meter with a dust- and lint-free dry or slightly damp cloth. A
mild soap solution can also be used for liposoluble contamination.

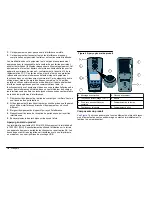
Apply silicone oil to a sample cell

Sample cells and caps must be extremely clean and free from significant
scratches. Apply a thin coating of silicone oil on the outside of the sample
cells to mask minor imperfections and scratches that may contribute to
light scattering.

Note: Use only the provided silicone oil. This silicone oil has the same refractive
index as the sample cell glass.

1. 

 Clean the inside and

outside of the cells and
caps by washing with a
laboratory glass
cleaning detergent.
Follow with multiple
rinses with distilled or
demineralized water.

2. 

 Apply a small bead of

silicone oil from the top
to the bottom of the cell.

3. 

 Use the provided

oiling cloth to spread the
oil uniformly. Wipe off
the excess so that only a
thin coat of oil is left.
Make sure that the
sample cell is almost dry
with little or no visible oil.

Note: Store the oiling
cloth in a plastic storage
bag to keep the cloth
clean.

Store the sample cells

N O T I C E


Do not air dry the sample cells.

Note: Always store the sample cells with caps on to prevent the cells from drying.

1.

Fill the sample cells with distilled or demineralized water.

2.

Cap and store the sample cells.

3.

Wipe the outside of the sample cells dry with the a soft cloth.

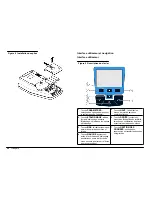
Replace the battery

W A R N I N G


Potential fire hazard. Use only alkaline or nickel metal hydride batteries (NiMH) in
the meter. Other battery types or incorrect installation can cause a fire. Never mix
battery types in the meter.

For battery replacement refer to 

Figure 3

 on page 7.

1.

Remove the battery cover.

2.

Remove the batteries.

3.

Install 4 AA alkaline or 4 AA nickel metal hydride (NiMH) batteries.
Make sure that the batteries are installed in the correct orientation.

4.

Replace the battery cover.

Replace the lamp

C A U T I O N


Burn Hazard. Wait until lamp cools down. Contact with the hot lamp can cause
burns.

English


11

Summary of Contents for 2100A

Page 1: ...DOC022 97 80041 2100Q and 2100Qis 01 2010 Edition 1 Basic User Manual Manuel d utilisation de base Manual b sico del usuario Manual b sico do usu rio G G...

Page 2: ...English 3 Fran ais 16 Espa ol 30 Portugu s 44 58 70 83 2...

Page 3: ...l verifications Data logger 500 records Specification Details Power requirement AC 100 240 V 50 60 Hz with power or USB power module 4 AA alkaline batteries Rechargeable NiMH for use with USB power mo...

Page 4: ...th this symbol may not be disposed of in European public disposal systems after 12 August of 2005 In conformity with European local and national regulations EU Directive 2002 96 EC European electrical...

Page 5: ...he equipment to a different outlet 3 Move the equipment away from the device receiving the interference 4 Reposition the receiving antenna for the device receiving the interference 5 Try combinations...

Page 6: ...contacts for corrosion and clean them if necessary N O T I C E When using nickel metal hydride NiMH batteries the battery icon will not indicate a full charge after freshly charged batteries have bee...

Page 7: ...BRATION key shows calibration screen start calibration select cal options 6 RIGHT key contextual read turbidity sample selects or confirms options opens jumps to sub menus 3 DOWN key scroll through me...

Page 8: ...option from a list Use the UP and DOWN keys to select an option If check boxes are shown more than one option can be selected Push the LEFT key under Select Note To deselect check boxes push the LEFT...

Page 9: ...ssociated with sample data until a different ID is selected Option Description Create a New Sample ID Enter a name for a new sample ID Delete Sample ID Delete an existing sample ID Use an operator ID...

Page 10: ...for reading fluctuations caused by drifting of sample particles through the light path The X bar icon is shown on the display when signal averaging is on The Signal Average mode measures 12 times and...

Page 11: ...m of the cell 3 Use the provided oiling cloth to spread the oil uniformly Wipe off the excess so that only a thin coat of oil is left Make sure that the sample cell is almost dry with little or no vis...

Page 12: ...1 2 3 4 12 English...

Page 13: ...5 6 7 8 English 13...

Page 14: ...and let it cool down Error Warning Description Solution RST Average value Solids are settling too slowly The reading mode is not suitable for this sample Select Normal or Signal Average reading mode C...

Page 15: ...d data to the computer 3 Delete Data Log on the module Delete Last Reading Failed Error in the data storage Turn the meter off and on If the error message still occurs contact technical support Delete...

Page 16: ...NTU FNU talonnage sur toute la gamme de 0 1000 NTU FNU talonnage par rapport des degr s de turbidit Enregistreur d talonnage Enregistre les 25 derniers talonnages r ussis Caract ristiques D tails Enr...

Page 17: ...ut tre endommag si ces instructions ne sont pas respect es Si un symbole Danger ou Attention se trouve sur l instrument une explication en est donn e dans le manuel Ceci est le symbole d alerte de s c...

Page 18: ...echniques ci dessous peuvent permettre de r duire les probl mes d interf rences 1 D brancher l quipement de la prise de courant pour v rifier s il est ou non la source des perturbations 2 Si l quipeme...

Page 19: ...rrosion sur les contacts des piles et les nettoyer si n cessaire A V I S En cas d utilisation de piles rechargeables nickel m tal hybride NiMH l ic ne d tat des piles n indique pas une charge compl te...

Page 20: ...talonnage d marre l talonnage s lectionne les options d talonnage 6 Touche DROITE contextuel mesure de l chantillon de turbidit s lection ou confirmation d options ouverture saut des sous menus 3 Tou...

Page 21: ...ner une option Il y existe deux m thodes pour modifier les options 1 S lectionner une option dans la liste Utiliser les touches HAUT et BAS pour s lectionner une option Si des cases cocher apparaissen...

Page 22: ...actuel S lectionner un ID dans une liste L ID en cours sera associ aux donn es d chantillon jusqu la s lection d un ID diff rent Cr er un nouvel ID d chantillon Entrer un nom pour un nouvel ID d chan...

Page 23: ...s la mesure Moyenne du signal Le mode Moyenne du signal compense les fluctuations de lecture caus es par une d rive des particules d chantillon sur le chemin optique L ic ne X bar appara t l affichag...

Page 24: ...qui pourraient contribuer la dispersion de la lumi re Remarque N utiliser que l huile au silicone fournie Cette huile au silicone a le m me indice de r fraction que le verre de la cuve chantillon 1 Ne...

Page 25: ...s dans l appareil Pour le remplacement de la pile consulter Figure 8 la page 20 1 D poser le capot des piles 2 D poser les piles 3 Installer 4 piles alcalines AA ou 4 piles rechargeables nickel m tal...

Page 26: ...1 2 3 4 26 Fran ais...

Page 27: ...5 6 7 8 Fran ais 27...

Page 28: ...scriptions Solution V rifiez la lampe Les signaux sont trop faibles sur le d tecteur 90 et 180 2100Q La lampe est d fectueuse Changer la lampe voir Remplacement de la lampe la page 25 2100Qis Contacte...

Page 29: ...e et essayer de renvoyer les donn es M moire module USB pleine Suppr des donn es et r essayez Stockage de donn es plein 1 Brancher le module USB alimentation l ordinateur 2 T l charger les donn es enr...

Page 30: ...mas 25 calibraciones exitosas Registrador de verificaci n Registra las ltimas 250 verificaciones exitosas Especificaci n Detalles Registrador de datos 500 registros Requisitos de energ a CA 100 240 V...

Page 31: ...lo indica que hay riesgo de descarga el ctrica y o electrocuci n El equipo el ctrico marcado con este s mbolo no puede ser descartado en los sistem s p blicos de desechos europeos desde el 12 de agost...

Page 32: ...toma el ctrica que el dispositivo que experimenta la interferencia conecte el equipo a otra toma el ctrica 3 Aleje el equipo del dispositivo que est recibiendo la interferencia 4 Cambie la posici n de...

Page 33: ...uebe los contactos de las pilas y l mpielos si es necesario A V I S O Cuando use pilas de hidruro met lico de n quel NiMH el icono de pilas no le indicar una carga completa despu s de haber insertado...

Page 34: ...a la pantalla de calibraci n inicia la calibraci n selecciona las opciones de calibraci n 6 Tecla DERECHA contextual lee la muestra de turbidez selecciona o confirma opciones abre salta a los sub men...

Page 35: ...onar una opci n Existen dos formas de cambiar las opciones 1 Seleccione una opci n de la lista use las teclas ARRIBA y ABAJO para seleccionar una opci n Si se muestran casillas de verificaci n se pued...

Page 36: ...e un ID de una lista El ID actual se asociar con los datos de la muestra hasta que se seleccione un ID diferente Crear nuevo ID de la muestra Introducir un nombre para una ID de muestra nueva Borrar I...

Page 37: ...e muestra despu s de la medici n Promedio de valores El modo Promedio de valores compensa las fluctuaciones en la medici n causadas por el desplazamiento de las part culas de la muestra en la trayecto...

Page 38: ...as para cubrir peque as imperfecciones y rayas que podr an generar difusi n de la luz Nota Utilice s lo el aceite de silicona suministrado Este aceite de silicona tiene el mismo ndice refractario que...

Page 39: ...laci n incorrecta puede provocar un incendio Nunca mezcle diferentes tipos de pilas en el medidor Para la instalaci n de las pilas consulte la Figura 13 en la p gina 34 1 Retire la tapa de las pilas 2...

Page 40: ...1 2 3 4 40 Espa ol...

Page 41: ...5 6 7 8 Espa ol 41...

Page 42: ...a Descripci n Soluci n Compruebe la l mpara Las se ales son muy bajas en el detector de 90 y 180 2100Q l mpara defectuosa Reemplace la l mpara consulte Cambie la l mpara en la p gina 39 2100Qis Comun...

Page 43: ...didor y trate de enviar los datos nuevamente La memoria USB est llena Borre datos e int ntelo de nuevo El almacenamiento de datos est lleno 1 Conecte el USB m dulo de alimentaci n al ordenador 2 Desca...

Page 44: ...em sucedidas Registro de verifica o Registra as ltimas 250 verifica es bem sucedidas Registro de dados 500 registros Especifica o Detalhes Fonte de alimenta o 100 240 VCA 50 60 Hz com o m dulo de for...

Page 45: ...s de seguran a que seguem este s mbolo a fim de evitar les es potenciais Se o s mbolo estiver no instrumento consulte o manual de instru es para obter informa es sobre a opera o ou seguran a Este s mb...

Page 46: ...interfer ncia 1 Desconecte o equipamento de sua fonte de alimenta o para verificar se ele ou n o a origem da interfer ncia 2 Se o equipamento est conectado mesma tomada do dispositivo que est sofrendo...

Page 47: ...os contatos da bateria e limpe os se necess rio A V I S O Ao usar baterias de n quel hidreto met lico NiMH o cone de bateria n o indicar a carga completa ap s a inser o de baterias carregadas recentem...

Page 48: ...ALIBRA O mostra a tela de calibra o inicia a calibra o seleciona as op es de calibra o 6 Tecla DIREITA leitura da amostra de turbidez seleciona ou confirma op es abre salta para submenus 3 Tecla PARA...

Page 49: ...es Pressione a tecla DIREITA para selecionar uma op o H duas maneiras de alterar as op es 1 Selecione uma op o de uma lista Use as teclas PARA CIMA e PARA BAIXO para selecionar uma op o Se caixas de s...

Page 50: ...o Descri o ID atual Selecione uma identifica o de uma lista A identifica o atual estar associada aos dados da amostra at que uma identifica o diferente seja selecionada Criar um novo ID de amostra Dig...

Page 51: ...dr o a ser inserido limitado 3 Pressione Ler A tela mostra a mensagem Estabilizando e em seguida mostra o resultado 4 Repita as etapas 2 e 3 com o padr o StablCal de 100 NTU e de 800 NTU Observa o Pre...

Page 52: ...T melhor usado em amostras que sedimentam rapidamente e que mudam continuamente de valor A leitura baseada em uma amostra corretamente preparada que est homog nea no in cio da leitura melhor aplicado...

Page 53: ...vel Observa o Guarde o pano de lubrifica o em um saco pl stico para mant lo limpo Guarde as cubetas de amostra A V I S O N o seque ao ar as cubetas de amostra Observa o Sempre guarde as cubetas de am...

Page 54: ...1 2 3 4 54 Portugu s...

Page 55: ...5 6 7 8 Portugu s 55...

Page 56: ...ico Erro Advert ncia Descri o Solu o Temperatura est muito alta Desligue o instrumento A temperatura ultrapassou os limites do medidor 60 C ou 140 F Desligue o medidor e deixe o esfriar RST Valor m di...

Page 57: ...computador 2 Baixe os dados armazenados para o computador 3 Exclua o registro de dados no m dulo Ocorreu uma falha ao excluir a ltima leitura Erro no armazenamento de dados Desligue e religue o medid...

Page 58: ...1 NTU 0 02 NTU FNU Rapidly Settling Turbidity RapidCal 0 40 NTU FNU 0 1000 NTU FNU 25 250 500 100 240V 50 60 Hz USB 4 AA USB 0 50 C 32 122 F 30 C 0 90 40 C 0 80 50 C 0 70 40 60 C 40 140 F USB 15 mL 0...

Page 59: ...ference Causing Equipment Regulation IECS 003 A A Cet appareil num rique de la classe A respecte toutes les exigences du R glement sur le mat riel brouilleur du Canada FCC 15 A FCC 15 1 2 FCC 15 A 1 2...

Page 60: ...21 1 5 2 6 3 7 4 8 22 22 2100Q 2100Qis 1 2100Q 2100Qis 6 2 7 20 100 800 NTU StablCal 3 CD 8 AA pk 4 4 9 StablCal 10 NTU 5 1 10 mL pk 6 60...

Page 61: ...NiMH NiMH 1 2V 1 5V 2500 mAH 90 AA 10 30 USB 23 1 2 4 AA 4 AA NiMH 3 23 61...

Page 62: ...24 1 5 2 6 3 7 4 ID ID 25 25 1 ID 9 NTU FNU 2 ID 10 3 11 4 12 5 13 6 14 7 15 8 16 62...

Page 63: ...1 2 3 4 1 2 1 2 24 12 24 12 24 12 ID ID ID 1 ID 2 ID ID ID ID ID ID ID ID ID ID ID ID 63...

Page 64: ...1 ID 2 ID ID ID ID ID ID ID 10 ID ID StablCal 1 2 20 NTU StablCal 3 4 100 NTU 800 NTU StablCal 2 3 2 5 6 1 2 12 12 Rapidly Settling Turbidity RST RST 95 RST 20 NTU 64...

Page 65: ...1 1 2 3 1 2 3 NiMH 23 61 1 2 3 4 AA 4 AA NiMH 4 65...

Page 66: ...1 2 3 4 66...

Page 67: ...5 6 7 8 67...

Page 68: ...USB ADC 180 RapidCal 90 180 2100Q 65 2100Qis 60 C 140 F RST 95 95 ID ID ID ID USB USB USB 1 USB 2 3 68...

Page 69: ...69...

Page 70: ...TU 0 02 NTU FNU Rapidly Settling Turbidity 0 40 NTU FTU Single step RapidCal 0 1000 NTU FNU 25 250 500 AC 100 240 V 50 60 Hz USB 4 AA NiMH USB 0 50 32 122 F 30 0 90 40 0 80 50 0 70 40 60 40 140 F USB...

Page 71: ...2005 8 12 EU 2002 96 EC IECS 003 A A Cet appareil num rique de la classe A respecte toutes les exigences du R glement sur le mat riel brouilleur du Canada FCC PART 15 A FCC 15 1 2 FCC 15 A 71...

Page 72: ...1 2 3 4 5 2100Q 2100Qis 0 1000 NTU FTU 4 AA USB 26 1 5 2 6 3 7 4 8 27 72...

Page 73: ...7 2100Q 2100Qis 1 2100Q 2100Qis 6 2 7 20 100 800 NTU StablCal 3 CD ROM 8 AA pk 4 4 9 StablCal 10 NTU 5 pk 6 1 10 mL NiMH NiMH NiMH 1 2V 1 5V 2500 AH NiMH 90 AA NiMH 10 30 USB 28 1 2 4 AA 4 AA NiMH 3 7...

Page 74: ...28 29 1 5 UP 2 6 RIGHT 3 DOWN 7 4 LEFT 74...

Page 75: ...ID ID 30 30 1 1 ID 9 NTU FNU 2 ID 10 Rapidly Settling Turbidity 3 11 4 OK 12 5 13 6 14 OK 7 AC 15 8 16 UP DOWN RIGHT 2 1 UP DOWN LEFT LEFT 2 UP DOWN 3 RIGHT 4 RIGHT OK ON OFF AC CD 3 75...

Page 76: ...1 OK 2 1 2 1 yyyy mm dd 24 yyyy mm dd 12 dd mm yyyy 24 dd mm yyyy 12 mm dd yyyy 24 mm dd yyyy 12 ID ID ID 1 ID 2 ID ID ID ID ID ID ID ID ID ID ID ID 1 ID 2 ID ID ID ID ID ID ID 10 ID ID StablCal 4 76...

Page 77: ...tablCal 3 4 100 NTU 800 NTU StablCal 2 3 2 5 6 CD 1 UP DOWN 2 1 3 X 12 3 12 Rapidly Settling Turbidity RST Rapidly Settling Turbidity RST 95 RST 20 NTU Rapidly Settling Turbidity Rapidly Settling Turb...

Page 78: ...1 2 3 1 2 3 NiMH 28 74 1 2 3 4 AA 4 AA NiMH 4 78...

Page 79: ...1 2 3 4 79...

Page 80: ...5 6 7 8 80...

Page 81: ...USB ADC 180 RapidCal 90 180 2100Q 78 2100Qis 60 140 F RST 95 Rapidly Settling Turbidity 95 ID ID ID ID 1 1 1 81...

Page 82: ...USB USB USB 1 USB 2 3 82...

Page 83: ...1 NTU 0 02 NTU FNU Rapidly Settling Turbidity 0 40 NTU FNU RapidCal 0 1000 NTU FNU 25 250 500 AC 100 240 V 50 60 Hz USB AA 4 NiMH USB 0 50 C 32 122 F 30 C 0 90 40 C 0 80 50 C 0 70 40 60 C 40 140 F USB...

Page 84: ...EU Directive 2002 96 EC IECS 003 A A Cet appareil num rique de la classe A respecte toutes les exigences du R glement sur le mat riel brouilleur du Canada FCC Part 15 Class A FCC Part 15 1 2 FCC Part...

Page 85: ...2 3 4 5 2100Q 2100Qis 0 1000 NTU FNU AA 4 USB 31 1 5 2 6 3 7 4 8 32 32 2100Q 2100Qis 1 2100Q 2100Qis 6 2 7 20 100 800 NTU StablCal 3 CD ROM 8 AA pk 4 4 9 StablCal 10 NTU 5 pk 6 1 10 mL 85...

Page 86: ...NiMH NiMH 1 5 V NiMH 1 2 V 2500 mAH NiMH 90 AA NiMH 10 30 USB 33 1 2 AA 4 AA NiMH 4 3 33 86...

Page 87: ...34 1 5 2 6 3 7 4 ID ID 35 35 1 ID 9 NTU Nephelometric Turbidity Unit FNU Formazin Turbidity Unit 2 ID 10 Rapidly Settling Turbidity 3 11 X 4 OK 12 5 13 6 14 OK 7 AC 15 8 16 87...

Page 88: ...1 2 3 4 OK ON OFF AC CD 1 2 1 2 yyyy mm dd 24h yyyy mm dd 12h dd mm yyyy 24h dd mm yyyy 12h mm dd yyyy 24h mm dd yyyy 12h ID ID ID 1 ID 2 ID ID ID ID ID ID ID ID ID 88...

Page 89: ...ID ID ID 1 ID 2 ID ID ID ID ID ID ID 10 ID ID StablCal 4 1 2 20 NTU StablCal 3 4 100 NTU 800 NTU StablCal 2 3 2 5 6 CD 1 2 3 X 12 3 12 89...

Page 90: ...Rapidly Settling Turbidity RST Rapidly Settling Turbidity RST 95 RST 20 NTU Rapidly Settling Turbidity Rapidly Settling Turbidity 5 1 1 2 3 1 2 3 NiMH 90...

Page 91: ...33 86 1 2 3 AA 4 AA NiMH 4 4 91...

Page 92: ...1 2 3 4 92...

Page 93: ...5 6 7 8 93...

Page 94: ...USB ADC 180 RapidCal 90 180 2100Q 91 2100Qis 60 C 140 F RST 95 Rapidly Settling Turbidity 95 ID ID ID ID 1 1 1 USB USB USB 1 USB 2 3 94...

Page 95: ...95...

Page 96: ...www hach com Hach Company 2010 All rights reserved Printed in the U S A 01 2010 Edition 1...

Reviews: