30
Installation
1.
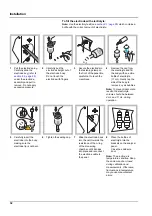
Place the reagent containers in the instrument (
).
2.
Insert the tubing in the reagent containers.
3.
Screw the reagents to the supplied caps.
Table 3 Reagents and measuring ranges
Reagent
Lid color
Measuring range 1
0.02–5 mg/L
Measuring range 2
0.05–20 mg/L
Measuring range 3
1–100 mg/L
Measuring range 4
10–1000 mg/L
EU US
EU US EU US EU US EU US
CAL 1:
Standard 1
(low)
transparent
gray
BCF1148 25146-54 BCF1010
28941-54
(1 mg/L)
BCF1020
28943-54
(10 mg/L)
BCF1012
28258-54
(50 mg/L)
CAL 2:
Standard 2
(high)
light blue
BCF1149 25147-54 BCF1011
28943-54
(10 mg/L)
BCF1021
58958-54
(50 mg/L)
BCF1013
28259-54
(500 mg/L)
Reagent
orange
BCF1009 28944-52 BCF1009 28944-52 BCF1009 28944-52 BCF1009 28944-52
Cleaning
solution
gray
LCW867 28942-46 LCW867
28942-46 LCW867
28942-46 LCW867
28942-46
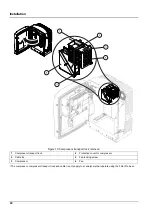
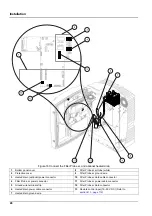
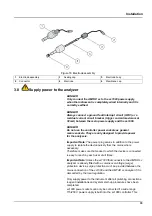
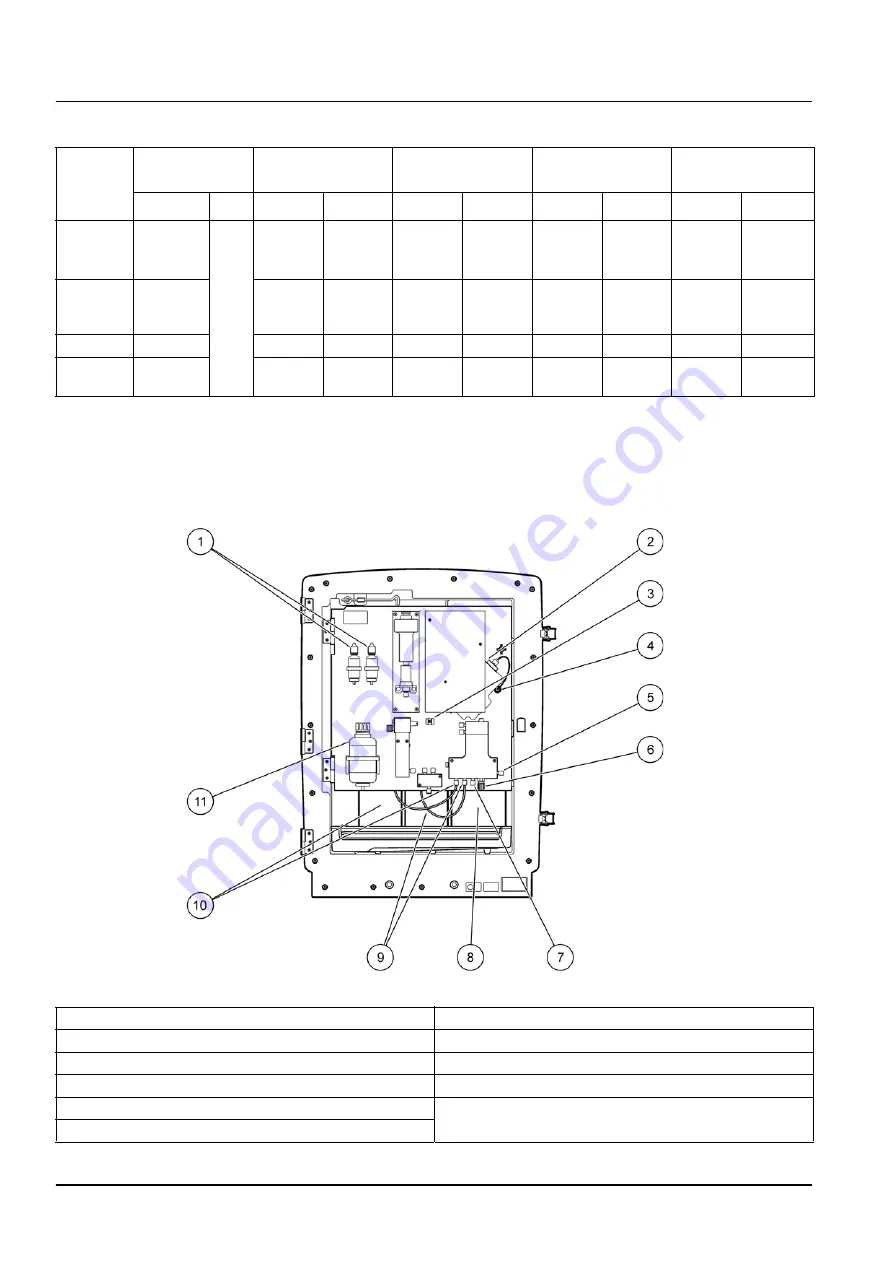
Figure 17 Chemicals and reagents in the AMTAX sc (Refer to
for more information)
1
Electrolyte solution replacement bottles
7
Sample line
2
Electrode assembly
8
Reagent
3
Fastener for membrane cap
9
Standard solution: High standard
4
Electrode panel connector
10
Standard solution: Low standard
5
Connection to cuvette
11
Cleaning solution
6
Drain
Summary of Contents for AMTAX sc
Page 2: ......
Page 7: ...7 Specifications Figure 1 Instrument dimensions AMTAX sc...
Page 12: ...12 General Information...
Page 36: ...36 System Start Up...
Page 44: ...44 Operation...
Page 56: ...56 Maintenance...
Page 64: ...64 Troubleshooting...
Page 69: ...69 Replacement Parts and Accessorie Figure 23 Analyzer enclosure AMTAX indoor sc...
Page 70: ...70 Replacement Parts and Accessorie Figure 24 Analyzer panel overview...
Page 71: ...71 Replacement Parts and Accessorie Figure 25 Analyzer panel front view details...
Page 72: ...72 Replacement Parts and Accessorie Figure 26 Analyzer panel back view details...
Page 76: ...76 Warranty and liability...

