54
Maintenance
6.7 Shut the analyzer down
No special measures are necessary for taking out of operation for a
short period (up to a week in frost-free ambient conditions).
Important note:
If the power supply to the controller is interrupted,
frost damage may occur. Make sure that the instrument and tubing
cannot freeze.
1.
Interrupt the measurement and switch the instrument to the
service state (MAINTENANCE>TEST/MAINT.>SERVICE
MODE).
2.
Disconnect the AMTAX sc from the controller.
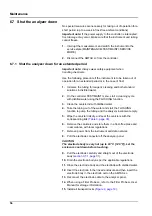
6.7.1 Shut the analyzer down for an extended period
Important note:
Always wear safety equipment when
handling chemicals.
Use the following procedure if the instrument is to be taken out of
operation for an extended period or in the case of frost.
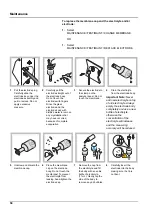
1.
Immerse the tubing for reagent, cleaning and both standard
solutions in distilled water.
2.
On the controller TEST/MAINT menu, start a cleaning cycle
with distilled water using the FLUSHING function.
3.
Clean the canister lid with distilled water.
4.
Take the tubing out of the water and start the FLUSHING
function to pump the tubing and the analysis instrument empty.
5.
Wipe the canister lids dry and seal the canisters with the
corresponding lids (
6.
Remove the canisters and store them in a frost-free place and
in accordance with local regulations.
7.
Remove power from the instrument and data network.
8.
Pull the electrode connector off the analyzer panel.
CAUTION
The electrode body is very hot (up to 60 °C [140 °F]). Let the
enclosure cool down before touching.
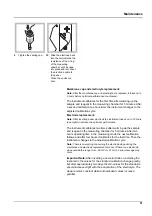
9.
Pull the electrode carefully and straight out of the electrode
body (
10.
Drain the electrode body as per the applicable regulations.
11.
Rinse the electrode body and the electrode with distilled water.
12.
Insert the electrode in the rinsed enclosure and then insert the
electrode body in the electrode cell on the AMTAX sc.
13.
Reconnect the electrode cable to the analyzer panel.
14.
When using a Filter Probe sc, refer to the Filter Probe sc User
Manual for storage information.
15.
Install all transport locks (
Summary of Contents for AMTAX sc
Page 2: ......
Page 7: ...7 Specifications Figure 1 Instrument dimensions AMTAX sc...
Page 12: ...12 General Information...
Page 36: ...36 System Start Up...
Page 44: ...44 Operation...
Page 56: ...56 Maintenance...
Page 64: ...64 Troubleshooting...
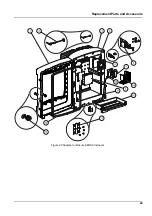
Page 69: ...69 Replacement Parts and Accessorie Figure 23 Analyzer enclosure AMTAX indoor sc...
Page 70: ...70 Replacement Parts and Accessorie Figure 24 Analyzer panel overview...
Page 71: ...71 Replacement Parts and Accessorie Figure 25 Analyzer panel front view details...
Page 72: ...72 Replacement Parts and Accessorie Figure 26 Analyzer panel back view details...
Page 76: ...76 Warranty and liability...

