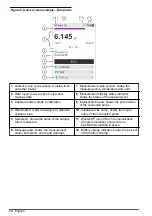
6.3 Main menu
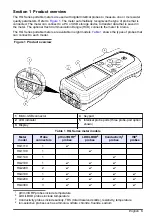
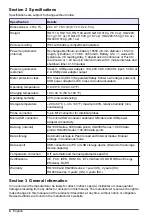
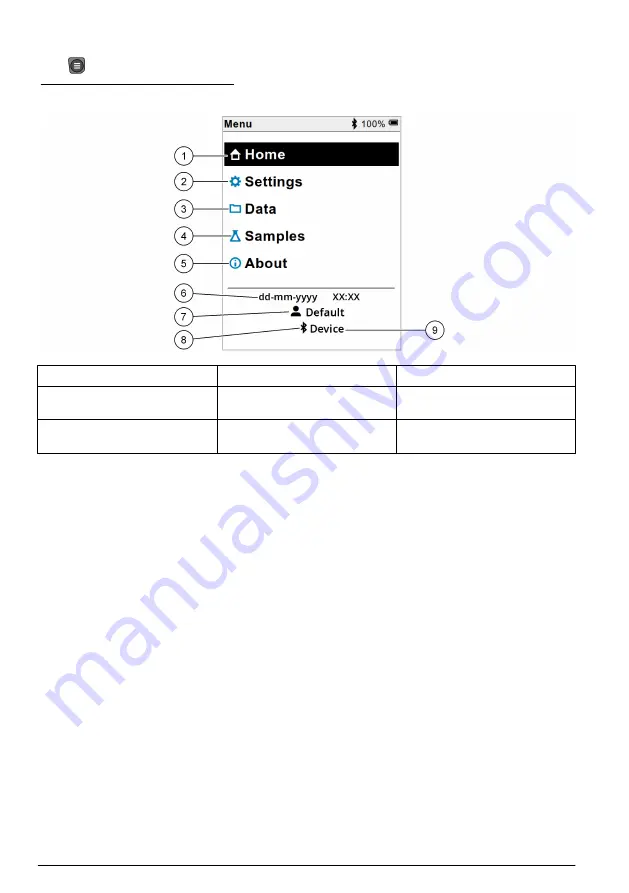
Push
to go to the main menu. Refer to
.
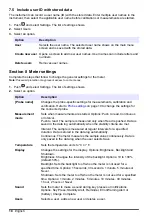
Figure 12 Main menu description
1
Home screen
4
Sample ID menu
7
User ID
2
Settings menu
5
About meter screen
8
Bluetooth
®
icon (if HCD is
installed)
3
Data menu
6
Date and time
9
Bluetooth
®
device ID (if
HCD is installed)
Section 7 Operation
This section gives general operation instructions for the meter. For more complete instructions, refer
to the on-screen instructions in the meter or in the user manual for the probe.
7.1 Measure samples
The steps that follow are general steps to measure samples with the meter.
1.
Select the measurement mode. Refer to
on page 18.
2.
Prepare the sample for measurement. Refer to the on-screen instructions in the meter or in the
user manual for the probe.
3.
Measure the sample as follows:
•
Push to read mode:
Select Read (or Read all) to measure the sample value. The meter
automatically saves the value.
•
Interval mode:
Select Start (or Start all) to start the measurements. The meter automatically
measures and saves the sample value at the specified time intervals. Select Stop (or Stop all)
to stop the measurements.
•
Continuous mode:
The meter measures the sample value continuously. Select Save (or Save
all) to save the value that shows on the display screen.
After each measurement, the display shows the result. The save icon shows on the display if the
result is saved in the data log.
16
English
Summary of Contents for HQ1110
Page 2: ......
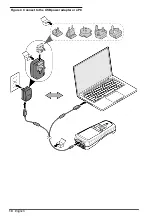
Page 12: ...Figure 4 Connect to the USB power adapter or a PC 10 English...
Page 37: ......


