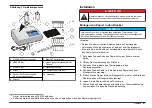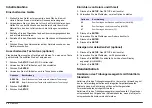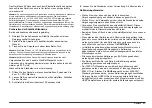
Push
ENTER
when signal averaging is on to erase data in the signal
averaging buffer and provide an immediate update on the display as
necessary. This is especially useful when measuring samples with large
differences in turbidity.
To change the number of measurements that are used to calculate the
average reading (default=10):
1.
Push
SETUP
. The SETUP light turns on.
2.
Select 09 using the arrow keys.
3.
Push
ENTER
.
4.
Use the arrow keys to select the number of measurements—1 to 15.
Note: If a number greater than 15 is selected, 15 measurements will be used.
5.
Push
ENTER
.
6.
Push
SETUP
.
Ratio on or off
Ratio on provides very good linearity, calibration stability and a wide
measurement range. Ratio on helps correct for interference when color
is present in the sample that absorbs at the wavelength of incident light.
The manufacturer recommends that Ratio on be used for most
measurements. Ratio must be on to measure samples greater than
40 NTUs (268 nephelos or 9.8 EBCs).
Ratio can be turned on for NTU, EBC, NEP and ASC -1- and -2-
measurements.
Push
RATIO
to turn Ratio on or off. The Ratio light is on when Ratio is
on.
Notes:
• If the sample being measured is greater than 40 NTU (or equivalent)
and Ratio is off, the display will show 9s and the RATIO light will flash.
Push
RATIO
to turn Ratio on and remove the over-range condition.
• Measurements with Ratio on and measurements with Ratio off are
almost the same for turbidity measurements that are less than 40 NTU
if interferences caused by color or light absorbing particles are not
present.
Maintenance
D A N G E R
Multiple hazards. Only qualified personnel must conduct the tasks
described in this section of the document.
Clean the instrument
Keep the instrument clean to get continuous and accurate operation.
N O T I C E
Never use cleaning agents such as turpentine, acetone or similar products to
clean the instrument including the keypad.
1.
Turn the instrument off and disconnect the power cord.
2.
Clean the surface of the instrument with a soft, moist cloth and a
weak soap solution.
3.
Dry the surface of the instrument with a lint-free cloth.
Change the filter assembly
N O T I C E
The filter assembly is fragile and must be handled with care to prevent damage.
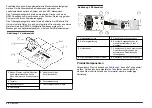
1.
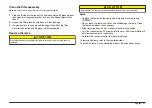
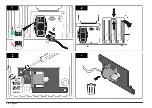
Hold the tab of the filter assembly and pull straight up and out of the
instrument.
2.
Store the filter assembly in a clean container.
3.
Before installation, clean the lens of the filter assembly. Refer to
on page 17.
4.
Hold the tab of the filter assembly with the arrows pointing toward the
front of the instrument.
5.
Push the filter assembly fully into the housing.
16
English
Summary of Contents for Lange 2100AN
Page 18: ...1 18 English...
Page 39: ...1 Deutsch 39...
Page 60: ...1 60 Italiano...
Page 80: ...1 80 Fran ais...
Page 102: ...1 102 Espa ol...
Page 122: ...1 122 e tina...
Page 142: ...1 142 Dansk...
Page 162: ...1 162 Nederlands...
Page 182: ...1 182 Polski...
Page 202: ...1 202 Svenska...
Page 222: ...1 222 Suomi...
Page 241: ...1 Magyar 241...
Page 261: ...1 Rom n 261...
Page 281: ...1 T rk e 281...
Page 288: ...12 2005 2002 96 IECS 003 A IECS IECS FCC 15 A 15 FCC 1 2 15 FCC 1 2 3 4 5 288...
Page 292: ...1 Calibration Setup 1 NTU NEP EBC CU T Abs 292...
Page 296: ...StablCal 1 302 2 USEPA 302 3 4 CAL Zero CAL Zero 00 NTU 5 0 1 NTU 6 296...
Page 298: ...30 60 24 298...
Page 299: ...1 30 mL 2 3 4 5 6 299...
Page 300: ...7 RS232 PRINT RANGE MANUAL AUTO 40 NTU 268 nephelo 9 8 EBC 300...
Page 302: ...1 2 3 1 2 3 302 4 5 1 2 3 30 60 302...
Page 303: ...1 303...
Page 307: ......


