56
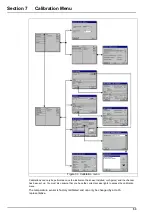
Calibration Menu
7.3 Zero calibration
7.4 100% humid air calibration (high range sensors only)
7.5 High level adjustment
7.6 Sensor verification
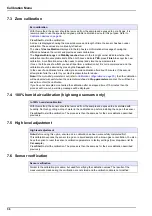
Zero calibration
With this method, the sensor should be removed from the sample and exposed to pure N
2
gas. It is
recommended to use the specially designed portable calibration device for this purpose. Refer to
Calibration devices on page 36
.
Press
Start
to start the calibration.
A screen is displayed showing the measured values and length of time the sensor has been under
calibration. These values are continually refreshed.
The value
% last calibration
displayed in the top box is an informational message showing the
difference between the current and previous sensor calibrations.
The
Signal within range
and
Stability reached
boxes in the top right corner indicate whether the
calibration is within acceptable limits. When both boxes indicate
YES
, press
Finish
to accept the new
calibration. A confirmation screen then asks to accept and store the new parameters.
If one or both boxes show
NO
, you can still perform a calibration but it is not recommended, and the
calibration should be aborted by pressing the
Cancel
button.
In the case of a calibration failure, attempt a second calibration after about 5 minutes. If the second
attempt also fails, then refer to your Hach representative for advice.
Note:
If the Auto-End parameter is set (refer to
Calibration configuration on page 55
), then the calibration
will be deemed successful when the parameters defined in
Stop parameters
are met. You will then be
asked to confirm the calibration.
If you have not accepted or cancelled the calibration after an elapsed time of 10 minutes then the
process will time-out, a warning message will be displayed.
In 100% humid air calibration
With this method, the sensor should be removed from the sample and exposed to air saturated with
humidity. Do this by putting a drop of water in the calibration cap before installing the cap on the sensor.
Press
Start
to start the calibration. The process is then the same as for the zero calibration described
previously.
High level adjustment
Note:
Before using this option, ensure a zero calibration has been successfully completed first.
This calibration exposes the sensor to a gas or a liquid sample with a known gas concentration. You also
have the option to reset the sensor’s calibration parameters to factory settings (from drop-down list for
Cal. sample
).
Press
Start
to start the calibration. The process is then the same as for the zero calibration described
previously.
Sensor verification
Similar to the calibration procedure, but used for verifying the calibration values. The results of the
measurements made during the verification are not stored and the calibration data is not modified.
Summary of Contents for ORBISPHERE K1200
Page 5: ...4 Table of Contents...
Page 13: ...12 General Information...
Page 39: ...38 Installation...
Page 45: ...44 User Interface...
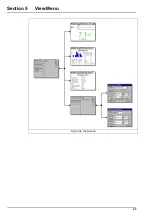
Page 46: ...45 Section 5 View Menu Figure 34 View menu...
Page 49: ...48 View Menu...
Page 59: ...58 Calibration Menu...
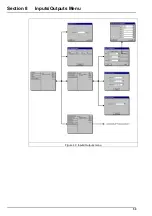
Page 60: ...59 Section 8 Inputs Outputs Menu Figure 40 Inputs Outputs menu...
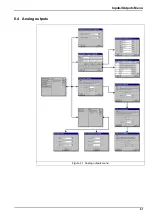
Page 62: ...61 Inputs Outputs Menu 8 4 Analog outputs Figure 41 Analog outputs menu...
Page 69: ...68 Inputs Outputs Menu...
Page 86: ...85 Section 11 Products Menu Figure 44 Products menu...
Page 89: ...88 Global Configuration Menu...
Page 90: ...89 Section 13 Services Menu Figure 46 Services menu Part 1...
Page 91: ...90 Services Menu Figure 47 Services menu Part 2...


