1.
Push
MENU
.
2.
Go to PROGRAM SETUP>RESTORE.
3.
Select YES.
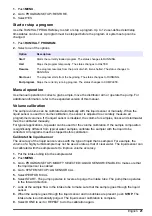
Start or stop a program
Use the RUN/HALT PROGRAM key to start or stop a program. Up to 12 user-defined start/stop
times/dates can be set. A program must be stopped before the program or system setup can be
changed.
1.
Push
RUN/HALT PROGRAM
.
2.
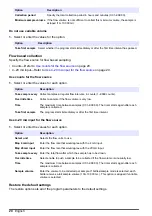
Select one of the options.
Option
Description
Start
Starts the currently loaded program. The status changes to RUNNING.
Halt
Stops the program temporarily. The status changes to HALTED.
Resume
The program resumes from the point at which it was halted. The status changes to
RUNNING.
Start over
The program starts from the beginning. The status changes to RUNNING.
End program
Stops the currently running program. The status changes to COMPLETE.
Manual operation
Use manual operation to collect a grab sample, move the distributor arm or operate the pump. For
additional information, refer to the expanded version of this manual.
Volume calibration
The sample volume can be calibrated automatically with the liquid sensor or manually. When the
liquid sensor is used for volume calibration, the sensor is adjusted to accurately measure all
programmed volumes. If the liquid sensor is disabled, the volume for samples, rinses and stormwater
must be calibrated manually.
For typical applications, tap water can be used for the volume calibration. If the sample composition
is significantly different from typical water samples, calibrate the sampler with the liquid to be
collected. All programs must be stopped before calibration.
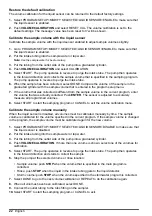
Calibrate the liquid sensor
The accuracy of the liquid sensor varies with the type of liquid that is sampled. For example, the
volume of a highly turbid sample may not be as accurate as that of clear water. The liquid sensor can
be calibrated with the sample water to improve volume accuracy.
1.
Put the intake tubing into the sample water.
2.
Push
MENU
.
3.
Go to PROGRAM SETUP>MODIFY SELECTED>LIQUID SENSOR>ENABLE to make sure that
the liquid sensor is enabled.
4.
Go to SYSTEM SETUP>LIQ SENSOR CAL.
5.
Select PERFORM CAL.
6.
Select START. The pump operates in reverse to purge the intake tube. The pump then operates
in the forward direction.
7.
Look at the sample flow in the intake tube to make sure that the sample goes through the liquid
sensor.
8.
When the sample goes through the liquid sensor and no bubbles are present, push
STOP
. The
intake tube is automatically purged. The liquid sensor calibration is complete.
9.
Select DONE to exit or REPEAT to do the calibration again.
English
21
Summary of Contents for SD900
Page 2: ...English 3 Fran ais 28 Espa ol 54 Portugu s 80 106 129 153 2...
Page 25: ...English 25...
Page 103: ...Portugu s 103...
Page 109: ...FCC 15 A 1 2 3 4 5 SD900 1 1 1 6 2 7 3 8 4 9 5 10 21 L 5 5 gal 2 109...
Page 111: ...110 106 111 114 106 1 111 2 3 111...
Page 113: ...4 1 1 1 6 2 1 24 7 21 L 5 5 gal 3 1 8 8 4 1 2 4 9 5 1 111 2 1 112 3 5 8 4 8 113...
Page 115: ...6 1 3 2 7 8 115...
Page 117: ...15 A 117 1 2 10 3 117...
Page 118: ...10 50 C 122 F 1 3 5 15 2 11 MENU ENTER BACK 118...
Page 125: ...12 1 12 2 3 4 5 O 6 12 1 3 O 2 4 125...
Page 126: ...4 6 m 15 2 m 15 ft 50 ft 1 2 3 4 5 126...
Page 127: ...126 127...
Page 128: ...1 2 13 3 4 13 1 3 5 2 4 128...
Page 131: ...Web IECS 003 A 131...
Page 133: ...1 1 6 2 7 3 8 4 9 5 10 21 L 2 HACH Japan 2 1 6 2 7 AC 3 8 4 9 5 10 133...
Page 136: ...1 5 137 4 1 1 1 6 2 1 24 7 21 L 3 1 8 8 4 2 2 4 9 5 1 135 2 1 135 3 5 8 1 4 8 136...
Page 138: ...6 1 3 2 7 8 138...
Page 140: ...GFCI GFI 15 A PE 141 AC 140...
Page 141: ...1 2 10 3 10 50 C 1 3 5 15 2 AC 11 MENU ENTER BACK 141...
Page 149: ...12 1 12 2 3 4 5 O 6 12 1 3 O 2 4 149...
Page 150: ...4 6 m 15 2 m 1 2 Web 3 4 5 150...
Page 151: ...150 151...
Page 152: ...1 2 13 3 4 13 1 3 5 2 4 152...
Page 155: ...IECS 003 A 155...
Page 157: ...1 1 6 2 7 3 8 4 9 5 10 21 L 5 5 gal 2 2 1 6 2 7 AC 3 8 4 9 Teflon 5 10 157...
Page 158: ...XXX 1993 4 15 OSHA CFR 1910 146 250 000 19 5 23 5 H2S 10 ppm 158 153 159 161 153 158...
Page 160: ...4 1 1 1 6 2 24 1 7 21 L 5 5 gal 3 8 1 8 4 2 4 1 9 5 1 159 2 1 159 3 5 8 1 4 8 160...
Page 162: ...6 1 3 2 7 8 162...
Page 164: ...GFCI GFI 15 A PE 165 AC 164...
Page 165: ...1 2 10 3 10 50 C 122 F 1 3 5 15 2 AC 11 MENU ENTER BACK 165...
Page 172: ...0 1 MANUAL OPERATION 2 GRAB SAMPLE 3 4 5 6 7 ENTER 8 172...
Page 173: ...12 1 12 2 3 4 5 6 12 1 3 2 4 4 6 m 15 2 m 15 ft 50 ft 1 2 3 4 5 173...
Page 174: ...174...
Page 175: ...173 1 2 13 3 4 13 1 3 5 2 4 175...
Page 176: ......
Page 177: ......


