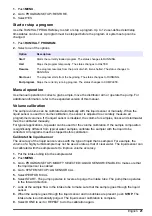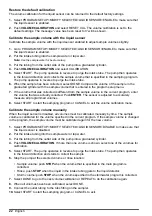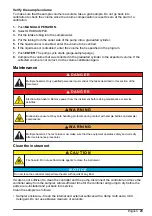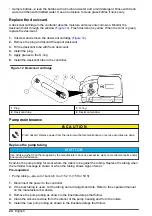
Restore the default calibration
The volume calibration for the liquid sensor can be returned to the default factory settings.
1.
Select PROGRAM SETUP>MODIFY SELECTED>LIQUID SENSOR>ENABLE to make sure that
the liquid sensor is enabled.
2.
Push
VOLUME CALIBRATION
and select RESET CAL. The volume calibration is set to the
default settings. The message “value has been reset to 0” will be shown.
Calibrate the sample volume with the liquid sensor
Calibrate the sample volume with the liquid sensor enabled to adjust sample volumes slightly.
1.
Go to PROGRAM SETUP>MODIFY SELECTED>LIQUID SENSOR>ENABLE to make sure that
the liquid sensor is enabled.
2.
Put the intake tubing into the sample water or tap water.
Note: Use the sample water for best accuracy.
3.
Put the tubing from the outlet side of the pump into a graduated cylinder.
4.
Push
VOLUME CALIBRATION
and select CALIBRATION.
5.
Select START. The pump operates in reverse to purge the intake tube. The pump then operates
in the forward direction and collects the sample volume that is specified in the sampling program.
The pump operates in reverse to purge the intake tube.
6.
When the sample has been collected, select DONE. Compare the volume of the sample in the
graduated cylinder with the sample volume that is entered in the program setup menu.
7.
If the volume that was collected is different from the sample volume in the current program, enter
the volume that was actually collected. Push
ENTER
. The sensor is adjusted to accurately
measure all programmed volumes.
8.
Select START to start the sampling program or CANCEL to exit the volume calibration menu.
Calibrate the sample volume manually
When the liquid sensor is disabled, all volumes must be calibrated manually by time. The sample
volume is calibrated for the volume specified in the current program. If the sample volume is changed
in the program, the sample volume must be calibrated again for the new volume.
1.
Select PROGRAM SETUP>MODIFY SELECTED>LIQUID SENSOR>DISABLE to make sure that
the liquid sensor is disabled.
2.
Put the intake tubing into the sample water or tap water.
3.
Put the tubing from the outlet side of the pump into a graduated cylinder.
4.
Push
VOLUME CALIBRATION
. If more than one volume is shown, select one of the volumes for
calibration.
5.
Select START. The pump operates in reverse to purge the intake tube. The pump then operates
in the forward direction and starts to collect the sample.
6.
Stop the pump at the selected volume or rinse location:
• Sample volume: push
STOP
when the volume that is specified in the main program is
collected.
• Rinse: push
STOP
when the liquid in the intake tubing gets to the liquid detector.
• Storm volume: push
STOP
when the volume specified in the stormwater program is collected.
7.
Select DONE to go to the next volume calibration or REPEAT to do the calibration again.
8.
When all volumes have been calibrated, select DONE.
9.
Connect the outlet tubing to the tube fitting on the sampler.
10.
Select START to start the sampling program or CANCEL to exit.
22
English
Summary of Contents for SD900
Page 2: ...English 3 Fran ais 28 Espa ol 54 Portugu s 80 106 129 153 2...
Page 25: ...English 25...
Page 103: ...Portugu s 103...
Page 109: ...FCC 15 A 1 2 3 4 5 SD900 1 1 1 6 2 7 3 8 4 9 5 10 21 L 5 5 gal 2 109...
Page 111: ...110 106 111 114 106 1 111 2 3 111...
Page 113: ...4 1 1 1 6 2 1 24 7 21 L 5 5 gal 3 1 8 8 4 1 2 4 9 5 1 111 2 1 112 3 5 8 4 8 113...
Page 115: ...6 1 3 2 7 8 115...
Page 117: ...15 A 117 1 2 10 3 117...
Page 118: ...10 50 C 122 F 1 3 5 15 2 11 MENU ENTER BACK 118...
Page 125: ...12 1 12 2 3 4 5 O 6 12 1 3 O 2 4 125...
Page 126: ...4 6 m 15 2 m 15 ft 50 ft 1 2 3 4 5 126...
Page 127: ...126 127...
Page 128: ...1 2 13 3 4 13 1 3 5 2 4 128...
Page 131: ...Web IECS 003 A 131...
Page 133: ...1 1 6 2 7 3 8 4 9 5 10 21 L 2 HACH Japan 2 1 6 2 7 AC 3 8 4 9 5 10 133...
Page 136: ...1 5 137 4 1 1 1 6 2 1 24 7 21 L 3 1 8 8 4 2 2 4 9 5 1 135 2 1 135 3 5 8 1 4 8 136...
Page 138: ...6 1 3 2 7 8 138...
Page 140: ...GFCI GFI 15 A PE 141 AC 140...
Page 141: ...1 2 10 3 10 50 C 1 3 5 15 2 AC 11 MENU ENTER BACK 141...
Page 149: ...12 1 12 2 3 4 5 O 6 12 1 3 O 2 4 149...
Page 150: ...4 6 m 15 2 m 1 2 Web 3 4 5 150...
Page 151: ...150 151...
Page 152: ...1 2 13 3 4 13 1 3 5 2 4 152...
Page 155: ...IECS 003 A 155...
Page 157: ...1 1 6 2 7 3 8 4 9 5 10 21 L 5 5 gal 2 2 1 6 2 7 AC 3 8 4 9 Teflon 5 10 157...
Page 158: ...XXX 1993 4 15 OSHA CFR 1910 146 250 000 19 5 23 5 H2S 10 ppm 158 153 159 161 153 158...
Page 160: ...4 1 1 1 6 2 24 1 7 21 L 5 5 gal 3 8 1 8 4 2 4 1 9 5 1 159 2 1 159 3 5 8 1 4 8 160...
Page 162: ...6 1 3 2 7 8 162...
Page 164: ...GFCI GFI 15 A PE 165 AC 164...
Page 165: ...1 2 10 3 10 50 C 122 F 1 3 5 15 2 AC 11 MENU ENTER BACK 165...
Page 172: ...0 1 MANUAL OPERATION 2 GRAB SAMPLE 3 4 5 6 7 ENTER 8 172...
Page 173: ...12 1 12 2 3 4 5 6 12 1 3 2 4 4 6 m 15 2 m 15 ft 50 ft 1 2 3 4 5 173...
Page 174: ...174...
Page 175: ...173 1 2 13 3 4 13 1 3 5 2 4 175...
Page 176: ......
Page 177: ......


