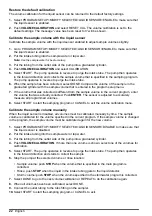
Confined spaces are not designed for human occupancy. Confined spaces have a restricted entry
and contain known or potential hazards. Examples of confined spaces include manholes, stacks,
pipes, vats, switch vaults and other similar locations.
Standard safety procedures must always be obeyed before entry into confined spaces and/or
locations where hazardous gases, vapors, mists, dusts or fibers can be present. Before entry into a
confined space, find and read all procedures that are related to confined space entry.
Mechanical installation
Site installation guidelines
D A N G E R
Explosion hazard. The instrument is not approved for installation in hazardous locations.
Refer to the guidelines that follow for the site location evaluation.
• Obey all the safety precautions if the sampler is installed in a confined space. Refer to
on page 8.
• Make sure that the temperature at the location is in the specification range. Refer to
on page 3.
• Install the sampler on a level surface or hang the sampler with the suspension harness, the
support bracket or the spanner bar. Refer to
Install the sampler in a manhole
the applicable installation documentation.
• As near the sample source as possible to decrease analysis delay. Refer to
on page 12.
• For limitations on transport velocity and maximum vertical lift, refer to
on page 3.
Install the sampler in a manhole
Install the sampler above the sample water in a manhole. Install the sampler with a spanner bar or a
support bracket. Install the spanner bar inside the manhole. The spanner bar is supported by
pressure against the walls. The support bracket has the same width as the manhole cover. Install the
support bracket directly below the cover for support.Refer to the expanded manual on the
manufacturer's website.Refer to the documentation supplied with the accessories to install the
sampler.
Install the distributor or full-bottle shutoff (optional)
The distributor or full-bottle shutoff assembly is typically installed at the factory. Refer to the
distributor or full-bottle shutoff documentation for installation.
Prepare the sampler
Clean the sample bottles
Clean the sample bottles and caps with a brush, water and a mild detergent. Flush the containers
with fresh water followed by a distilled water rinse.
Install a single bottle
Use a single bottle to collect one composite sample. When the bottle is full, the full bottle shut-off
stops the sample program.
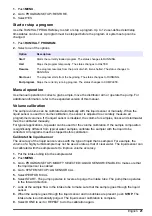
1.
Clean the sample bottles. Refer to
on page 9.
2.
Install the sample bottle as shown in
.
English
9
Summary of Contents for SD900
Page 2: ...English 3 Fran ais 28 Espa ol 54 Portugu s 80 106 129 153 2...
Page 25: ...English 25...
Page 103: ...Portugu s 103...
Page 109: ...FCC 15 A 1 2 3 4 5 SD900 1 1 1 6 2 7 3 8 4 9 5 10 21 L 5 5 gal 2 109...
Page 111: ...110 106 111 114 106 1 111 2 3 111...
Page 113: ...4 1 1 1 6 2 1 24 7 21 L 5 5 gal 3 1 8 8 4 1 2 4 9 5 1 111 2 1 112 3 5 8 4 8 113...
Page 115: ...6 1 3 2 7 8 115...
Page 117: ...15 A 117 1 2 10 3 117...
Page 118: ...10 50 C 122 F 1 3 5 15 2 11 MENU ENTER BACK 118...
Page 125: ...12 1 12 2 3 4 5 O 6 12 1 3 O 2 4 125...
Page 126: ...4 6 m 15 2 m 15 ft 50 ft 1 2 3 4 5 126...
Page 127: ...126 127...
Page 128: ...1 2 13 3 4 13 1 3 5 2 4 128...
Page 131: ...Web IECS 003 A 131...
Page 133: ...1 1 6 2 7 3 8 4 9 5 10 21 L 2 HACH Japan 2 1 6 2 7 AC 3 8 4 9 5 10 133...
Page 136: ...1 5 137 4 1 1 1 6 2 1 24 7 21 L 3 1 8 8 4 2 2 4 9 5 1 135 2 1 135 3 5 8 1 4 8 136...
Page 138: ...6 1 3 2 7 8 138...
Page 140: ...GFCI GFI 15 A PE 141 AC 140...
Page 141: ...1 2 10 3 10 50 C 1 3 5 15 2 AC 11 MENU ENTER BACK 141...
Page 149: ...12 1 12 2 3 4 5 O 6 12 1 3 O 2 4 149...
Page 150: ...4 6 m 15 2 m 1 2 Web 3 4 5 150...
Page 151: ...150 151...
Page 152: ...1 2 13 3 4 13 1 3 5 2 4 152...
Page 155: ...IECS 003 A 155...
Page 157: ...1 1 6 2 7 3 8 4 9 5 10 21 L 5 5 gal 2 2 1 6 2 7 AC 3 8 4 9 Teflon 5 10 157...
Page 158: ...XXX 1993 4 15 OSHA CFR 1910 146 250 000 19 5 23 5 H2S 10 ppm 158 153 159 161 153 158...
Page 160: ...4 1 1 1 6 2 24 1 7 21 L 5 5 gal 3 8 1 8 4 2 4 1 9 5 1 159 2 1 159 3 5 8 1 4 8 160...
Page 162: ...6 1 3 2 7 8 162...
Page 164: ...GFCI GFI 15 A PE 165 AC 164...
Page 165: ...1 2 10 3 10 50 C 122 F 1 3 5 15 2 AC 11 MENU ENTER BACK 165...
Page 172: ...0 1 MANUAL OPERATION 2 GRAB SAMPLE 3 4 5 6 7 ENTER 8 172...
Page 173: ...12 1 12 2 3 4 5 6 12 1 3 2 4 4 6 m 15 2 m 15 ft 50 ft 1 2 3 4 5 173...
Page 174: ...174...
Page 175: ...173 1 2 13 3 4 13 1 3 5 2 4 175...
Page 176: ......
Page 177: ......


