Section 4
Page 23
8544operations.fm
Setting the Time and Date
4.3 Setting the Time and Date
Before programming the sampler for the first time, check the real time clock
and date settings.
Note:
When setting the time and
date, the
*
key causes the display to
back up to the previously flashing
character.
1.
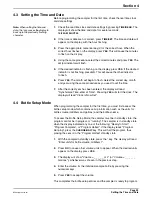
Check the real-time clock and date settings by pressing
TIME/READ
. The
display will show the time and date for several seconds:
10:35 AM 24OCT00
2.
If the time or date are not correct, press
TIME/SET
. The time and date will
appear on the display, with the hour flashing.
3.
Press the appropriate numerical key(s) for the correct hour. When the
correct hour flashes on the display, press
YES
. This will cause the minutes
to flash on the display.
4.
Using the same procedure, select the correct minutes and press
YES
. The
am/pm indicator will flash.
5.
If the desired indicator is flashing on the display, press
YES
. If the desired
indicator is not flashing, press
NO
. This will cause the other indicator
to flash.
6.
Press
YES
. The month will begin to flash. Select the correct day, month
and year using the same procedure as you used to set the time.
7.
After the correct year has been entered, the display will read
"Synchronize Time-enter at Time
"
. Pressing
YES
will start the clock. The
display will read "Clock is Now Set
"
.
4.4 Bottle Setup Mode
When programming the sampler for the first time, you must first access the
bottle setup mode which contains set-up information such as the units for
bottle volume (milliliters and gallons) and the bottle volume.
To access the Bottle Setup Mode, the sampler must be in standby state, the
program cannot be in progress or "running". The sampler is in standby state
when the display indicated any one of the following: "Ready to Start",
"Program Complete", or "Program Halted". If the display reads "Program
Running", press the
CHANGE/HALT
key. This will halt the program, thus
placing the sensor in the “Program Halted” standby state.
1.
With the sampler in standby state, press the * key. The display will read
“Enter units for bottle volume, milliliters?”.
2.
Press
NO
to cause other volume units to appear. When the desired units
appear on the display, press
YES
.
3.
The display will show
"
Volume = _ _ _ _ _ mL
"
(or "Volume = _ _ _ _ _
Gallons
")
, whichever was chosen in the previous step.
4.
Enter the volume for the individual sample bottle by pressing the
numerical keys.
5.
Press
YES
to accept the volume.
This completes the bottle setup entries and the sampler is ready to program.
Summary of Contents for SIGMA 900
Page 2: ...Visit http www hach com...
Page 6: ...Visit http www hach com...
Page 20: ...Visit http www hach com...
Page 32: ...Visit http www hach com...
Page 40: ...Visit us at www hach com...
Page 42: ...Visit http www hach com...
Page 44: ...Visit http www hach com...


