background image


8

Maintenance & Care_________________________________________________ 


Monthly Cleaning and Maintenance 

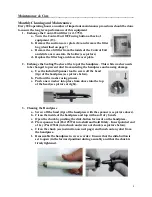
Every 200 operating hours a number of important maintenance procedures should be done 
to ensure the long term performance of this equipment 

1.


Exchange the Control Unit filter (Art. 3752).   

a.


Turn the Control Unit OFF using button at back of 
equipment (13). 

b.


Remove the suction cover plate (14) and remove the filter 
bag (described on page 7) 

c.


Remove the old filter from the inside of the Control Unit 
and slide a new one into the holder (see picture)  

d.


Replace the filter bag and close the over plate. 


2.


Exchange the Sealing Washer at the top of the handpiece.  This white washer needs 
to be changed to prevent dust from entering the handpiece and causing damage. 

a.


Use the included Spanner tool to screw off the head 
(tip) of the handpiece (see picture below). 

b.


Pull out the washer using pincers. 

c.


Push a new washer into place from above into the top 
of the head (see picture at right). 


3.


Cleaning the Handpiece 

a.


Screw off the head (tip) of the headpiece with the spanner (see picture above). 

b.


Clean the inside of the handpiece and top with a soft dry brush. 

c.


Open the chuck by pushing the slide-button forwards on the handpiece. 

d.


Place spanner tool (Part #5374) into shaft and hold firmly.  Insert pointed end 
of key (Part #5361) into chuck and screw out chuck (see picture below). 

e.


Clean the chuck (see instruction on next page) and brush out any dust from 
the handpiece. 

f.


Reassemble the handpiece in reverse order.  Ensure that the slide-button is 
set to open (in the forward position) during assembly and that the chuck is 
firmly tightened. 


Summary of Contents for HELIUS-40

Page 1: ...40 000rpm TABLE OF CONTENTS Section Page General Guidelines 1 Safety Information 2 Standard Operating Procedures 3 Maintenance Care 7 Equipment Specifications 12 For more information or for customer support contact your local dealer or call 800 361 3079 ...

Page 2: ...cifically designed to work with a corresponding HADEWE control unit Do not tamper with the handpieces as incorrect voltage or improper settings can destroy the motor HADEWE machines are designed to be operated using Rotatools and burrs with a standard 3 32 shaft Use only tools or burrs with the correct diameter Use the equipment only according to these instructions Any repairs modifications or mai...

Page 3: ...ure allowing the tool to do the work Always use the suction cleaner on level 4 or 5 when working on feet or nails Additionally the operator should wear nose and mouth protection to prevent the inhalation of dust Always wear safety glasses Before using equipment ensure that The shaft of the burr is completely dry straight and clean The burr is inserted fully into the clamping chuck test with the en...

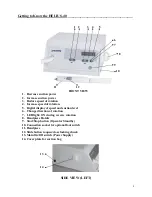
Page 4: ... 5 Digital display of speed and suction level 6 Change direction of rotation 7 LED light ON during reverse rotation 8 Handpiece Holder 9 Start Stop button Operator Standby 10 Connection socket for optional foot switch 11 Handpiece 12 Slide button to open close locking chuck 13 Main On Off switch Power Supply 14 Cover plate for suction bag SIDE VIEW LEFT 9 5 1 2 3 4 6 7 10 8 11 12 13 14 ...

Page 5: ...ton on the front of the unit 9 2 Set the speed to minimum with the speed regulator 4 the digital display should show 7000 3 Set suction power to 0 with the suction regulator 3 4 Choose clockwise or anticlockwise function with rotation button 6 5 Stop the equipment by pressing the start stop button 9 6 Pick up the handpiece and slide the button forward to open the locking chuck 12 7 Insert desired ...

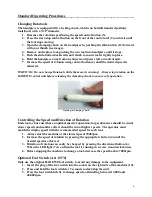
Page 6: ...leasing the clamping chuck to ensure safe operation Opening the Clamping Chuck Controlling the Speed and Direction of Rotation Each tool or burr used has an optimal speed of operation larger abrasives should be run at slower speeds and smaller cutters should be run at higher speeds The operator must match the display speed with the recommended speed for each tool 1 Always start the machine at the ...

Page 7: ...ll and that it is connected properly to the suction hose 1 Unfold a new filter bag and push your finger into the opening on the front to ensure that it is unobstructed 2 Remove cover plate 14 on side of unit by pulling outwards 3 Discard the old filter bag by pulling the filter from the suction hose being careful not to spill its contents 4 Replace the filter bag by holding the new bag by the fron...

Page 8: ... from entering the handpiece and causing damage a Use the included Spanner tool to screw off the head tip of the handpiece see picture below b Pull out the washer using pincers c Push a new washer into place from above into the top of the head see picture at right 3 Cleaning the Handpiece a Screw off the head tip of the headpiece with the spanner see picture above b Clean the inside of the handpie...

Page 9: ...ar as possible into the chuck If the groves are visible cleaning is necessary If the dipstick is not available depth limit is 1 The shaft of the Rotatools become dirty while in the handpiece Rotatools can only be inserted with force In order to clean the clamping chuck remove it from the handpiece follow the instructions on the previous page and follow these instructions 1 Soak the clamping chuck ...

Page 10: ...o could damage electrical components in the handpiece Always leave a tool or the enclosed dipstick in the unused handpiece Don t drop or knock the handpiece This could damage the bearings or the motor Using damaged tools causes extra vibration of the handpiece This could result in damage or destruction of the bearings the clamping chuck and or the motor Do not apply excessive force when working wi...

Page 11: ...ghtened well Tighten the chuck firmly according to the instructions in the manual Button on the handpiece cannot be moved easily Chuck is dirty Clean the chuck according to the instructions in the manual The cable is not plugged in Check to ensure that the equipment is plugged into a working wall socket The main power button is turned off Check at the back side of the unit to ensure that the power...

Page 12: ...ermal fuse Protection Class 1 Voltage potential output 5 27V Suction capacity 300 600 mmWs Noise level 64dBA at 1m distance Suction Handpiece Weight 160g Length 160mm 6 3 Handpiece diameter 17 5mm 22mm 7 9 Power supply 5 27v DC Speed range 7000 40 000rpm Manufacturer Information Made in Germany by HADEWE Service and Support in North America Thomas Machinery Ltd Tel 519 824 2315 Fax 519 824 9691 E ...

Reviews:

Related manuals for HELIUS-40