background image

4

OPERATION MANUAL

GENERAL MACHINE SHOP SAFETY 

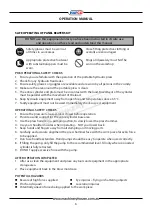
DO NOT use this machine unless you have read this manual or have been instructed in the use 

of this machine in its safe use and operation 

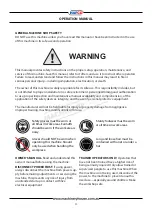
Safety glasses must be worn at 

all times in work areas. Earmuffs 

should be worn if the work area is 

noisy.  

Sturdy footwear must be worn 

at all times in work areas.

Long and loose hair must be 

contained with a net or under a 

hat

This manual provides safety instructions on the proper setup, operation, maintenance, and 

service of this machine. Save this manual, refer to it often, and use it to instruct other operators.

Failure to read, understand and follow the instructions in this manual may result in fire or 

serious personal injury—including amputation, electrocution, or death.

The owner of this machine is solely responsible for its safe use. This responsibility includes, but 

is not limited to proper installation in a safe environment, personnel training and authorization 

to use, proper inspection and maintenance, manual availability and comprehension, of the 

application of the safety devices, integrity, and the use of personal protective equipment.

The manufacturer will not be held liable for injury or property damage from negligence, 

improper training, machine modifications or misuse.

WARNING

DISCONNECT POWER FIRST.

 If using power, 

always disconnect the machine from power sup-

ply before making adjustments, or servicing the 

machine. This prevents any risk of injury from 

unintended startup or contact with live 

electrical equipment

OWNER’S MANUAL.

 Read and understand this

owner’s manual before using the machine.

TRAINED OPERATORS ONLY. 

Operators that 

have not been trained have a higher risk of 

being seriously injured. Only allow trained or 

supervised people to use this machine. When 

the machine is not being used, disconnect the 

power, to the machine to prevent unautho-

rized use—especially around children. Make 

the workshop safe.

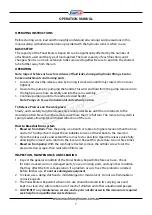
Gloves should NOT be worn when 

operating this machine. Should 

only be used when handling the 

workpiece

Summary of Contents for PBK-10H

Page 1: ...OPERATION MANUAL Edition No PBK 10H 3 Date of Issue 07 2020 Model PBK 10H Order Code A366 Hydraulic Panel Beater Kit...

Page 2: ...NG TO THE CONTINUOUS IMPROVEMENT OF THE HAFCO PRODUCT CHANGES MAY BE MADE AT ANY TIME WITHOUT OBLIGATION OR NOTICE C O N T E N T S 1 GENERAL MACHINE INFORMATION 1 Specifications 3 2 Identification 3 3...

Page 3: ...Base Size mm 160 x 90 3 Extension Tube x 1 mm 520 4 Extension Tube x 1 mm 365 5 Extension Tube x 1 mm 265 6 Extension Tube x 1 mm 110 7 Round Rubber Ball Head mm 78 8 Spreader Bar Capacity Tonne 0 5...

Page 4: ...nvironment personnel training and authorization to use proper inspection and maintenance manual availability and comprehension of the application of the safety devices integrity and the use of persona...

Page 5: ...GUARDS COVERS Guards and covers reduce accidental contact with moving parts or flying debris Make sure they are properly installed undamaged and working correctly FORCING MACHINERY Do not force the ma...

Page 6: ...lty equipment must not be used Immediately check suspect equipment OPERATIONAL SAFETY CHECKS 1 Ensure the pressure release valve is closed before operation 2 Provide a solid support for the entire cyl...

Page 7: ...s are used together Be sure to position the shortest tube further away from the ram Note Inspect before each use for evidence of fluid leaks damaged hydraulic fittings bent or broken attachments and m...

Page 8: ...unction 1 Close Release Valve tightly 2 Do not exceed maximum PSI or range of travel for Hydraulic Ram 3 Have a qualified service technician check out 1he Hydraulic Pump and or Hydraulic Ram Handle ki...

Page 9: ...ion plate mounted on the machine 2 A scanned copy of your parts list diagram with required spare part s identified NOTE SOME PARTS MAY ONLY BE AVAILABLE AS AN ASSEMBLY 3 Go to www machineryhouse com a...

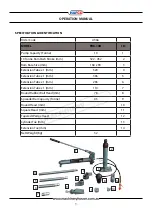
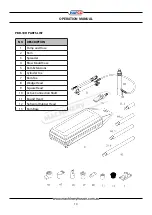
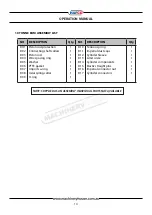
Page 10: ...CRIPTION 1 Pump and Hose 2 Ram 3 Spreader 4 Blow Mould Case 5 Ram Extensions 6 Cylinder Toe 7 Ram Toe 8 Wedge Head 9 Square Head 10 Active Connection Shaft 11 Round Head 12 Spherical Rubber Head 13 Ra...

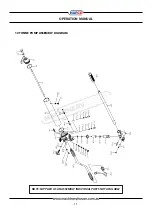
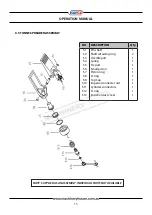
Page 11: ...11 OPERATION MANUAL 10 TONNE PUMP ASSEMBLY DIAGRAM NOTE SUPPLIED AS AN ASSEMBLY INDIVIDUAL PARTS NOT AVAILABLE...

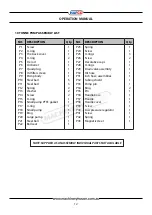
Page 12: ...Ring Large pump Steel ball Ball seat 1 1 1 2 1 1 1 1 1 5 3 2 2 2 1 1 1 1 1 1 1 1 P23 P24 P25 P26 P27 P28 P29 P30 P31 P32 P33 P34 P35 P36 P37 P38 P39 P40 P41 P42 P43 Spring Screw O rings Screw Decorat...

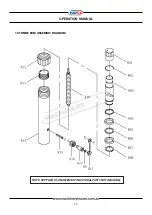
Page 13: ...13 OPERATION MANUAL 10 TONNE RAM ASSEMBLY DIAGRAM NOTE SUPPLIED AS AN ASSEMBLY INDIVIDUAL PARTS NOT AVAILABLE...

Page 14: ...ing Washer PTFE gasket Imports u ring Axial spring collar O ring 1 1 1 1 1 1 1 1 1 R10 R11 R12 R13 R14 R15 R16 R17 Tension spring Imperial dust caps Cylinder Sleeve Limit circle Cylinder components El...

Page 15: ...6 S7 S8 S9 S10 S11 S12 S13 Pin shaft Shaft retaining ring Flexible part spring Fix part Small piston Piston ring O ring Top Cap Imperial connector nut Cylinder connectors O ring Imperial dust cover 1...

Page 16: ...the off position before re connecting 14 Use correct amperage extension cords Undersized extension cords overheat and lose power Replace extension cords if they become damaged 15 Keep machine well ma...

Page 17: ...when using the tool Position your body as far away from the Ram as is practical when the Ram is under a load It is possible for a Ram to slip under a load possibly resulting in serious injury and or p...

Page 18: ...ion Item Hazard Assessment STRIKING B C E CRUSHING MEDIUM OR PUNCTURING Risk Control Strategies Recommended for Purchase Buyer User Never put any part of your body between hydraulic ram and material D...

Reviews: