
61
en
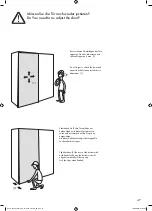
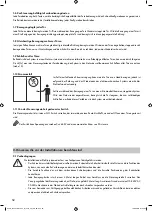
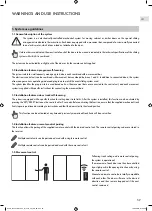
3.1 Initial cabinet set-up
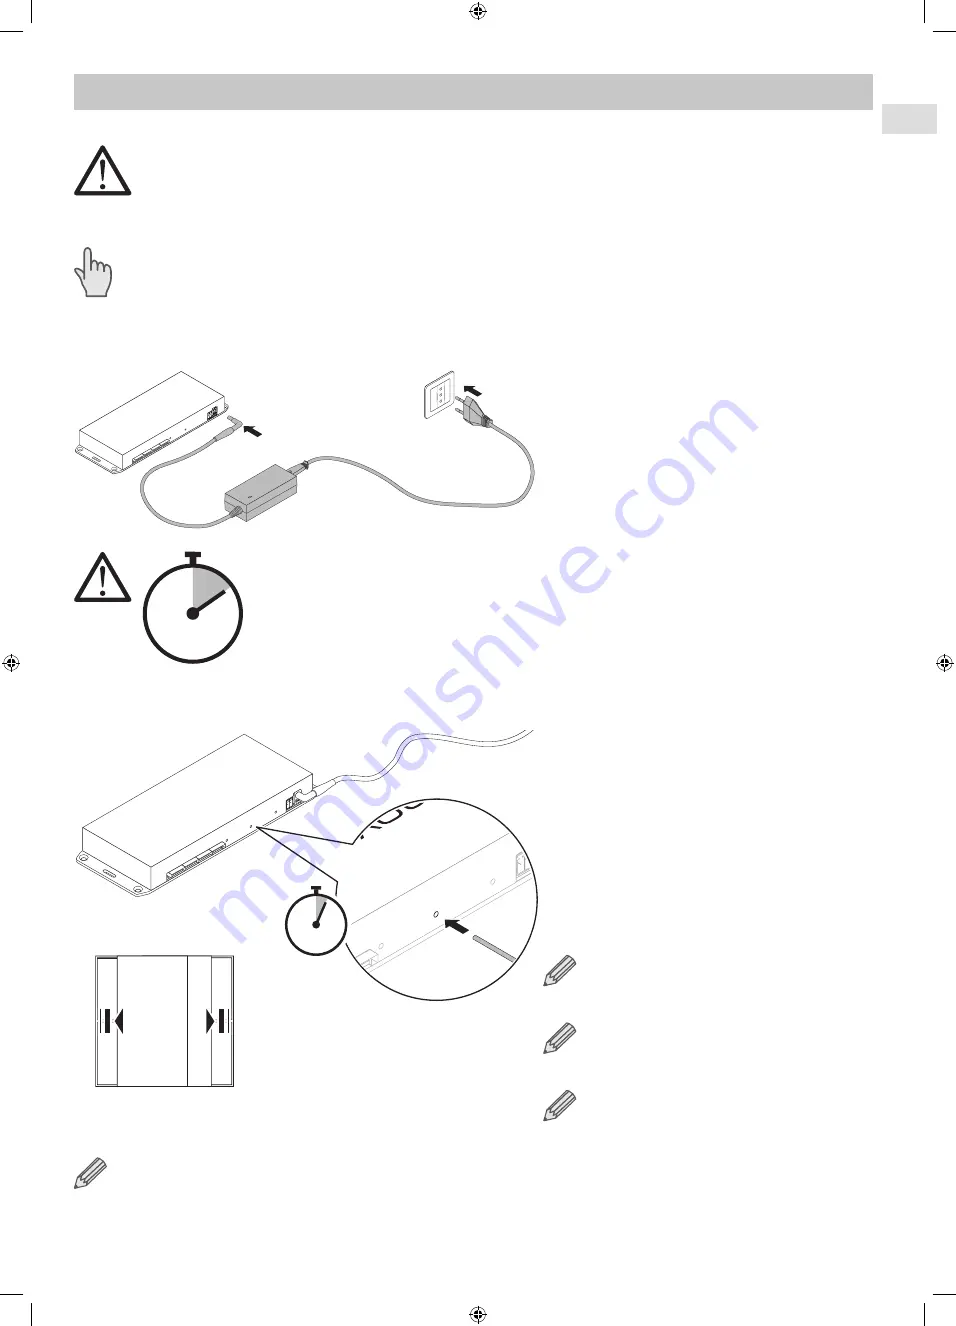
Do not power the control unit until all motors have been connected.
Connect all movement bar motors to the control unit according to the chosen cabinet confi guration.
After connecting all the motors to the control unit according to instructions, manually bring the doors to their closed positions.
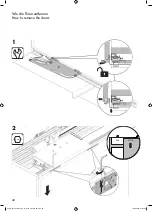
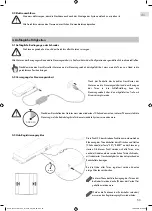
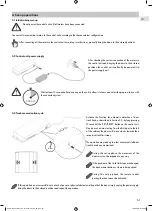
3.2 Control unit power supply
After checking the correct connection of the motors to
the control unit and bringing the doors to their closed
positions, the control unit can fi nally be powered via
the power supply unit.
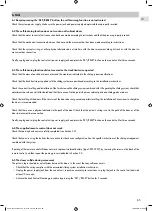
00:00:10
Wait at least 10 seconds after powering on the unit to allow it to learn and select the program to use with
the connected system.
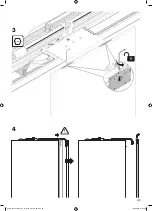
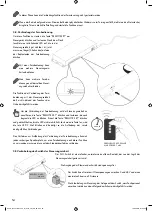
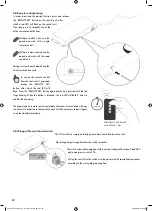
3.3 Track memorization cycle
SET/
RESET
00:00:03
Activate the function for automatic detection of door
track limits, as described in Section 2.3, by long pressing
(3 seconds) the ‘SET/RESET’ button on the control unit.
One door at a time, starting from the fi rst door to the left
of the cabinet, the doors will move slowly towards their
respective track limit stops.
The operation may take up to a few minutes until all door
tracks have been memorized.
During this set-up phase, the movement of the
doors must not be impeded in any way.
If the positions of the track limit stops are changed,
the track memorization cycle must be repeated.
During this set-up phase, the remote control
pairing function cannot be activated.
If this operation is not successful due to a lack of power or physical obstacles in the path of the door, simply unplug the power supply,
bring the doors to their closed positions and repeat the operation.
3. Set-up operations
A920_Schiebetürantrieb_für_Slido_Flat_60_FB.indd 61
19.08.2019 07:54:46
Summary of Contents for 400.50.038
Page 15: ...15 3 A920_Schiebetürantrieb_für_Slido_Flat_60_FB indd 15 19 08 2019 07 54 26 ...
Page 16: ...16 4 A920_Schiebetürantrieb_für_Slido_Flat_60_FB indd 16 19 08 2019 07 54 26 ...
Page 18: ...18 Ø5 5 6 mm 5 6 A920_Schiebetürantrieb_für_Slido_Flat_60_FB indd 18 19 08 2019 07 54 27 ...
Page 19: ...19 7 8 A920_Schiebetürantrieb_für_Slido_Flat_60_FB indd 19 19 08 2019 07 54 28 ...
Page 20: ...20 10 9 A920_Schiebetürantrieb_für_Slido_Flat_60_FB indd 20 19 08 2019 07 54 29 ...
Page 23: ...23 14 15 A920_Schiebetürantrieb_für_Slido_Flat_60_FB indd 23 19 08 2019 07 54 30 ...
Page 24: ...24 16 17 18 19 A920_Schiebetürantrieb_für_Slido_Flat_60_FB indd 24 19 08 2019 07 54 31 ...
Page 26: ...26 20 21 A920_Schiebetürantrieb_für_Slido_Flat_60_FB indd 26 19 08 2019 07 54 32 ...
Page 29: ...29 35 17 35 25 70 24 A920_Schiebetürantrieb_für_Slido_Flat_60_FB indd 29 19 08 2019 07 54 33 ...
Page 35: ...35 A 1 1 1 1a A920_Schiebetürantrieb_für_Slido_Flat_60_FB indd 35 19 08 2019 07 54 37 ...
Page 36: ...36 A 1 1 1 1b A920_Schiebetürantrieb_für_Slido_Flat_60_FB indd 36 19 08 2019 07 54 37 ...
Page 37: ...37 A 1 1 EN 59 DE 51 A920_Schiebetürantrieb_für_Slido_Flat_60_FB indd 37 19 08 2019 07 54 37 ...
Page 39: ...39 E 1 1 1 1 A920_Schiebetürantrieb_für_Slido_Flat_60_FB indd 39 19 08 2019 07 54 38 ...
Page 40: ...40 E 4 4 2 4 A920_Schiebetürantrieb_für_Slido_Flat_60_FB indd 40 19 08 2019 07 54 39 ...
Page 41: ...41 E 1 4 EN 59 DE 51 A920_Schiebetürantrieb_für_Slido_Flat_60_FB indd 41 19 08 2019 07 54 39 ...
Page 43: ...43 F 2 2 2 1 A920_Schiebetürantrieb_für_Slido_Flat_60_FB indd 43 19 08 2019 07 54 40 ...
Page 44: ...44 F 3 3 3 2 A920_Schiebetürantrieb_für_Slido_Flat_60_FB indd 44 19 08 2019 07 54 41 ...
Page 45: ...45 F 3 2 EN 59 DE 51 A920_Schiebetürantrieb_für_Slido_Flat_60_FB indd 45 19 08 2019 07 54 41 ...
Page 49: ...49 4 3 mm 3 A920_Schiebetürantrieb_für_Slido_Flat_60_FB indd 49 19 08 2019 07 54 44 ...
Page 67: ...A920_Schiebetürantrieb_für_Slido_Flat_60_FB indd 67 19 08 2019 07 54 46 ...


