


Hafele Nagold Appliances
5
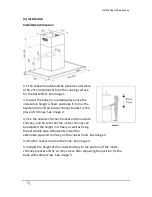
(3) Installation
Installation dimension
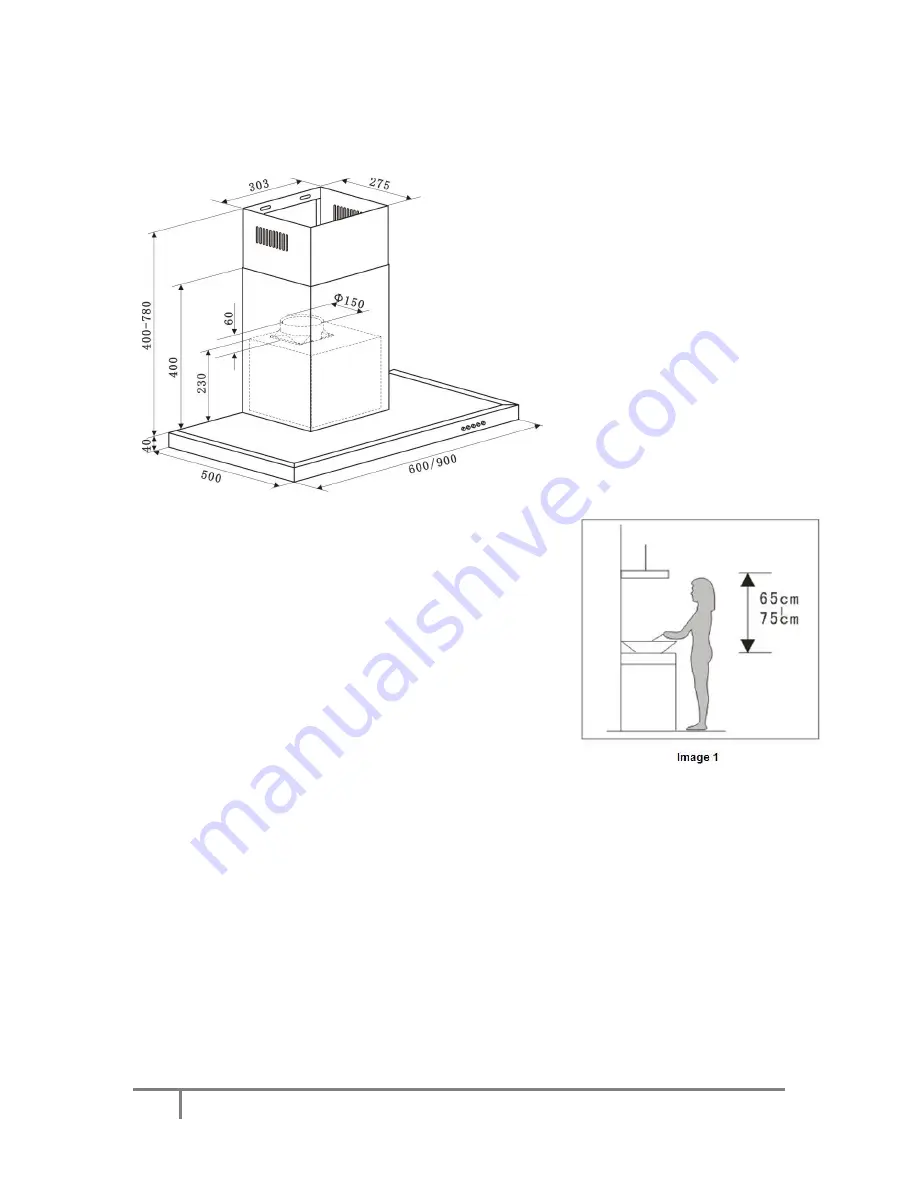
3.1
The cooker hood should be placed at a distance
of 65-75cm (26-30inch) from the cooking surface
for the best effect. See Image 1.
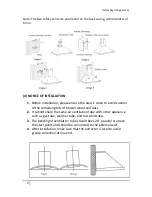
3.2 Install the hook on a suitable place once the
installation height is fixed, and keep it in line. The
fixed position of the inside chimney bracket is the
place of chimney. See Image 2.
3.3 Fix the outside chimney bracket on the outside
chimney, and be sure that the inside chimney can
be adjusted the height in it freely as well as fixing
the extensible pipe. Afterwards, install the
extensible pipe and chimney on the cooker hood. See Image 3.
3.4 Put the cooker hood on the hook. See Image 4.
3.5 Adjust the height of the inside chimney to the position of the inside
chimney bracket and fix on it by screw, after adjusting the position, fix the
body with safety screw. See Image 5.


