background image

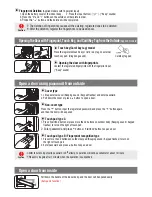
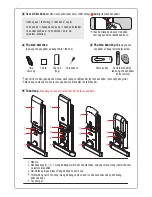
 The fingerprints of infants in the developmental stage or some users with unique fingerprints (those which cannot 

     be registered) may not be recognized.

 Scanning foreign substance (sweat and moisture)-stained fingerprints or dry fingerprints may lead to failure to 

     recognize fingerprints.

 Stay clean the fingerprint input unit so it is not stained with foreign substances and do not use a wet finger.

 If fingerprint recognition is not successful, input and use the fingerprints of another finger.

 Registered fingerprints may be also registered in a duplicate manner.

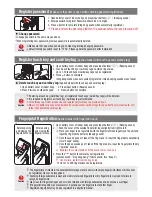
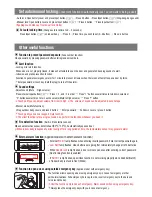
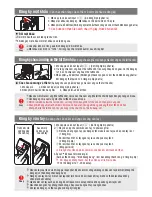
1. Open battery cover of indoor body and press Input button (

). (Beeping sound)

2. 

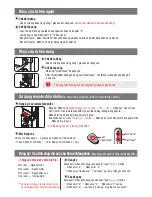
 Push the cover of the outside fingerprint input slightly from right to left.

 Place your finger to be registered with the fingerprint module gently on the unit and 

         input the fingerprints primarily (Beeping sound).

 Once the sound goes off, take off the finger and re-input the fingerprints secondarily

         (Two “beeps” sound).

 Once the beep sounds go off, take off the finger and re-input the fingerprints thirdly

         (“ppiririck” sound).

 Maintain the contact state until the sound comes to an end.

    (success sound: "ding dong dang”/ failure sound: two "beeps”).

 Upon failure, restart from the beginning.


 Up to 1 to 200 fingerprints can be registered.

Register password  

(

Make sure that door is open when checking password registration) 

Register touch key and card/key tag 

(Applied model with touch key and card/key tag)


Fingerprint Registration 

(Applied model with fingerprint input)

Before opening 

and closing the 

fingerprint cover

After opening 

and closing the 

fingerprint cover

1. Open battery cover of indoor body and press Input button(

). (Beeping sound)

2. Enter password to register. Password should be 3-19 digits.
3. Press   button to complete (Ding dong sound when successfully registered)

Please perform the next steps (Within 15 seconds) before the lamp is turned off. 

 Change password  

Change password in the same way as above.  

When registering new password, previous password is automatically deleted. 

Make sure that a door keeps being open when registering/changing password.

Default factory password is set to “1234”. Please update the password after installation.

Caution

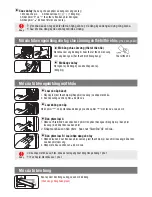
1. Open battery cover of indoor body and press Input button

(

)

. (Beeping sound)

2. Touch each touch key or card/key tag on external input area. 

    Up to 1-50 touch keys or cards/key tags can be registered.

3. Press   button to complete 

    (Ding dong sound when successfully registered / three beeping sounds when failed)


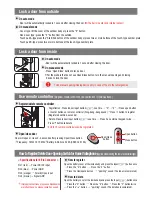
Delete touch key and card/key tag 

(Applied model with touch key and card/key tag)

1. Open battery cover of indoor body.     2. Press Input button. (Beeping sound)

3. Press 0 twice on outdoor keypad.       4. Press    button to complete.

If deleting a touch key (Card/Key tag), all registered touch keys (Cards/Key tags) will be deleted.

It is required to register new touch key (Card/Key tag) after deletion.

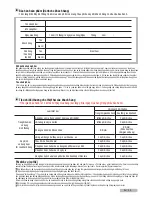
For card/key tag model, please use and register only card/key tag provided by us.

We are not liable for any security incident if user uses other cards or tags (Such as traffic card, credit card, etc) 

    rather than dedicated card/key tag.

Caution

Caution

3. Press the “   “ button to complete your registration.

Summary of Contents for Series 7000

Page 1: ...USER MANUAL ENGLISH...

Page 2: ......

Page 3: ...ot dismantle the product yourself It causes malfunction of product If you dismantle the product yourself the product may not function as it should Do not impact on or alter the product It may cause ma...

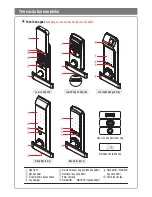
Page 4: ...e Fingerprint recognition type Touchpad type A Touchpad type B Touch keypad structure Card Key tag input part Sliding cover Keypad buttons 9V emergency power supply socket Handle Touch key input Appli...

Page 5: ...e controller 1 outdoor body 1 indoor body 1 Mortise latch Strike box 1 set 1 user manual 1 installation guide 1 caution sticker Bolt set 4 AA batteries Alkaline Basic components Extra accessories and...

Page 6: ...print input Before opening and closing the fingerprint cover After opening and closing the fingerprint cover 1 Open battery cover of indoor body and press Input button Beeping sound 2 Enter password t...

Page 7: ...ngerprints to be used anew Fingerprint Deletion Applied models with fingerprint input 1 Open the battery cover of the indoor body 2 Press the Input button Beep sounds 3 Press the 0 and 1 buttons on th...

Page 8: ...ion which identical defect occurs twice Free service Paid service Parts for repair is not available Exchange Exchange In accordance with the declining balance method of depreciation Consumer s intenti...

Page 9: ...ad A type press the Start End button of the outdoor body or press two or more buttons of the touch type number plate Touch pad B type press two or more buttons of the touch type number plate On auto m...

Page 10: ...on Touch pad type A Enable Press and hold Start End button on outdoor body for more than 5 seconds to enable dual locking function Disable Press and hold Start End button on outdoor body Enter registe...

Page 11: ...ft up outdoor body cover and press button Enter password Pull down cover or press button Touch pad type does not support mute function The silent function is for a single occasion so perform the funct...

Page 12: ...et when using this function External emergency power supply socket does not have polarity Location of external emergency power supply socket may differ according to the product model Product speicific...

Page 13: ...H NG D N S D NG TI NG VI T...

Page 14: ......

Page 15: ...m b o kh ng c khe h sau khi l p t kh a C c khe h s t o i u ki n cho k gian x m nh p Kh ng t c c ch t d g y ch y n nh b t l a g n s n ph m C th khi n s n ph m b h ng ho c ho t ng b t th ng Kh ng s d ng...

Page 16: ...Lo i nh n d ng v n tay B n ph m lo i A B n ph m lo i B C u tr c b n ph m c m ng N i nh n th t th nh N p tr t N t b n ph m c m 9V khi c n s c nhanh Tay n m g t N i tra ch a c m ng t y theo s n ph m N...

Page 17: ...ng 1 th n kh a c gi 1 b bas h p 1 h ng d n s d ng 1 h ng d n l p t 1 d n nh n c nh b o 1 b ch t c a 4 pin AA pin ki m Alkaline C c chi ti t c b n ph ki n k m theo v s l ng c th thay i t y theo s n ph...

Page 18: ...cho s n ph m s d ng ch a c m ng v th t th nh ng k v n tay p d ng cho s n ph m s d ng c m ng v n tay Tr c khi m v ng n p che v n tay Sau khi m v ng n p che v n tay 1 M n p pin v n n t Input C ti ng b p...

Page 19: ...t t c nh ng v n tay ng k v ang s d ng c ng b x a Sau khi x a ng k d u v n tay m i s d ng X a v n tay p d ng cho s n ph m s d ng c m ng v n tay 1 M n p che pin 2 Nh n n t Input 1 ti ng b p 3 Nh n ph m...

Page 20: ...ch a consists of part cost and travel repair fee and each fee is determined by the followings Service fee part cost travel repair fee Repair service fee S a ch a mi n ph p d ng v i nh ng v n v ho t n...

Page 21: ...h m t b n ngo i B n ph m lo i A Nh n Start End tr n th n kh a ngo i ho c nh n h n 2 ph m b t k tr n b n ph m s B n ph m lo i B Nh n h n 2 ph m b t k tr n b n ph m s Ch t ng C a s t ng kh a trong v ng...

Page 22: ...ng kh a k p b n trong Khi ch c n ng kh a k p trong c thi t l p c a s kh ng m ngay c khi nh p ng m t kh u t b n ngo i Thi t l p Nh n nhi u h n 2 ph m tr n b n ph m c m ng b n ngo i Nh n v gi ph m tr n...

Page 23: ...t ti ng ch th c ng M n p che ph n th n ngo i v nh n ph m Nh p m t kh u y n p l i ho c nh n ph m Lo i ph m c m ng kh ng h tr ch c n ng t t ti ng Ch c n ng im l ng ch c t c d ng t m th i n n h y s d ng...

Page 24: ...kh u M c a b ng ch a c m ng Th t Th nh v ng k m t kh u m i ngo i tr c c s n ph m c bi t T t c c c ch c n ng s v hi u h a sau khi nh p sai m t kh u l n th 5 Ch 1 ph t sau c i t m t kh u ho c ch a c m...

Reviews: