

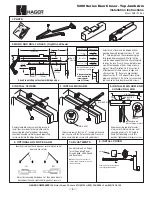
See Adjustments on
Page 6 for setting
Spring Power, Sweep
Speed, Latch Speed,
and Backcheck.
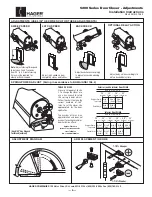
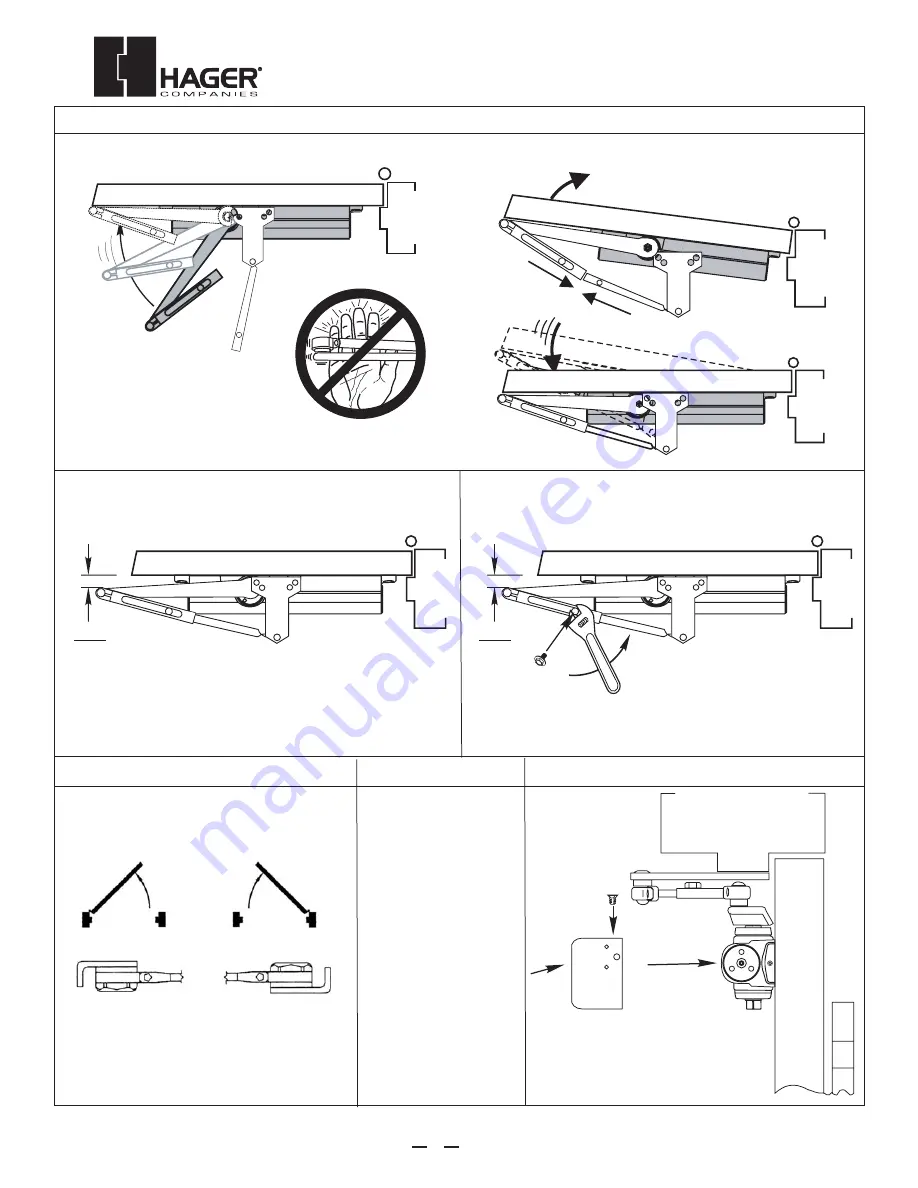
NOTE:
Do not fully unscrew valves
or hydraulic fluid will leak and closer
will no longer be functional.
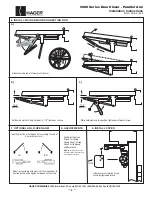
Identify direction of hold-open nut according to hand of
door and mount arm.
Adjust by loosening hold-open nut, then open door to
desired position and tighten hold-open nut securely.
7. OPTIONAL HOLD-OPEN ARM
LH
RH
6. INSTALL MAIN ARM AND CONNECTING ROD
8. ADJUSTMENTS
9. INSTALL COVER
Slide connecting rod into forearm of main arm.
Rotate main arm until the pivot point is 1-1/2" from door surface.
While holding arm in this position, tighten down forearm screw.
5200 Series Door Closer - Parallel Arm
Installation Instructions
Meets ANSI A156.4
a)
b)
c)
4
HAGER COMPANIES
139 Victor Street, St. Louis, MO 63104 • (800) 325-9995 • Fax (800) 782-0149
1-1/2"
(38mm)
1-1/2"
(38mm)
COVER
Slide cover over closer body and
secure by tightening screws.


